Email Stationery Guide
This guide is comprehensive, addressing Stationery enablement (a SchoolMessenger Administrator’s role), design (involving Stationery designers), and usage (involving all users who will be sending emails using the provided Stationery). We show you how to create and personalize a stationery template to best reflect your school’s brand. This includes adding images, like your school’s logo or banner, selecting the stationery’s colors and how to add and remove sections. There’s also a helpful section on troubleshooting and best practices.
Enable Email Stationery – SchoolMessenger Administrator
The ability to both create and/or use stationery depends on whether permissions affecting these functions are enabled in user accounts. A SchoolMessenger administrator sets these preferences in various profiles. Each user then inherits all the permissions and access rights of the profile their account is consigned to.
Providing Users Access to Stationery
If you are a SchoolMessenger Administrator, follow these instructions to allow users to create Stationery, and, optionally, require users to use Stationery.
Click the Admin tab and then the Profiles sub-tab.

Admin Tab
Select the user profile whose Stationery Options you’d like to configure.
Scroll down to the Messaging Options.
Enable the following options by checking their box:
Can Create Stationery: Allows users to create stationery for email messages.
Restrict to Stationery: Users must use stationery when creating email messages.
Click Save to complete or continue to the next section below to enable publishing and subscription permissions.
If no stationery has been created users with Restrict to Stationery enabled will be unable to send an email.
Providing Users Access to Stationery
If you are a SchoolMessenger Administrator, follow these instructions to allow users to create stationery, and, optionally, require users to use stationery.
Click the Admin tab and then the Profiles sub-tab.
Select the user profile whose Stationery Options you’d like to configure.
Scroll down to the Messaging Options.
Enable the following options by checking their box:
Can Create Stationery: Allows users to create stationery for email messages.
Restrict to Stationery: Users must use stationery when creating email messages.
Click Save to complete or continue to the next section below to enable publishing and subscription permissions.
If no stationery has been created, users with Restrict to Stationery enabled will be unable to send an email.
Providing Users with the Ability to Share and Edit Shared Stationery
All stationery and messages created in SchoolMessenger are by default private and accessible only to the user who created them. They only become available to other users when their creator publishes them and others subscribe to them. But in both cases, the ability of users to either publish or subscribe to stationery and messages depends on having permissions activated in the profiles that are assigned to user accounts. If you are a SchoolMessenger Administrator, follow these instructions to allow users to publish and subscribe to stationery and messages.
Scroll down to the Publish/Subscribe Options.
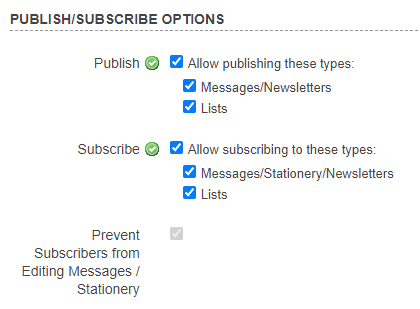
Publish/Subscribe Options
Enable the following options by checking their boxes.
Under Allow publishing these types enable:
Messages: Allows messages to be published. You may wish to enable the publication of Lists here as well.
Under Allow subscribing to these types enable:
Messages/Stationery/Newsletters: Allows users to subscribe and use messages and stationery created by others who’ve published them. You may wish to enable subscription to Lists here as well.
Prevent Subscribers from Editing Messages/Stationery: Prevents those who have subscribed to stationery and messages from being able to edit them. They can only use them.
Designing Email Stationery
Only those features that you have been granted access to will display. For access to additional features contact your system administrator.
Note: The email stationery editor built into SchoolMessenger Communicate is fairly simple, and it should not be compared with a comprehensive website editor that it shares some capabilities with. It allows you to create fairly simple and attractive templates, which is adequate for most school and district-related messaging. The more complex the templates you create are, the more unwieldy they may be for users who wish to use them.
Click the Broadcasts tab, and then the Messages sub-tab.

Broadcasts Tab
Click Add New Stationery.
Enter a Stationery Name. You can also enter a Description if you wish.

Stationery Layouts
Select and preview one of the generic layouts from the Layout pull-down list. You can cycle through all sample layouts, choosing the one that is most appealing or appropriate to use as a base for your new stationery.
Note: Keep in mind that selecting more complex stationery designs will be more complicated both for designers and users to work with. Also, a simple, clean, well-structured email stationery will be more welcomed by those receiving your emails than stationery that is too busy and/or colorful.
Click Next.
Editor Options
Default Text Editor Options | |
Button in Text Editor | Description |
 | Bold: Bolds text. |
 | Italics: Italicizes text. |
 | Underline: Underlines text. |
 | Strikethrough: Places a line through text. |
 | Text Color: Open a color picker to choose a color for your text. |
 | Background Color: Open a color picket to choose the background color of highlighted text. |
 | Remove Formatting: Strip any formatting for any highlighted text. |
 | Styles: Choose different styles to apply to your text. |
 | Paragraph Formatting: Quickly format your text for headers, sub-headers, and normal text. |
 | Font: Choose a font for your text. |
 | Font Size: Choose the size of your text. |
 | Numbered List: Create a numbered list. |
 | Bulleted List: Create a bulleted list. |
 | Left Align: Left align the selected text. |
 | Center Align: Center the selected text. |
 | Right Align: Right align the selected text. |
 | Justify: Justify the selected text. |
 | Decrease Indent: Decrease the indent if possible. |
 | Increase Indent: Increase the indent. |
 | Link: Add a hyperlink. |
 | Image: Add an image. |
 | Table: Add a table. |
 | Horizontal Line: Insert a horizontal line. Useful for separating content blocks. |
 | Show Formatting Blocks: Shows HTML elements on page like paragraph and div tags. |
 | Maximize: Makes your editing interface take the full browser screen. |
 | Field Insert: Inserts a field variable in the body of your stationery. These field variables are automatically populated with data obtained from the SchoolMessenger database. |
 | Make Editable Block: If you’re planning on sharing the stationery for others to use, you can lock sections of the stationery. This prevents others from editing that specific section when they apply the stationery to their email. |
 | Theme Manager: Use this to quickly change the colors of your stationery. |
 | Paste from Word: If you’ve prepared the content of your stationery in Word, use this button to insert that text into your stationery. |
 | Spell Check: Check for any spelling errors. |
 | Print: Print your stationery. |
 | Source: View the stationery in HTML format. |
 | Undo: Undo your actions. |
 | Redo: Redo an action you have undone. |
Adding Images
It's a best practice to make sure your images are small enough to fit within small email clients such as those found on mobile devices. Typically, this means ensuring that a design doesn't exceed 600 pixels in width. Also, many email clients do not display images by default, so it's a good idea to avoid conveying important content of your message within.
Note: If you choose to upload an image, your file should not exceed 750 kB in size and to keep the image at 100%. The best formats to use for images in emails are .jpg or .gif.
You can either add an image anywhere on a template or replace the image placeholders on your stationery templates. Only some of the templates (such as the one in this example) include placeholder images which you'll definitely want to replace. Others may not have these image placeholders, but you can still add images anywhere on the template if you like.
To replace an image placeholder, double-click the placeholder image.
To add an image, place your cursor where you want the image to appear and click the icon.
Both will open the Image Properties window.
Using External Images
Highlight the URL under the Image Info tab.
Replace the Image URL with the URL for your image.
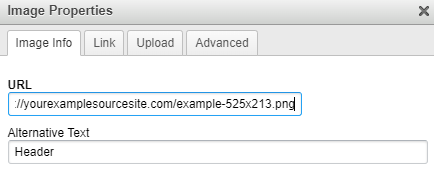
Image Info Tab
Click OK.
Uploading Your Own Images
Click the Upload tab.
Click Choose File.
Select an image from your computer.
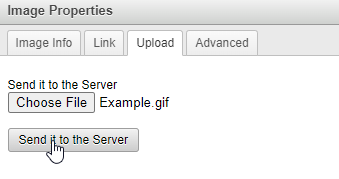
Image Properties
Click Send it to the Server.
You’ll be taken back to the Image Info tab.
Click OK.
Changing the Text and Theme Colors
Changing the text and theme colors of your stationery is a great way to personalize it.
Change Text Color or Highlight Color
To begin, click either the Text Color or Background Color icon.
Select any of the colors you see by clicking them.
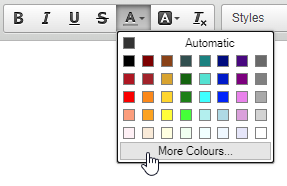
Text Color or Background Color
If you don’t see the color you want, click More Colours…
Select any of the colors by clicking them.
If you know the specific color hex code, enter it in the second box below Selected Color. Click any white space within the Select color window to see a preview of that color in the box above.
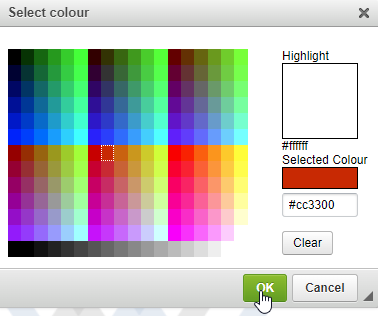
Select Colour Tab
Click OK. Your text is now the specified color hex code.
Change Colors Using the Theme Manager
The Theme Manager is a quick way to select colors for certain aspects of your stationery.
Note: There is currently no ability to insert specific color hex codes through the theme manager.
To edit colors, click the gear icon. The Theme Manager window will open.
Click the checkbox to the left of the theme component to select a color.
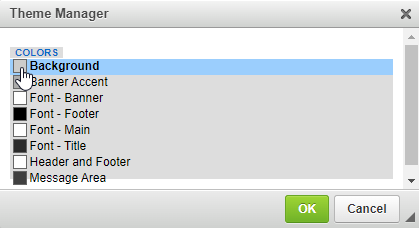
Theme Manager
The Color Selection window opens.

Color Selection Window
Choose a color from the Color Selection window.
Choose colors for any elements you wish to change.
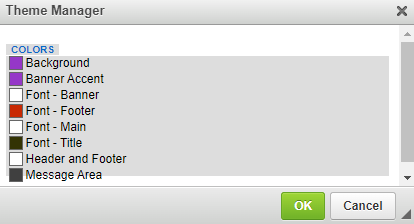
Theme Manager
Once you have set all the colors, click OK.
Theme Considerations
If you are unsure of what colors to use in your theme, there are free online color scheme tools you can use that will suggest what color(s) go with a chosen color.
If you want to get a better look at how your color scheme will look in an email message, click Preview in the footer of the editor.
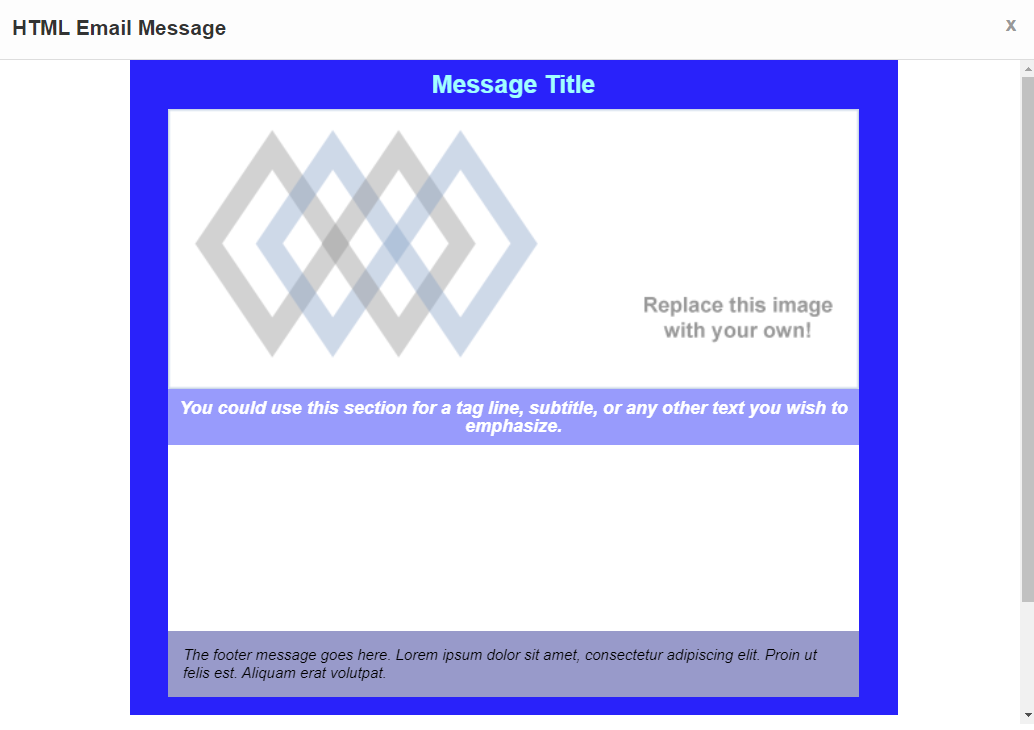
Message Title
This will show you a preview of your message text, layout and theme.
Changing the Default Text
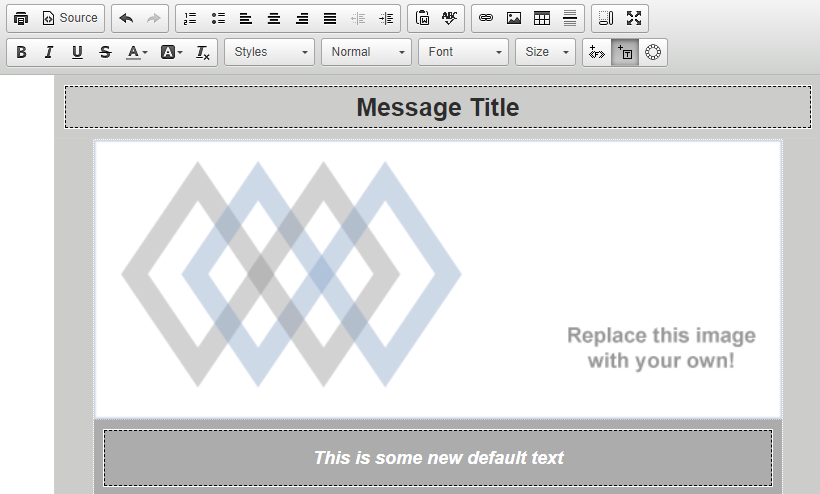
This stationery template has a banner beneath the placeholder image which can be used for a tagline.
Message Title
Highlight the text that should be edited and enter new text.
Locking Sections
If you intend to share the stationery you’re creating with other users, you may want to lock sections to prevent others from editing them. Locking sections such as the header and footer helps keep emails have the same look and feel no matter who sends them.
Notice that there are dashed lines around some parts of the template. The lines indicate a section of your template. When you use the icon, it will be for all contents within that section.
While you’ll need to keep certain sections editable, you may not want users to be able to edit certain parts of your template, like the school name and logo in the banner section at the top. Or you may want to structure your newsletter template with a predefined structure with identifiable section headings, like Announcements or Message from the Principal. The sections headings will remain unchangeable, while the messages beneath them can be edited.
Adding an Editable Block will add a layer of HTML code over that section. To keep things less confusing, turn off the icon.
Ensure you’re within the section you want to lock by clicking within the section. Either you’ll see a flashing text cursor if there’s text in the section or the image will have a darker dashed border around it.
To lock or unlock a section, click the icon.

Lock or Unlock Section
An unlocked section will have dashed lines around it. A locked section will have no lines.
Sharing Stationery
Once your stationery is complete, you can share it with other users in the system.
Go to the Broadcasts tab and the Messages sub-tab.
Click Stationery on the left-hand side of the screen.
Locate the stationery you wish to share.

Broadcasts Tab
Click Publish to the right of the name.
When you publish your stationery, it will not appear in your subscriber’s Stationery list like it appears on your list under the Messages tab. The stationery is located amongst the stationery templates available to them when they create an email broadcast.
To see it, they will need to start a new broadcast.
Using Stationery in an Email
Only those features that you have been granted access to will display. For access to additional features contact your system administrator.
Using stationery in your email messages lets you control the appearance of your email messages with custom colors and images, or even create professional looking newsletters for your organization. If you're an administrator, it's also possible to configure users' access profiles to require the use of stationery. It's important to be sure that there are published stationery designs available before restricting users to stationery, otherwise the restricted users will not be able to create email messages.
Selecting Email Stationery
Note: If your access profile is set to require email stationery, you may only send email which includes stationery.
Click New Broadcast on your Dashboard and follow the steps until you reach the Message Content step.
Click Email.
Click Stationery next to the Body field.
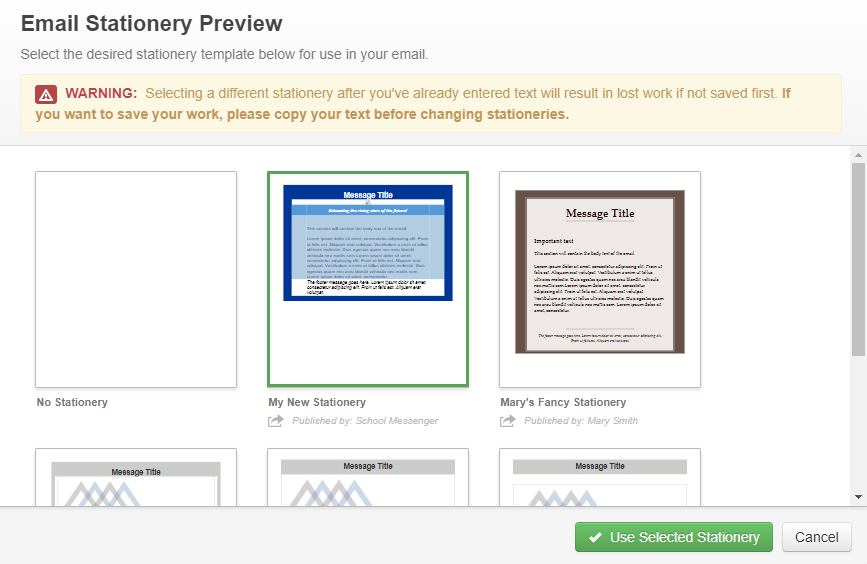
The Email Stationery Preview window opens.
Locate the stationery you’d like to use.
Click the stationery. The selected stationery becomes outlined in green.
Email Stationery Preview
Click Use Selected Stationery.
Editing Selected Stationery
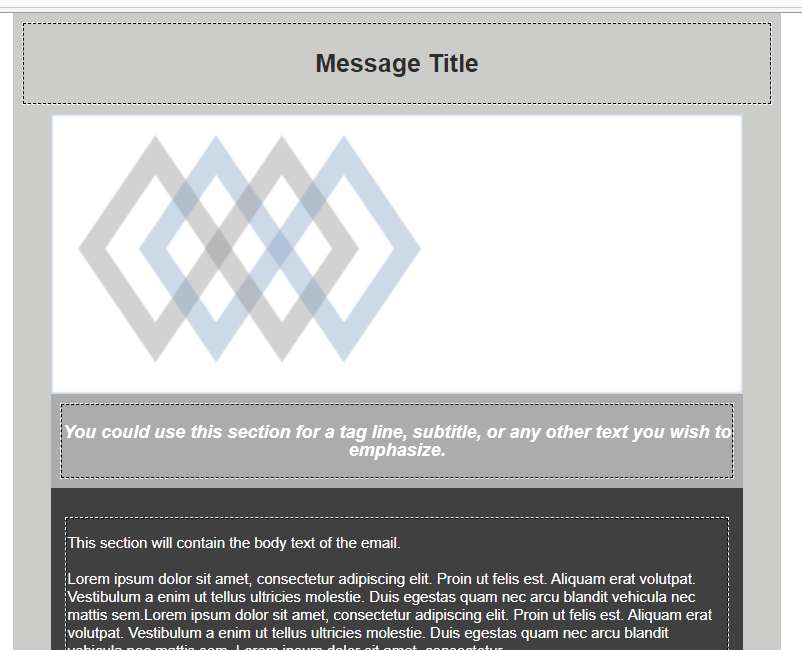
You can edit any content within an area outlined with a dashed border. Areas without this dashed border were locked by the stationery creator and can’t be edited.
Message Title
Editing the Content Area
Click the editable area. A format bar will appear.

Editing the Content Area
Write whatever content you choose.
Use the formatting options in the bar provided to customize your message. There are many formatting options including:
Customizing the style, color and size of the font.
Inserting a link, image, or table.
Attaching a file and inserting a data field.
Pasting text from word and running a spellcheck.
After making your edits, click Save to complete.
Note: For more information on the editing tools, see the Editor Options section.
Translation Options
The following are your translation options once you check the Translate box.
Within the Translation Options button, you can choose:
Select all (checks all boxes for all available languages) or none (de-selects all checked translations).
Re-translate All: If you edit your original message after translating, you’ll need to select this to update the translation to match your new edit.
Disable Translations: If you’ve already translated your broadcast but change your mind, you can undo the translations.
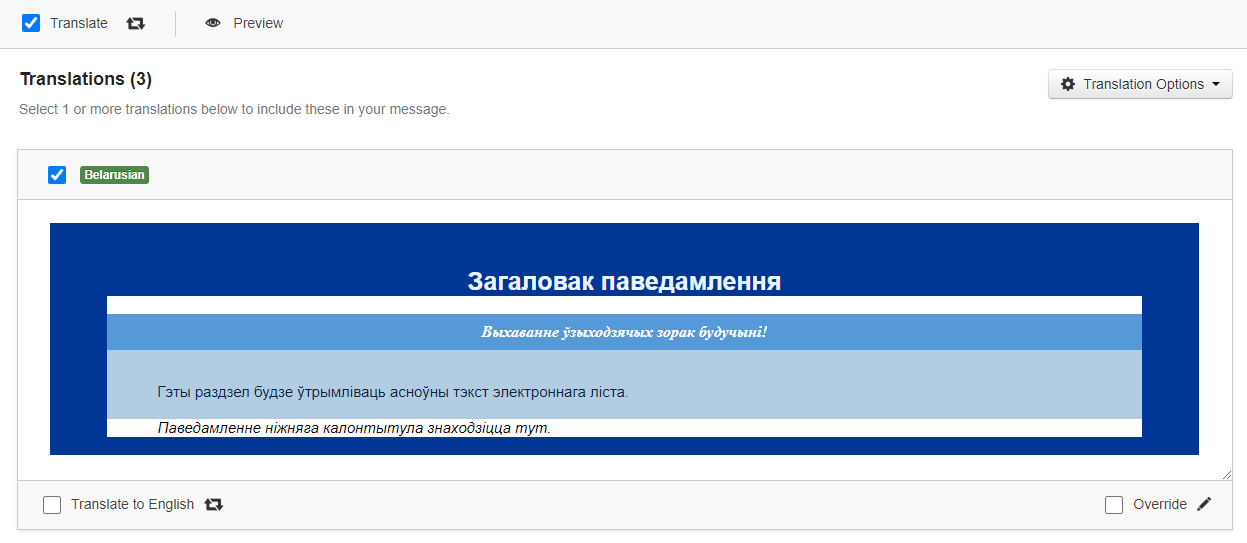
You can also click the name of each individual language you wish to include in the translation. Within each language, you can choose:
Translate to English: Gives you an opportunity to see what the alternate language looks like when translated back into English.
Override: Make manual text edits to the alternate language message in the event that you wish to provide a correction or improvement to the translated message.
Translations
Troubleshooting and Best Practices
The Stationery tool is incredibly robust, but also sensitive. To ensure the best experience with this tool, follow these guidelines.
Best Practices
Adding Images
The design doesn't exceed 600 pixels in width.
Email clients do not display images by default, so it's a good idea to avoid conveying important content of your message within.
Files should not exceed 750 kB in size.
Keep the image at 100%.
The best formats to use for images in emails are .jpg or .gif.
Adding and Removing Sections
Turn on the icon to clearly see each section.
Copy and paste sections you want more of.
Remove sections by highlighting the text and tapping Delete.
Locking Sections
Turn off the icon to avoid confusion.
Lock sections that you don’t want others to change like the header and footer of your stationery.
Running Into Issues
Be careful about turning to the Source button (viewing the stationery in HTML format) to resolve issues with sections. Unless you are an HTML export, it can be very easy to cause new problems as you attempt to address a current one.
Use the left arrow and right arrow keys (or keyboard shortcuts) to undo actions if you make mistakes.
Contact our support teams if you require assistance.
Troubleshooting
Why am I not able to send any emails at all?
Your administrator likely has set your account to use stationery only and there have not been any stationery templates yet created. To resolve, please contact your system administrator.
Why can’t my subscribers to my stationery see the stationery in their Messages tab?
When you publish your stationery, users will be able to access the stationery when they create an email broadcast. Your published stationery will be amongst the other stationery templates available.
Why doesn’t my image doesn’t appear properly when I insert it into the section?
Your image may be too large for the section. Try resizing the image to make it smaller. Ensure that it doesn’t exceed 750 kb in size and doesn’t exceed 600 pixels in width.
Why is it that when I add a section using copy and paste, extra, unwanted boxes appear?
You may be pasting the section in an area outside of where you intend it to go. To resolve, undo your action. Copy the section you want to add and make sure your text cursor is at the very end of the section you want to copy. Paste the copied section.
There are too many sections in the stationery template I’m using and I want to remove some. How do I do that?
Delete all of the content in the section first. Then press Delete again.
How do I use color hex codes to change the colors of certain sections of my stationery using the Theme Manager?
There is currently no option to apply color hex codes in the theme manager. There is only that option when changing the color of your text or the highlight color behind the text.
I’m locking sections and I’m seeing extra boxes appearing around my locked section. Am I breaking something?
If you have the icon on, you will see the extra DIV box being created around your locked section.
To avoid confusion, simply turn off the icon.
