
The SchoolMessenger Communicate Plugin for PowerSchool adds two specific links to the PowerSchool interface. In the Functions section, it adds the Message Sender option. In the Applications section, it adds the SchoolMessenger option.
The guide deals with possible options you will have in PowerSchool, depending on your configuration, and using the Message Sender.
Possible Configurations
Depending on your Communicate and PowerSchool configurations, for the ASP Manager and Embedded Message Sender, you may have both Admin and Teacher access, or Admin access only. The Parent Portal SSO may or may not be available. If it is available users may be able to log in with their Guardian accounts or a basic login.
The most basic version of the plugin is to have admin access to SchoolMessenger Communicate and Embedded Message Sender with parents having no access to the SchoolMessenger SSO link within the PowerSchool Parent Portal. This is only used with PowerSchool users who want to have the option of making a student selection in PowerSchool and sending messages to those students, as well as a Single Sign-On link to log directly into SchoolMessenger.
Installing all versions of the plugin is the same; the plugin is generated after it is confirmed to be activated on your account. The plugin gets generated by a support tech that will confirm that your PowerSchool URL has the proper SSL certs in place, that you are forcing your traffic to be HTTPS protected, and that you are not blocking traffic to accounts.relianceco.com. Once the plugin has been installed you will see two new links in PowerSchool:
In the Functions section:
In the Applications section:
These links will function the same no matter what version of plugin you have from above, the options available and who it is visible is what the options manage.
Using the Message Sender Link
Adding the Message Sender link will make it really easy to broadcast messages without having to leave PowerSchool. Be aware that permissions set in PowerSchool do not necessarily transfer to SchoolMessenger so you will need to confirm some user information during setup.
The user will have access to the student/staff selection that they have access to in SchoolMessenger; this may not match their permissions in PowerSchool. To align the selection options, permission adjustments must be made to the user’s account in SchoolMessenger.
Note: The Message Sender Link is only used for sending messages to students. It cannot be used to send messages to staff.
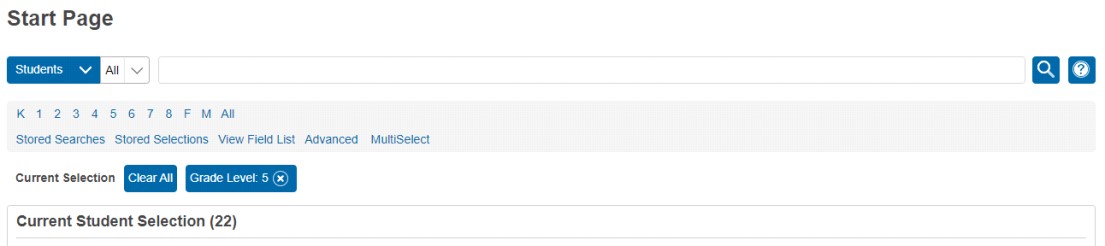
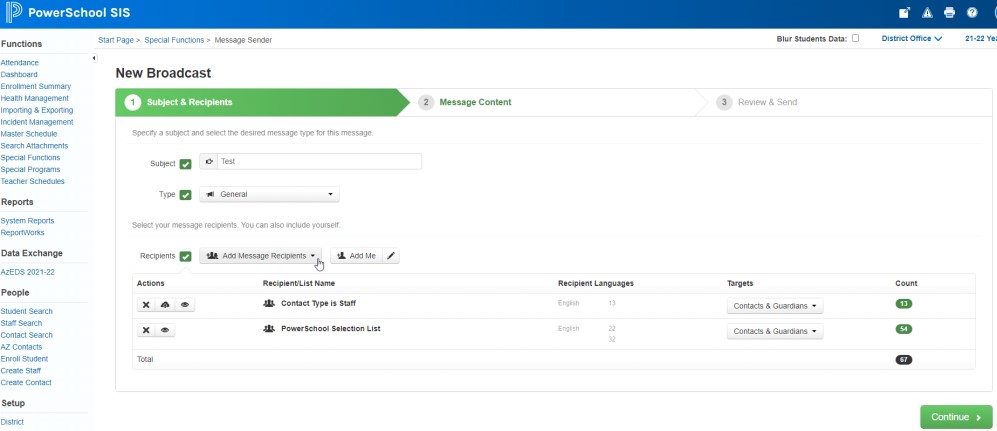
When you load the Message Sender in PowerSchool, you can make your student selection as normal. In the example screenshots below, the user is sending a message to the 5th graders without leaving PowerSchool.
First, select your users.
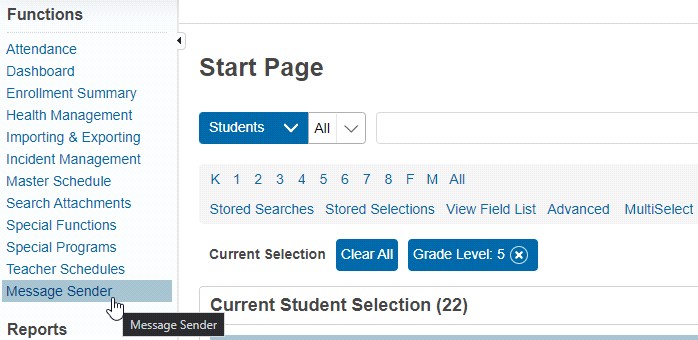
Next click on Message Sender.
This is going to load the Communicate New Broadcast builder inside PowerSchool:
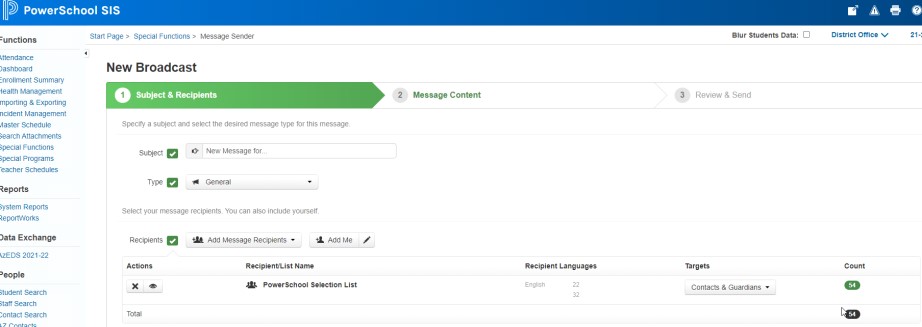
Sending a broadcast is identical to the process that you are used to in Communicate, just that it is done from within PowerSchool.
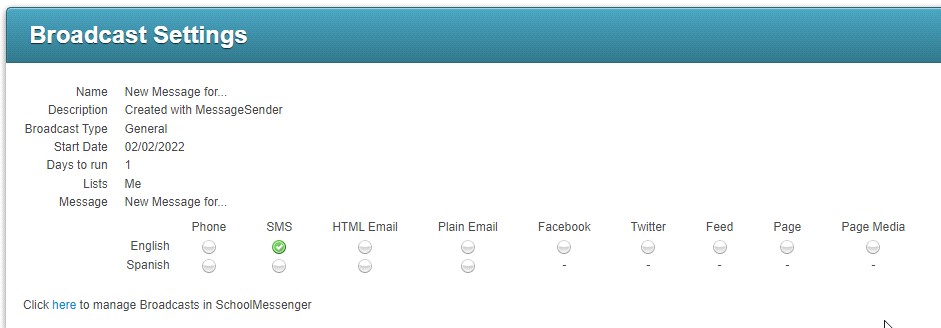
After creating your broadcast, you will see a summary page of the settings that were used for the broadcast. You will also find a link, Click here to manage Broadcasts in SchoolMessenger, that you can use to log directly into your Communicate account.
If you want to include Staff in the message that you are sending, you can utilize the Add Message Recipients option as well.
Note: The Targets option is part of the Guardian Data Model and should be discussed with your tech during deployment/setup.