
The easiest way to send a broadcast from your mobile phone is to use the Sender App. This app is available from both the Apple iOS App Store and the Android Google Play store. You can find the app by searching for “SM Sender App” on the appropriate store.
Preparation
In order to send a broadcast from the SenderApp, you will first need saved lists created under the User Account that you used to sign into the app.
You will have to log in to the web interface for Communicate and create the saved lists prior to sending a broadcast from the app, because you will not be able to create lists within the app.
If you already have lists that you can use, you can skip this step.
You do not need to prepare any saved messages in advance to send a normal broadcast from the app.
Using the App on Android Phones
While the basic information and steps are the same, there are some minor differences between the Android and iPhone versions of the app. If you are using an iPhone, please see the Using the App on iPhones section later in this guide.
Once you have created saved lists, and have successfully signed into the app, you are ready to send a broadcast, but there are a few things to consider when doing so.
There are two ways to send a broadcast – by manually creating a new broadcast, or by sending an existing repeating message.
Manually creating a New Broadcast gives you the most control. You will choose the parameters and settings of the broadcast, and record or type it directly within the app.
You also have the option to send a Repeating Broadcast. This allows you to broadcast a previously created broadcast to a previously established list of contacts.
Signing In
When you first open the app, you will be prompted to sign in.
Signing in with a Communicate Account
If you sign into Communicate with an account that was created specifically for Communicate then you will be signing in with the standard method. Enter your Username, Password and Customer Name.
The Username and Password will be the same one you use to log into your Communicate web interface.
The Customer Name will be the unique identifier your district uses when accessing Communicate. So, for example, if your Communicate URL was https://asp.schoolmessenger.com/exampleschooldistrict/start.php, then your Customer Name would be exampleschooldistrict.
Once you have entered your account information, click Sign In.
If you do not recall your password, you can click the Forgot Password link.
Signing in with a Single Sign On Account
If you sign into Communicate using a Single Sign On (SSO) account, such as a Google or a Microsoft account, you will want to use the appropriate sign in method.
To change your sign-in method, tap the icon to the right of Sign In. This will bring up the Configure Sign In Settings options.
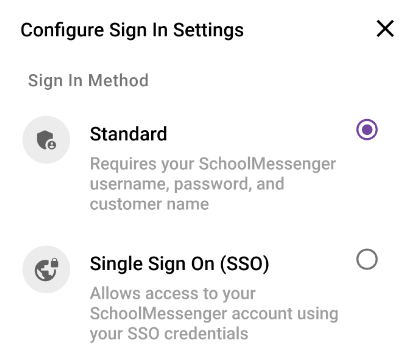
To change the sign in method, tap Single Sign On (SSO) and then tap th icon to return to the sign in screen.
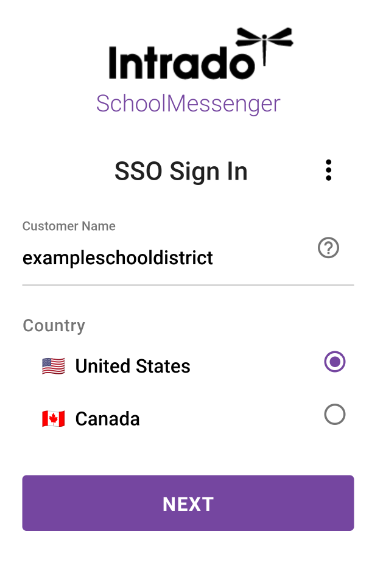
Enter your Customer Name. The Customer Name will be the unique identifier your district uses when accessing Communicate. So, for example, if your Communicate URL was https://asp.schoolmessenger.com/exampleschooldistrict/start.php, then your Customer Name would be exampleschooldistrict.
Choose the Country your district is located within and click Next.
You will be presented with an SSO Sign In page specific to the SSO provider your district has set up to work with Communicate.
Follow the on-screen instructions to log into your Single Sign On account.
Creating a New Broadcast
After logging in, to create and send a new broadcast, tap Create New on the dashboard of the app.
On the next screen, you’ll be presented with the New Broadcast screen.
Configuring Broadcast Settings
-
Tap From Scratch to configure your broadcast.
-
Tap the Broadcast Name and enter a name for your broadcast.
-
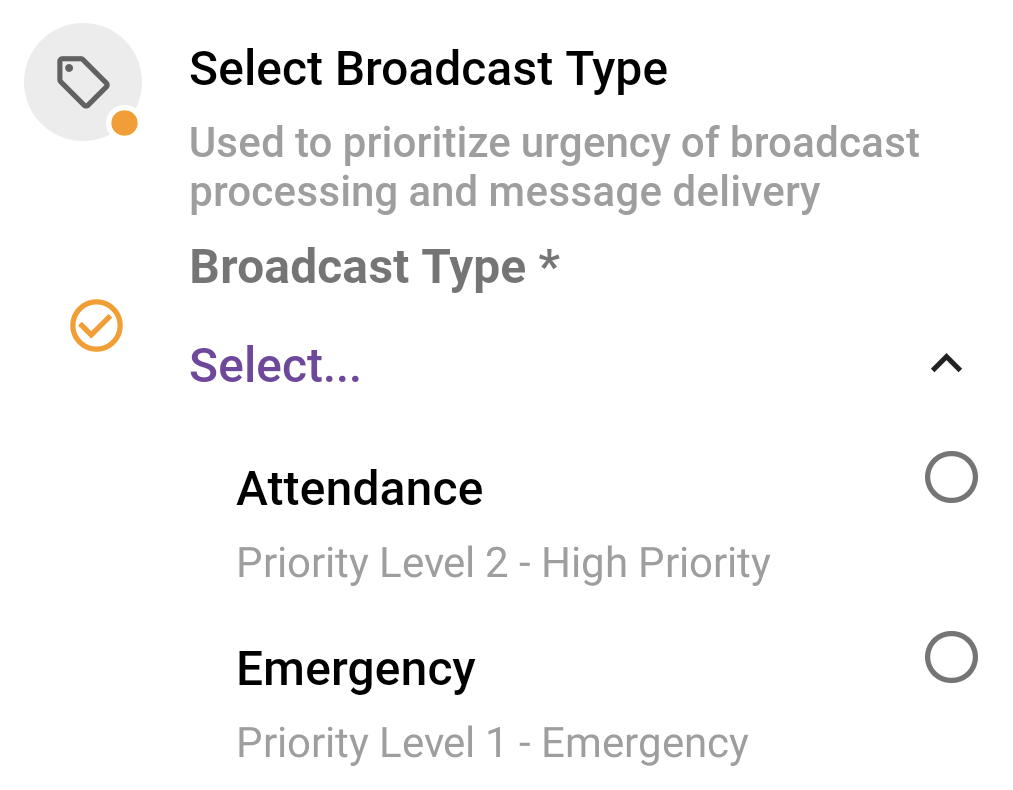
Then click Select… under Select Broadcast Type to choose the type of broadcast you wish to send. The types available will be pulled from your Communicate web account.
If you wish to have a report emailed after the broadcast goes out, check the Send Email Report option.
If you want to make sure that each recipient is not sent duplicate copies of the message (for instance, if the user was on two different contact lists, or the same email address was being used for two different contacts), you can check the Skip Duplicate Recipients option.
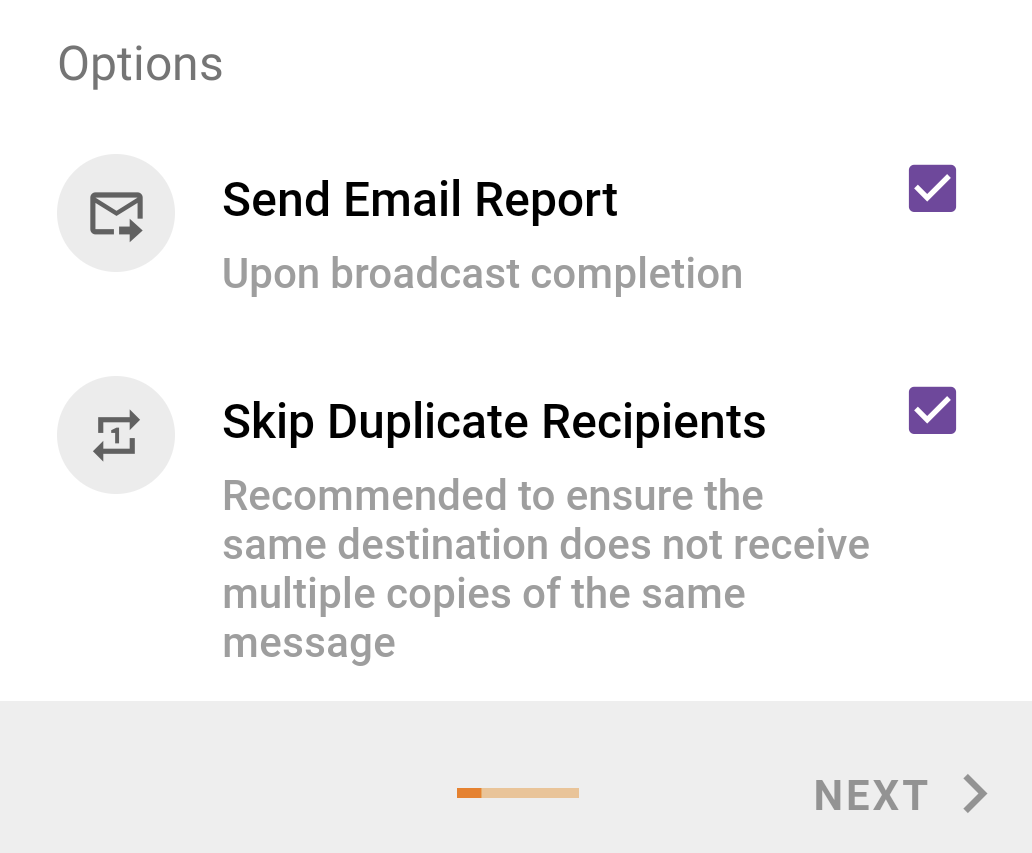
Tap Next to proceed.
Selecting Recipients
1. Click Select to the right of Recipients. You will be presented with a list of all recipient lists that your account has access to.
-
Check off each list you wish to include in your broadcast.
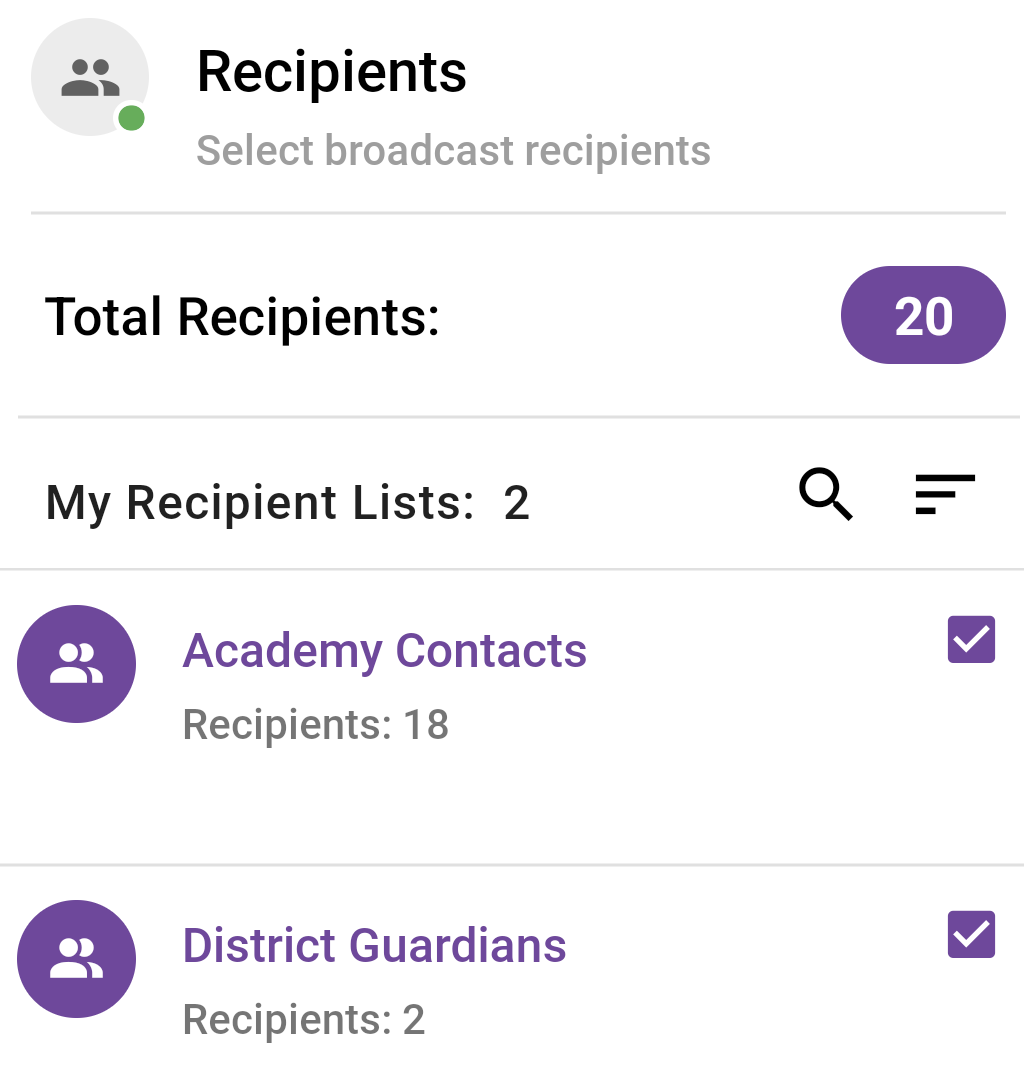
Note: If you have a large number of lists, you can use the Search icon to search for a specific list.
-
Once you have finished selecting your recipients, click Add.
Note: If you do not see a specific list you wish to use, you will need to log into the Communicate web interface and add or subscribe to the list.
-
Click Next.
Selecting Message Types
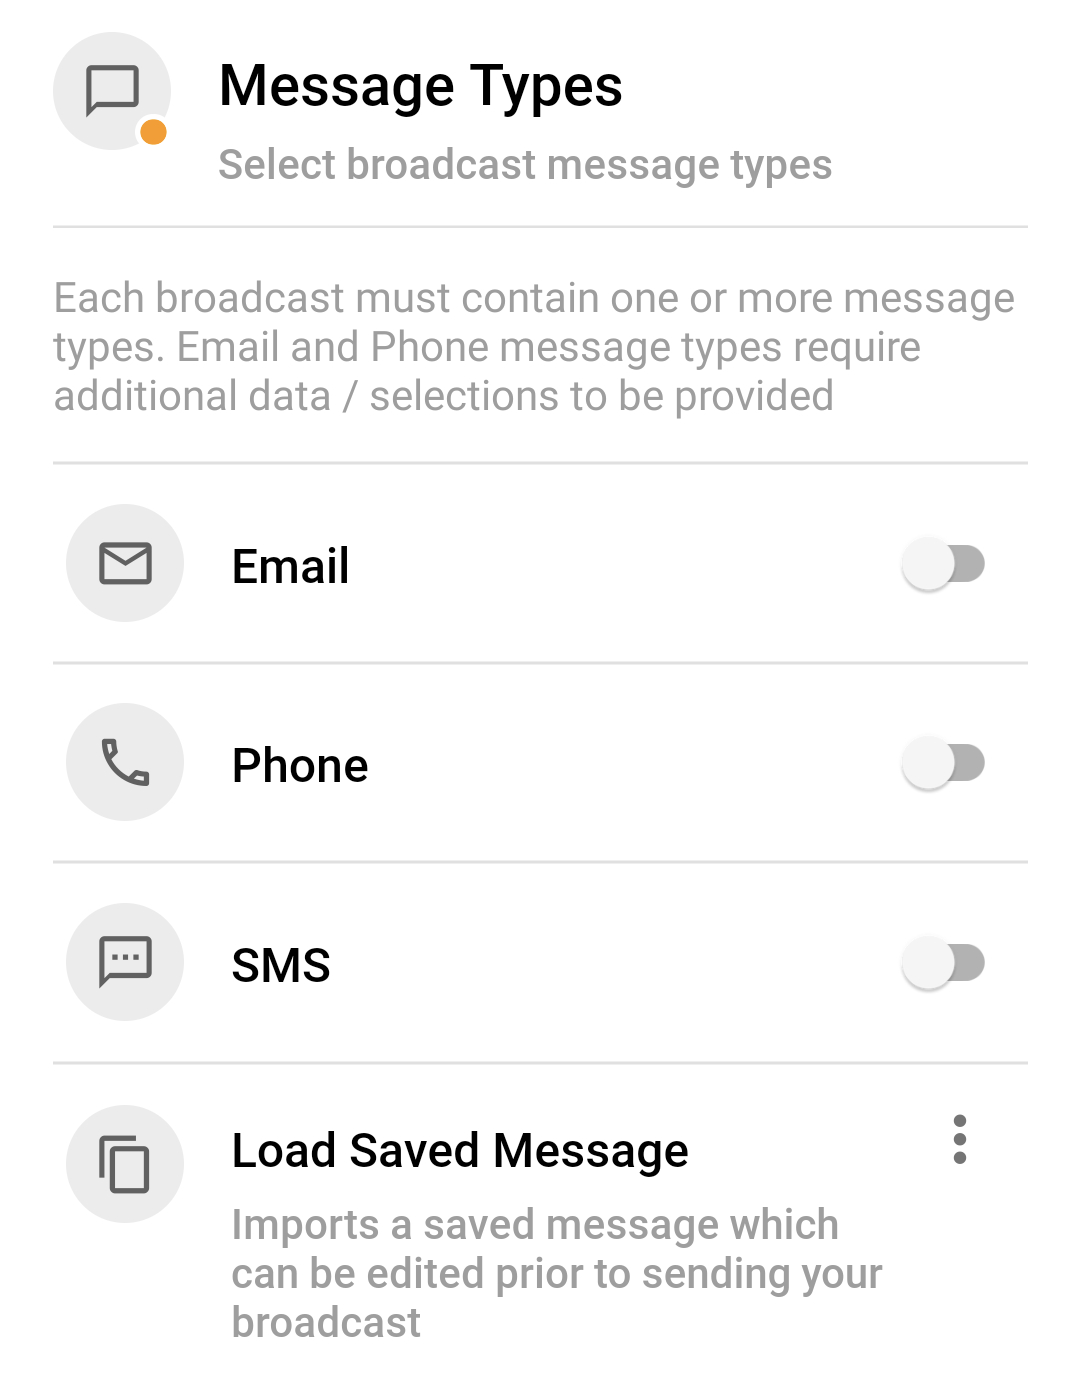
You will be prompted to choose the Message Type(s) for your broadcast.

Toggle on each of the Message Types you wish to include in your broadcast.
Once you have enabled and configured each type you wish to include, tap Next.
Loading a Saved Message
You can also choose to use a Saved Message when creating a new broadcast.
-
Click Load Saved Message to choose a Saved Message to use.
-
You will be presented with a list of My Saved Messages. This will be populated with Messages you have created within Communicate. Check the message you wish to use for your broadcast.
-
Click Load.
Note: If you have a large number of saved messages, you can use the Search icon to search for a specific message.
Configuring an Email Message Broadcast
If you choose Email as one of your message types, you will be prompted to configure settings for the email message.
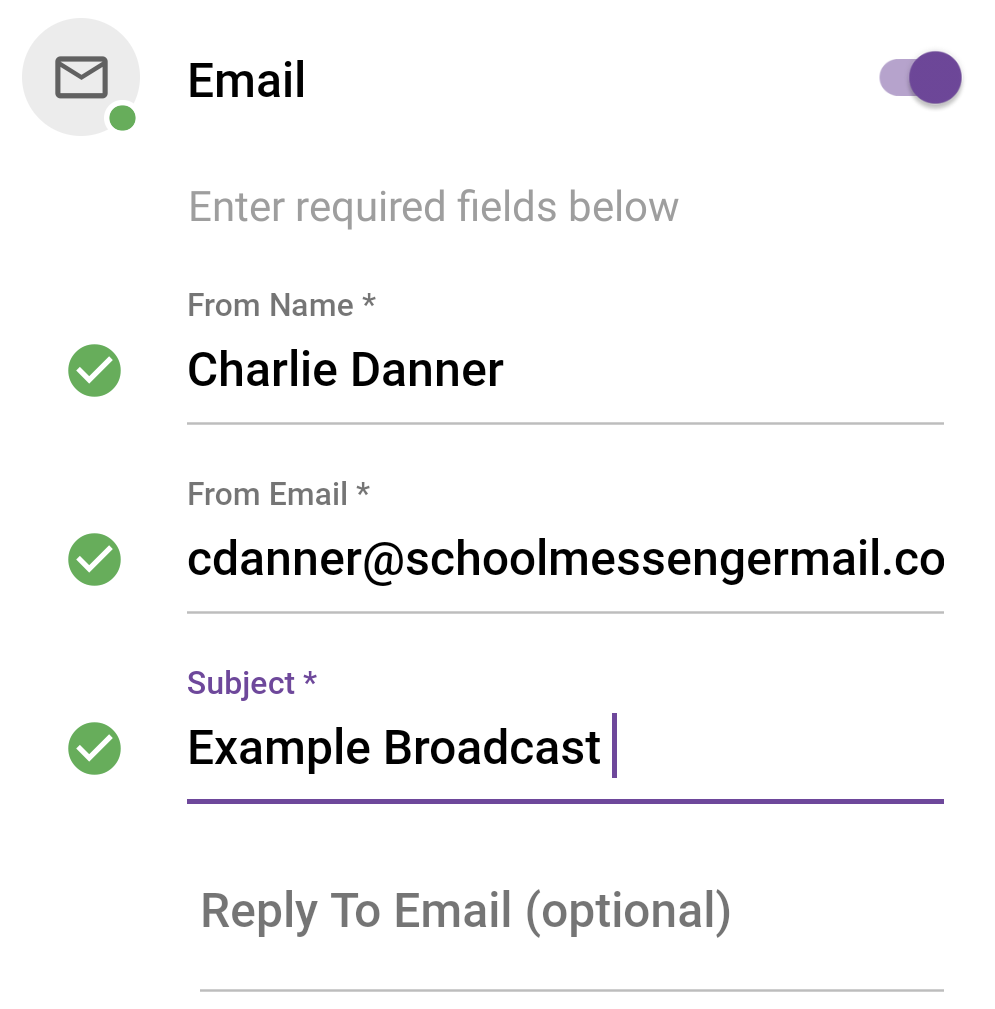
Fill in the following fields:
-
From Name: The name to be displayed as the email sender.
-
From Email: The email address to be displayed as the sender. This email address must use one of the domains that has been authorized for your account.
-
Subject: The subject line of the email to be displayed.
-
Reply to Email: If you wish you can set a reply to email for anyone who replies to the message. Use this if you want users to send their email to an address other than the one you set in From Email.
Configuring a Phone Message Broadcast
If you choose Phone as one of your message types, you will be prompted to configure settings for the voice message.

If you want to type a message and have it read to people who are called, choose the Text-to-Speech (TTS) option.
If you want to use your own voice to record a message, choose the Record Voice option.
The Caller ID will show you the phone number that will be displayed to recipients that receive your phone call.
Configuring an SMS Message
You can choose SMS Message as one of your Message Types if you wish to send a text message.

There is no configuration required for this option.
Creating Text Message to Broadcast
If your broadcast includes Email, Phone – TTS or SMS, you will be prompted to create a text message.
Creating a Default Message
Write your default message that you wish to send. This message will apply to the Email and SMS message types. It will also be used for the Phone message if you selected the Text-to-Speech (TTS) option for the broadcast.
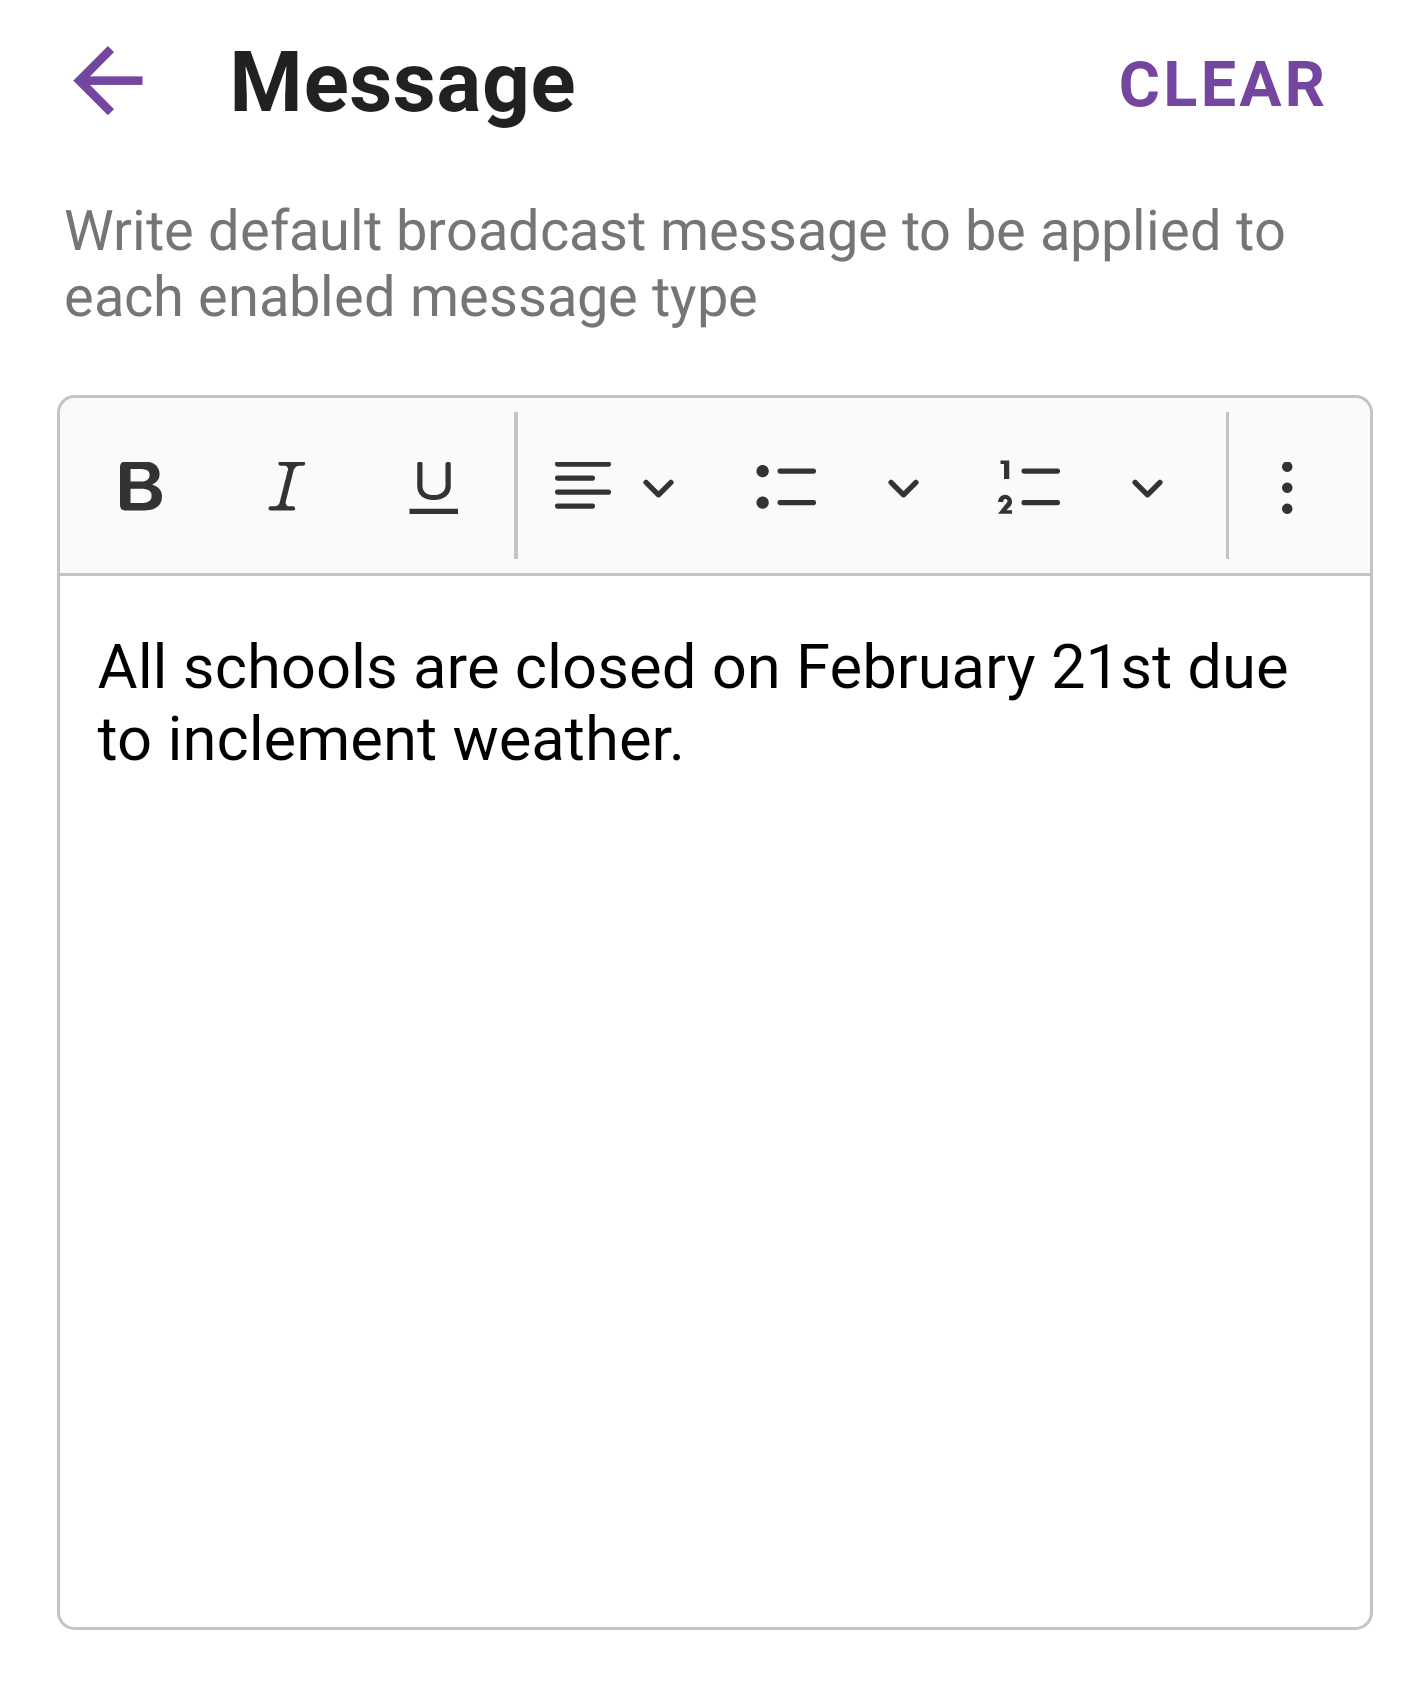
If you want to use the same message for all the selected Message Types, tap Next.
If you would prefer to customize the message for on or more of the Email, Phone – TTS or SMS messages, tap the Overrides option for the appropriate language. See the next section for more details.
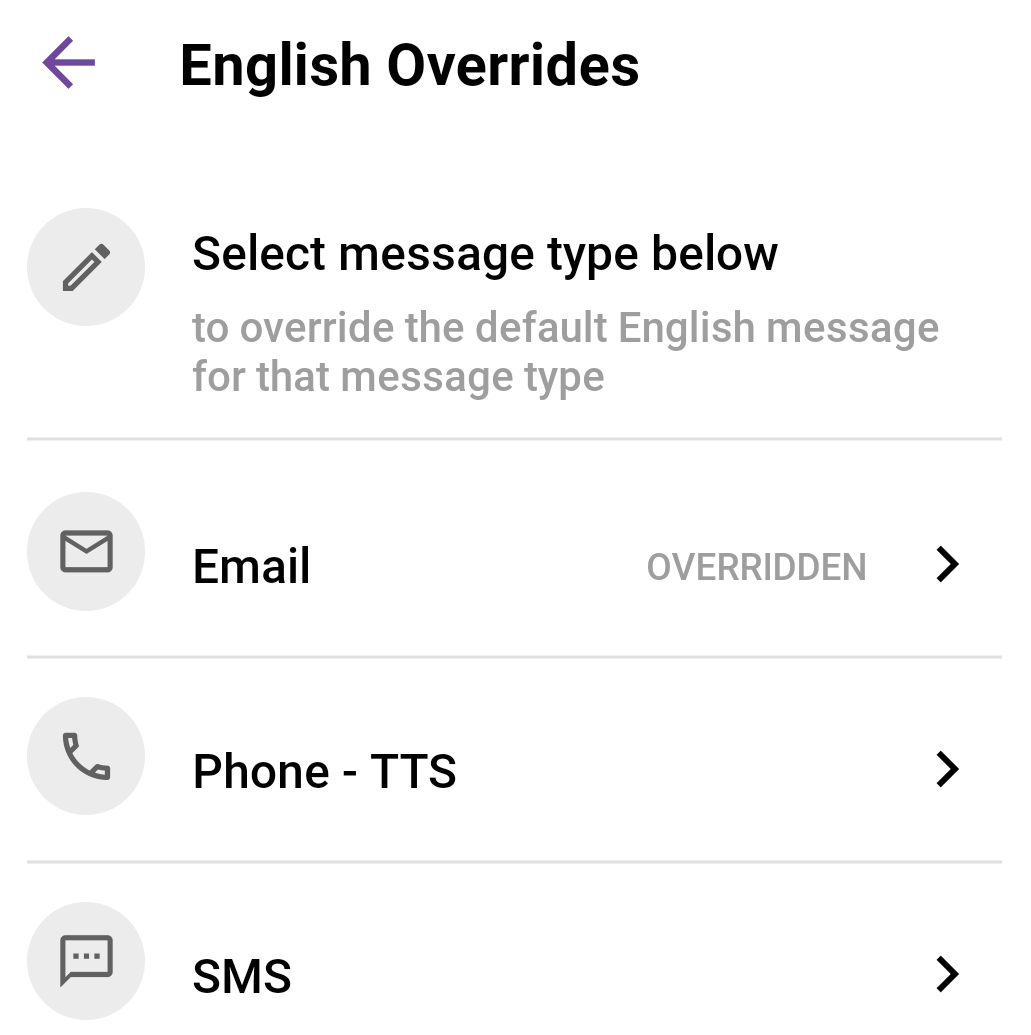
Overriding the Default Message
If you wish to customize the messages for one or more of the different Message Types you have selected, click the type of message you wish to override.
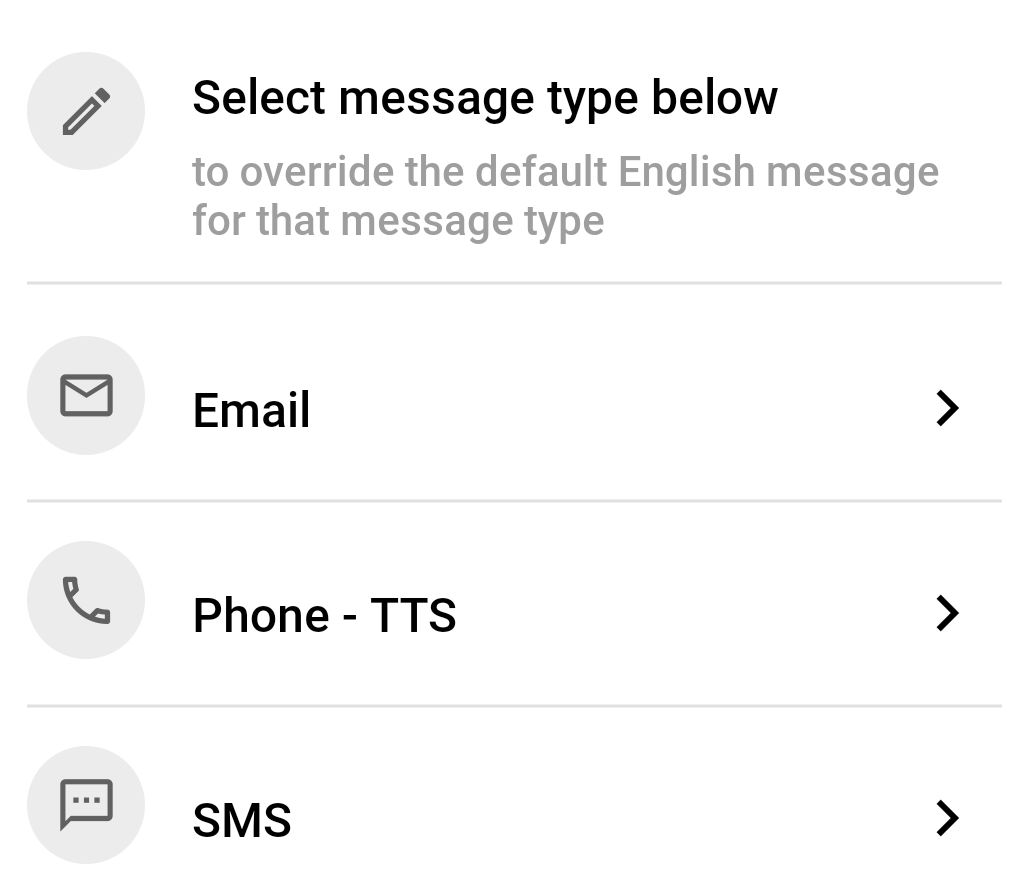
You will then be able to make any changes to the text for the Message Type you have selected.
Update the default message for any Message Types that you wish to override.
Tap the <- arrow at the top of the page to return to the previous screen and then click Next to proceed.
Automated Translations
If your user profile has the Require Translation option set on your profile, then your message will be automatically translated for other languages.
If the Require Translation option is not set on your profile, you will be prompted to choose which languages you wish to translate your message into via automatic translation.
Check the language(s) you wish to translate with Google Translate. You can also select all languages by checking Translate All Languages.
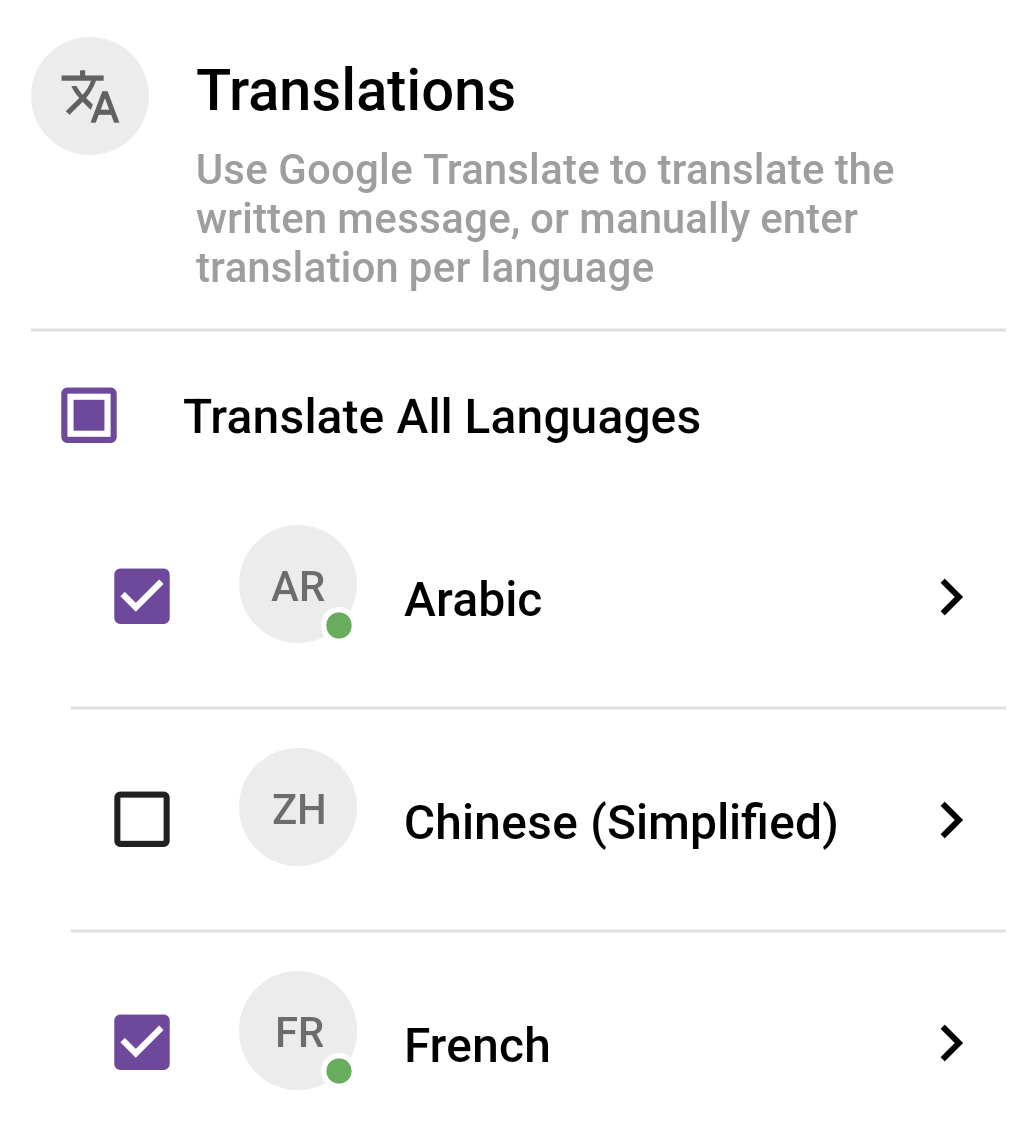
After choosing your languages, tap Next to proceed.
Recording Your Voice Message
If you have chosen to include a Phone message as one of your Message Types in your broadcast and chose Voice Recording you will be able to tap the icon to record your message.
Record your message.
If you have not already granted permission on the app, you will be asked to grant access to the app to record the audio. You can choose to allow access While using the app (if you don’t want to be asked again next time) or Only this time (in which case you will have to grant permission again next time you record a message).
Once permission has been granted, record your message.
Tap the icon when you have finished speaking.
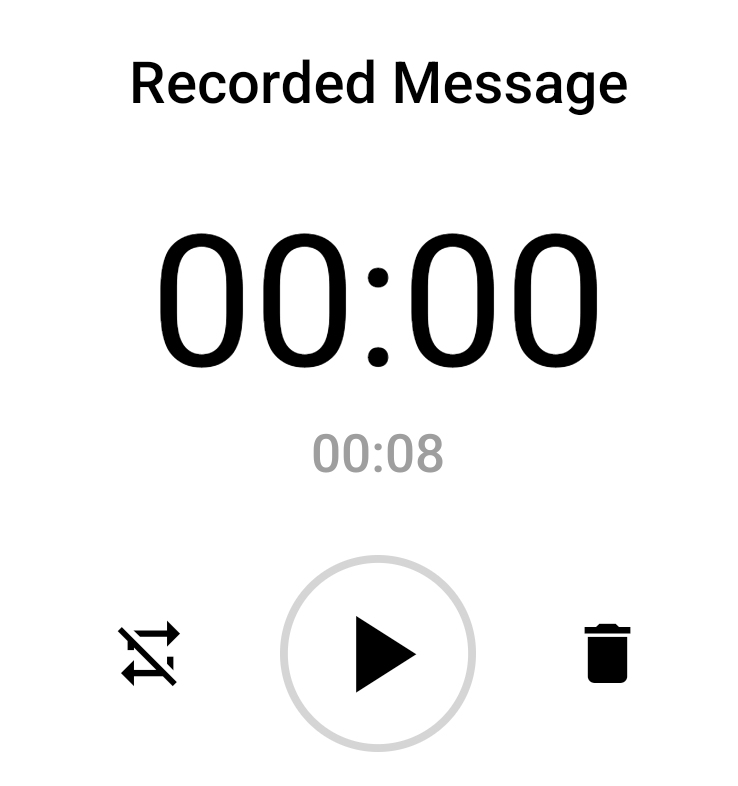
Once you have finished recording your message, you will be able play back your message by tapping the icon.
If you want to loop the audio for the audio preview, click the icon. This will mean the audio will keep repeating instead of automatically stopping at the end of the message playback. This only applies to the preview. The recording will only play once in the actual broadcast.
If you want to re-record the message, click the icon to delete your recording. You can then record a new message.
When you are satisfied with your recording, tap Next.
Publishing Your Broadcast
You will now be prompted to review your broadcast details.
-
If you wish to make any changes, tap Back.
-
If you are happy with your settings, tap Next.
-
You will be able to choose to send the broadcast now, or you can schedule it to be sent later.
-
If you wish to send your message later, tap Schedule.
-
Click the icon to the right of Date to send broadcast.
-
Use the sliders to select a month, day and year for your broadcast and click Confirm. Your broadcast must be sent on the current day or a day in the future.
-
Click the icon to the right of the Start Time and End Time to choose the start and end dates for the broadcast. The Start Time must be no earlier than the Earliest call time and the End Time must be no later than Latest call time. There must also be at least an hour between the Start Time and End Time.
-
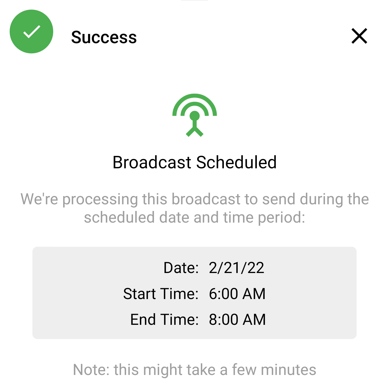
Once you have set the schedule, tap Submit to schedule your broadcast.
You will receive a confirmation message that your broadcast has been scheduled.
If you wish to send the broadcast immediately, tap Send Now.
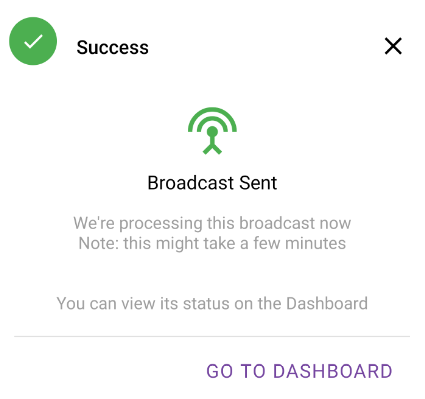
You will receive confirmation that your broadcast is being sent.
Sending a Repeating Broadcast
Aside from allowing on-the-fly broadcast creation as detailed above, the Sender App allows you to send an already created broadcast whenever you like, in seconds. This feature is commonly used for broadcasts that can be sent more than once at any time, such as a generic inclement weather-related message, or a generic bus delay message.
In order to use the Send Repeating option, you must have already done the following in the web interface for Communicate under the User Account that you are using in the app:
-
Create Lists: It is advisable to create a list with rules if it involves a constantly changing set of recipients, such as students, that way the list dynamically updates as your contacts update.
-
Create a Saved Message: It is advised to create a message that is more generic so that you can use the message for a wider range of topics. For instance, for a weather closure, you could use the term “inclement weather” instead of “blizzard” or “tornado.”
-
Create a Repeating Broadcast: You will be able to select existing Repeating Broadcasts that your account has access in the Communicate web interface.
Using the saved list(s) and message you have created for this purpose, create a Repeating Broadcast with whichever settings you like.
When you have completed all three requirements and have a fully functional (and unscheduled) Repeating Broadcast, you only need to complete two steps:
-
Open the app.
-
Tap Send Repeating.
-
You will see a list of repeating broadcasts that your account has access to.
-
Click the icon the right of the broadcast you wish to send.
-
A summary of the broadcast will be displayed.
-
Review the details and click Send Now to deliver the broadcast.
-
Click Dashboard to return to the app dashboard.
Note: If you have a large number of repeating broadcasts, you can use the icon to search for a specific broadcast. If your account does not have access to any repeating broadcasts, you will see that there is no content available.
Reviewing Broadcasts
To review your repeating and sent broadcasts, click the icon at the bottom of the app.
On the Repeating tab, you will see a list of repeating broadcasts your account can send.
On the Sent tab, you will see a list of broadcasts that have already been creating, including broadcasts that are scheduled but have not yet been delivered.
Note: If you have a large number of sent broadcasts, you can use the icon to search for a specific broadcast.
Viewing Recipient Lists
To view all of the recipient lists your account can use for a broadcast, click the icon at the bottom of the app.
You will be presented with a list of all recipient lists that your account has access to.
-
If you have a large number of lists, you can use the icon to search for a specific list.
-
If you do not see a specific list you wish to include, you will need to log into the Communicate web interface and add or subscribe to the list.
Viewing Account Details
To view information on your account, click the icon at the bottom of the app.
From the Account page, you can Sign Out from the app.
Viewing User Information
In the User Name and Customer Details sub-sections, you can also see your account information such as your username, school district and country.
The Contact Preferences sub-section will display any account preferences you have set in the Communicate web site, if any.
You are not able to make any edits to your account information from the app. If changes are needed, please use the Communicate website or contact your administrator.
Changing Default Language
On the Language sub-section of the Account page, you can choose your default language.
Simply tap on the language you prefer.
Support and Information
At the bottom of the Account page, you will find the Getting Support, Legal and Version sub-sections.
The Getting Support sub-section provides you links to contact our support team or the support website. You can also access the latest version of this document by clicking Help. Hel
The Legal sub-section provides links to the Terms of Service and Privacy Policy for the app.
Finally, the Version sub-section displays the version of the app.
Using the App on iPhones
While the basic information and steps are the same, there are some minor differences between the Android and iPhone versions of the app. If you are using an Android phone, please see the Using the App on Android Phones section earlier in this guide.
Once you have created saved lists, and have successfully signed into the app, you are ready to send a broadcast, but there are a few things to consider when doing so.
There are two ways to send a broadcast – by manually creating a new broadcast, or by sending an existing repeating message.
Manually creating a New Broadcast gives you the most control. You will choose the parameters and settings of the broadcast, and record or type it directly within the app.
You also have the option to send a Repeating Broadcast. This allows you to broadcast a previously created broadcast to a previously established list of contacts.
Signing In
When you first open the app, you will be prompted to sign in.
Signing in with a Communicate Account
If you sign into Communicate with an account created specifically for Communicate, you will be signing in with the standard method. Enter your Username, Password, and Customer Name.
The Username and Password will be the same one you use to log into your Communicate web interface.
The Customer Name will be the unique identifier your district uses when accessing Communicate. So, for example, if your Communicate URL was https://asp.schoolmessenger.com/exampleschooldistrict/start.php, then your Customer Name would be exampleschooldistrict.
Once you have entered your account information, click Sign In.
If you do not recall your password, you can click the Forgot Password link.
Signing in with a Single Sign On Account
If you sign into Communicate using a Single Sign On (SSO) account, such as a Google or a Microsoft account, you will want to use the appropriate sign in method.
-
To change your sign-in method, tap the More icon to the right of Sign In. This will bring up the Configure Sign In Settings options.
-
To change the sign in method, tap Single Sign On (SSO) and then tap the Delete icon to return to the sign in screen.
Enter your Customer Name. The Customer Name will be the unique identifier your district uses when accessing Communicate. So, for example, if your Communicate URL was https://asp.schoolmessenger.com/exampleschooldistrict/start.php, then your Customer Name would be exampleschooldistrict.
Choose the Country your district is located within and click Next.
You will be presented with an SSO Sign In page specific to the SSO provider your district has set up to work with Communicate.
Follow the on-screen instructions to log into your Single Sign On account.
Creating a New Broadcast
After logging in, to create and send a new broadcast, tap Create New on the dashboard of the app.
On the next screen, you’ll be presented with the New Broadcast screen.
Configuring Broadcast Settings
-
Tap From Scratch to configure your broadcast.
-
Tap the Broadcast Name and enter a name for your broadcast.
-
Then click Select… under Select Broadcast Type to choose the type of broadcast you wish to send. The types available will be pulled from your Communicate web account.
-
If you wish to have a report emailed after the broadcast goes out, select the Send Email Report option.
-
If you want to make sure that each recipient is not sent duplicate copies of the message (for instance, if the user was on two different contact lists, or the same email address was being used for two different contacts), you can check the Skip Duplicate Recipients option.
-
-
Tap Next to proceed.
Selecting Recipients
-
Click Select to the right of Recipients. You will be presented with a list of all recipient lists that your account has access to.
-
Select each list you wish to include in your broadcast.
-
Once you have finished selecting your recipients, click Add.
-
Click Next.
-
If you have a large number of lists, you can use the Search icon to search for a specific list.
-
If you do not see a specific list you wish to use, you will need to log into the Communicate web interface and add or subscribe to the list.
Selecting Message Types
You will be prompted to choose the Message Type(s) for your broadcast.
Toggle on each of the Message Types you wish to include in your broadcast.
Once you have enabled and configured each type you wish to include, tap Next.
Loading a Saved Message
-
You can also choose to use a Saved Message when creating a new broadcast. To choose a Saved Message to use, click Load Saved Message.
-
You will be presented with a list of My Saved Messages. This will be populated with Messages you have created within Communicate. Check the message you wish to use for your broadcast.
-
Click Load.
Note: If you have a large number of saved messages, you can use the Search icon to search for a specific message.
Configuring an Email Message Broadcast
If you choose Email as one of your message types, you will be prompted to configure settings for the email message.
Fill in the following fields:
-
From Name: The name to be displayed as the email sender.
-
From Email: The email address to be displayed as the sender. This email address must use one of the domains that has been authorized for your account.
-
Subject: The subject line of the email to be displayed.
-
Reply to Email: If you wish you can set a reply to email for anyone who replies to the message. Use this if you want users to send their email to an address other than the one you set in From Email.
Configuring a Phone Message Broadcast
-
If you choose Phone as one of your message types, you will be prompted to configure settings for the voice message.
-
If you want to type a message and have it read to people who are called, choose the Text-to-Speech (TTS) option.
-
If you want to use your own voice to record a message, choose the Record Voice option.
-
The Caller ID will show you the phone number that will be displayed to recipients that receive your phone call.
-
Configuring an SMS Message
-
You can choose SMS Message as one of your Message Types if you wish to send a text message.
There is no configuration required for this option.
Creating Text Message to Broadcast
If your broadcast includes Email, Phone – TTS or SMS, you will be prompted to create a text message.
Creating a Default Message
-
Write your default message that you wish to send. This message will apply to the Email and SMS message types. It will also be used for the Phone message if you selected the Text-to-Speech (TTS) option for the broadcast.
-
If you want to use the same message for all the selected Message Types, tap Next.
-
If you would prefer to customize the message for on or more of the Email, Phone – TTS or SMS messages, tap the Overrides option for the appropriate language. See the next section for more details.
Overriding the Default Message
-
If you wish to customize the messages for one or more of the different Message Types you have selected, click the type of message you wish to override.
-
You will then be able to make any changes to the text for the Message Type you have selected.
-
Update the default message for any Message Types that you wish to override.
-
Tap the <- arrow at the top of the page to return to the previous screen and then click Next to proceed.
Automated Translations
-
If your user profile has the Require Translation option set on your profile, then your message will be automatically translated for other languages.
-
If the Require Translation option is not set on your profile, you will be prompted to choose which languages you wish to translate your message into via automatic translation.
-
Check the language(s) you wish to translate with Google Translate. You can also select all languages by checking Translate All Languages.
-
After choosing your languages, tap Next to proceed.
Recording Your Voice Message
If you have chosen to include a Phone message as one of your Message Types in your broadcast and chose Voice Recording you will be able to tap the Record icon to record your message.
Record your message
If you have not already granted permission on the app, you will be asked to grant access to the app to record the audio. You can choose to allow access While using the app (if you don’t want to be asked again next time) or Only this time (in which case you will have to grant permission again next time you record a message).
Once permission has been granted, record your message.
-
Tap the Save icon when you have finished speaking.
-
Once you have finished recording your message, you will be able play back your message by tapping the Play icon.
-
If you want to loop the audio for the audio preview, click the Preview icon. This will mean the audio will keep repeating instead of automatically stopping at the end of the message playback. This only applies to the preview. The recording will only play once in the actual broadcast.
-
If you want to re-record the message, click the Delete icon to delete your recording. You can then record a new message.
-
When you are satisfied with your recording, tap Next.
Publishing Your Broadcast
You will now be prompted to review your broadcast details.
-
If you wish to make any changes, tap Back.
-
If you are happy with your settings, tap Next.
-
You will be able to choose to send the broadcast now, or you can schedule it to be sent later.
-
If you wish to send your message later, tap Schedule.
-
Click the Calender icon to the right of Date to send broadcast.
-
Use the sliders to select a month, day and year for your broadcast and click Confirm. Your broadcast must be sent on the current day or a day in the future.
-
Click the Calender icon to the right of the Start Time and End Time to choose the start and end dates for the broadcast. The Start Time must be no earlier than the Earliest call time and the End Time must be no later than Latest call time. There must also be at least an hour between the Start Time and End Time.
-
Once you have set the schedule, tap Submit to schedule your broadcast.
You will receive a confirmation message that your broadcast has been scheduled.
If you wish to send the broadcast immediately, tap Send Now.

You will receive confirmation that your broadcast is being sent.
Sending a Repeating Broadcast
Aside from allowing on-the-fly broadcast creation as detailed above, the Sender App allows you to send an already created broadcast whenever you like, in seconds. This feature is commonly used for broadcasts that can be sent more than once at any time, such as a generic inclement weather-related message, or a generic bus delay message.
To use the Send Repeating option, you must have already done the following in the web interface for Communicate under the User Account that you are using in the app:
-
Create Lists: It is advisable to create a list with rules if it involves a constantly changing set of recipients, such as students, that way the list dynamically updates as your contacts update.
-
Create a Saved Message: It is advised to create a message that is more generic so that you can use the message for a wider range of topics. For instance, for a weather closure, you could use the term “inclement weather” instead of “blizzard” or “tornado.”
-
Create a Repeating Broadcast: You will be able to select existing Repeating Broadcasts that your account has access in the Communicate web interface.
Using the saved list(s) and message you have created for this purpose, create a Repeating Broadcast with whichever settings you like.
When you have completed all three requirements and have a fully functional (and unscheduled) Repeating Broadcast, you only need to complete two steps:
-
Open the app and click Send Repeating. You will see a list of repeating broadcasts that your account has access to.
-
Click the Send icon to the right of the broadcast you wish to send. A summary of the broadcast will be displayed.
-
Review the details and click Send Now to deliver the broadcast.
-
Click Dashboard to return to the app dashboard.
Note: If you have a large number of repeating broadcasts, you can use the Search icon to search for a specific broadcast. If your account does not have access to any repeating broadcasts, you will see that there is no content available.
Reviewing Broadcasts
To review your repeating and sent broadcasts, click the Broadcasts icon at the bottom of the app.
On the Repeating tab, you will see a list of repeating broadcasts your account can send.
On the Sent tab, you will see a list of broadcasts that have already been creating, including broadcasts that are scheduled but have not yet been delivered.
Note: If you have a large number of sent broadcasts, you can use the Search icon to search for a specific broadcast.
Viewing Recipient Lists
To view all of the recipients lists your account can use for a broadcast, click the Profile icon at the bottom of the app.
You will be presented with a list of all recipient lists that your account has access to.
-
If you have a large number of lists, you can use the Search icon to search for a specific list.
-
If you do not see a specific list you wish to include, you will need to log into the Communicate web interface and add or subscribe to the list.
Viewing Account Details
To view information on your account, click the Profile icon at the bottom of the app.
From the Account page, you can Sign Out from the app.
Viewing User Information
In the User Name and Customer Details sub-sections, you can also see your account information such as your username, school district and country.
The Contact Preferences sub-section will display any account preferences you have set in the Communicate web site, if any.
You are not able to make any edits to your account information from the app. If changes are needed please use the Communicate web site or contact your administrator.
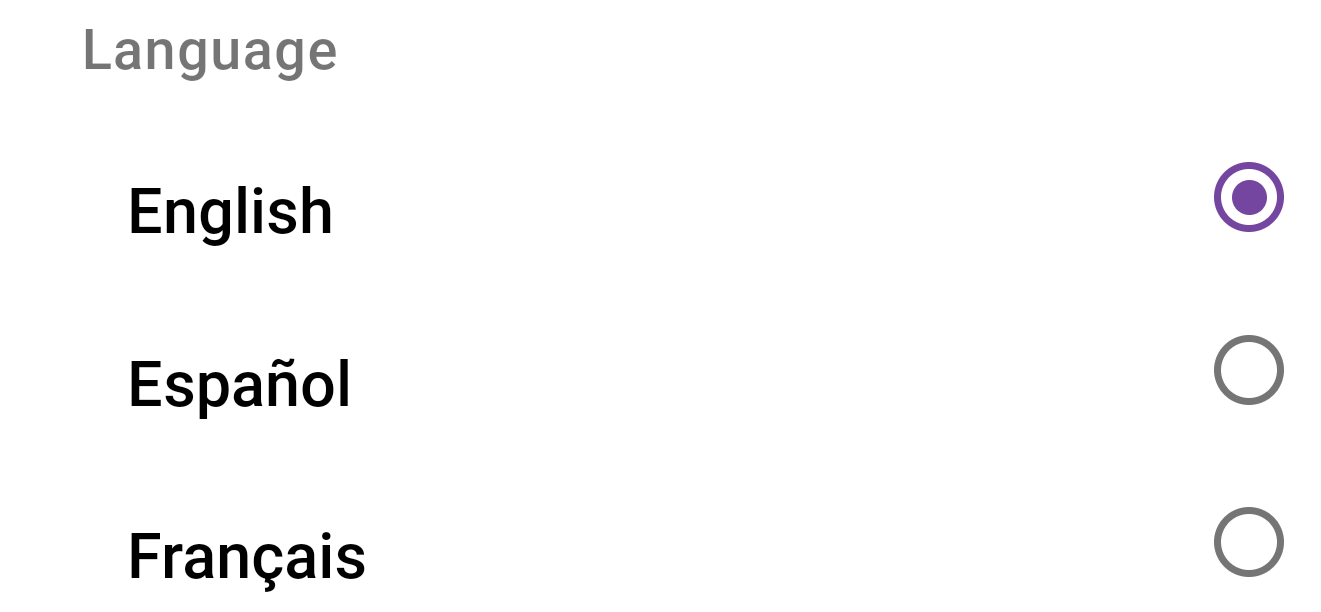
Changing Default Language
On the Language sub-section of the Account page, you can choose your default language.
Simply tap on the language you prefer.
Support and Information
At the bottom of the Account page, you will find the Getting Support, Legal and Version sub-sections.
The Getting Support sub-section provides you links to contact our support team or the support website. You can also access the latest version of this document by clicking Help. Hel
The Legal sub-section provides links to the Terms of Service and Privacy Policy for the app.
Finally, the Version sub-section displays the version of the app.