
To help you and your organization improve compliance with the FCC’s Telephone Consumer Protection Act (TCPA), SchoolMessenger has implemented a simple and friendly way for recipients of the telephone voice messages you send through Communicate to request that they be blocked from receiving future calls.
How Does Opting-Out Work?
At any time, while listening to a phone message broadcast through SchoolMessenger Communicate, recipients can press 5 on their phone to initiate the opt-out process. After pressing 5, they will be given three choices:
To unsubscribe from messages like these, please press 1.
To unsubscribe from all non-emergency messages, press 2.
To opt-out of all phone notifications, please press 3.
Following a recipients’ completion of this process, a report of their election is sent to your Communicate account so that, based on your accounts settings, either the account administrator can take action to ensure compliance with their request or the system will automatically unsubscribe the number accordingly.
Opting-out is done on a phone-by-phone basis and will only initiate a request for the phone number upon which the recipient is currently receiving a message and following these prompts. They must complete the process from every phone for which they wish to opt-out.
Getting Started
The Voice Call Opt-out feature is already active and working on all Communicate accounts and there are three ways you can ask for SchoolMessenger Communicate support staff to configure it to work:
Default: No verbiage in your intro message but if a recipient presses 5, they will be given the three options for opting out of future voice calls. Account Administrators must run a report and manually adjust settings for the recipient’s phone number.
Manual Compliance: Intro message contains verbiage prompting recipients to press 5 to be given the three options for unsubscribing from future voice calls. Account Administrators must run a report and manually adjust the recipients’ phone number preferences to unsubscribe them from specific broadcast types or put the number on the accounts block list if the recipient wants to be opted-out of all calls.
Automated Compliance: Intro message contains verbiage prompting recipients to press 5 to be given the three options for unsubscribing from future voice calls. The Communicate system will automatically adjust for the recipient’s phone’s election to unsubscribe it from specific broadcast types or put it on the block list.
Note: If you choose to utilize either Option 2 or 3, the first thing you must do to prepare is to put verbiage in your voice broadcast Intro Message which informs call recipients that the options are available to them.
Recording your Intro Messages
Your first step in this process should be to write a script for the introduction messages for your schools, which might sound something like this:
This is an important message from Springfield Elementary. Please press 1 to play this message immediately. Press pound to place this call on hold. If you would like to hear options to unsubscribe this phone out of future voice messages from our schools, press 5 at any time during the message.
Note: If you use multiple languages on your Communicate account and/or have different introductions for various broadcast types, such as emergencies, please have a script and available persons prepared for those as well.
While logged in to your Communicate account, click the Broadcasts tab, then select the Messages sub-tab.

Click Add New Message.
In Message Settings, enter a Message Name and Message Description and click Next.
In the Message Content section, click on the drop-down next to the first language you will record and select Record.
In the Voice Recording section, enter the phone number where you (or the person who will be recording) can be reached in the Number to Call box and click Call Now to Record.
The phone will begin ringing almost immediately. Answer and follow the prompts to record the intro message script. Remember to press 1 to save your message before hanging up.
On your Communicate account, the screen will change to give you the option to Play or Rerecord your message.
When you are satisfied with the recording, click the Done button. You will be returned to the Message Editor screen where you can see a green check next to the message type you selected.
Configuring Intro Messages
Now that your message has been saved, you will need to configure your Communicate account to use the appropriate Intro Message for each broadcast type.
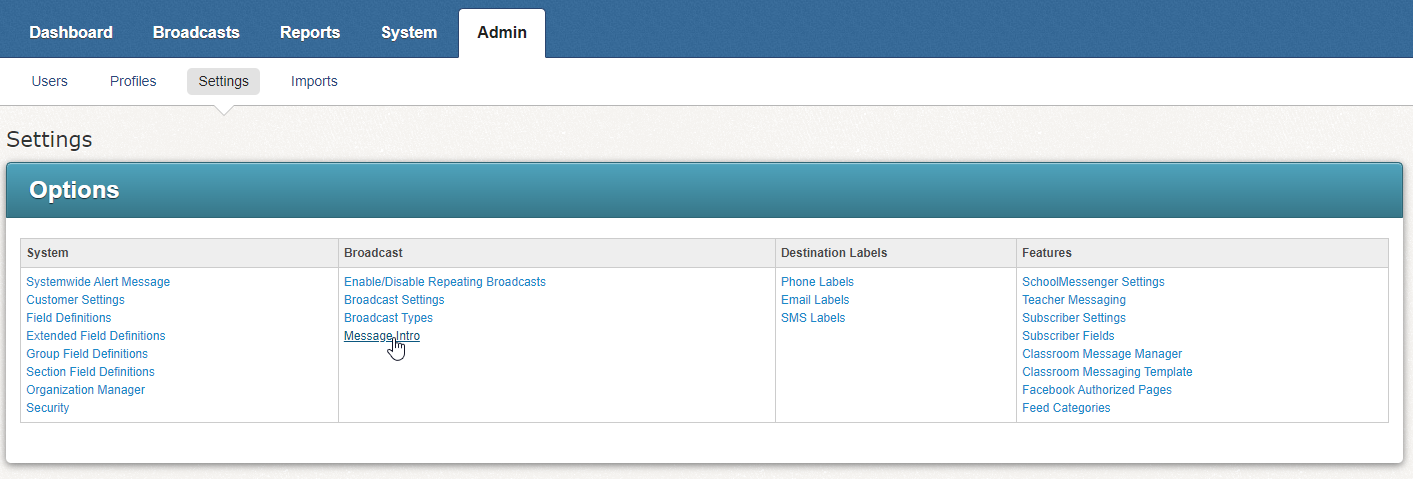
To configure your introductory messages, click the Admin tab and the Settings sub-tab.
Under the Broadcast column, click Message Intro.
Use the drop-down menu in your Default Intro section to select yourself (or the user’s account who recorded the intro message you want to use).
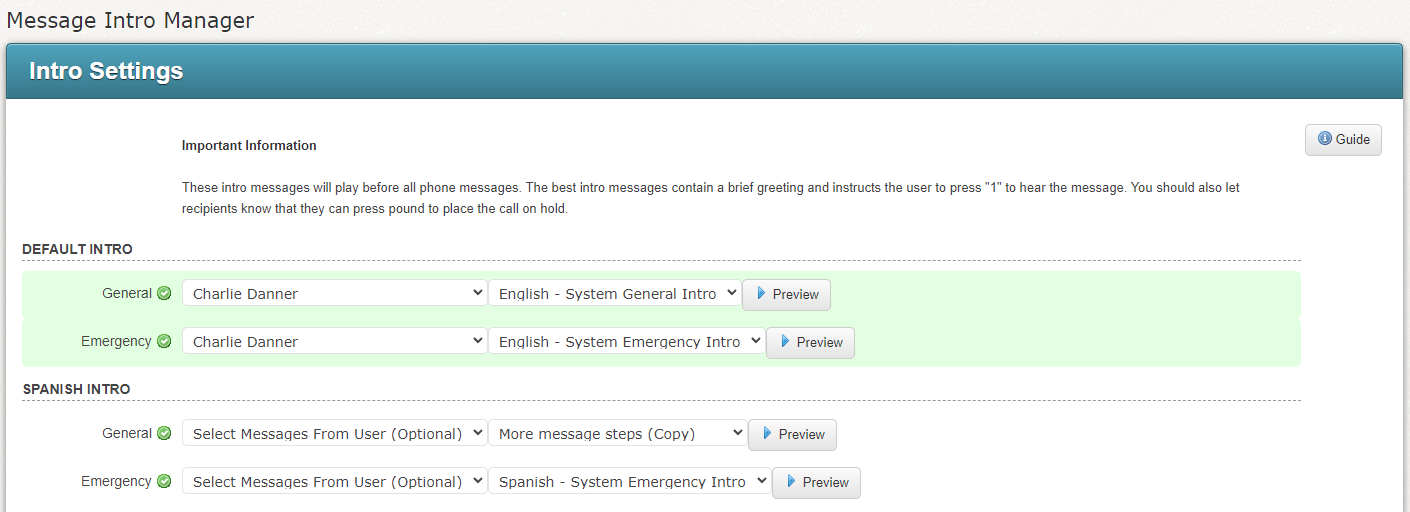
To the right of that, use the drop-down menu to select the appropriate message. We recommend using the Preview button to listen to each selected message to make sure it is the correct message.
Configure all the languages you have intros for.
Click Done when you have finished your configuration.
Taking Action on Opt-Out Requests
Recording and configuring the Intro Message is just the first step in the Voice Call Opt-Out process. When recipients of your messages do elect to opt-out of receiving further messages, there are distinct options for how your account will handle those requests.
Option 1: Default
If your organization chooses Option 1, saying nothing about the opt-out options during your accounts intro message, recipients could still possibly press 5 during a phone broadcast message to access the opt-out options. You can still view the reports and take the actions described below for Option 2, if you choose.
Option 2: Manual Adjustments
Having your account set for Option 2 leaves it up to someone at your organization to review requests and take specific action to ensure compliance with their wishes.
With this option, a report must be generated, and the numbers requesting to either unsubscribe or opt-out completely must be manually adjusted within your Communicate account.
This method is suitable for organizations wishing to double-check and/or confirm recipient elections to insure against accidental or malicious opt-outs but does require the most effort to maintain.
Click the Reports tab.
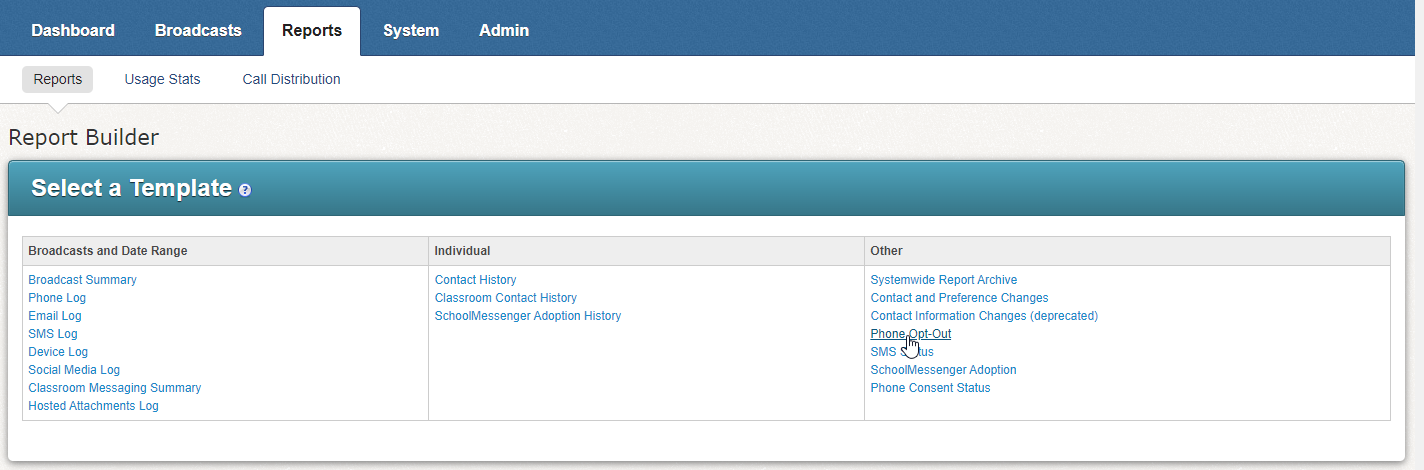
Under the Reports subtab, look under the Other column and click Phone Opt-Out.
Select a date range. The range should reflect the period of time since you last took action on an Opt-Out report.
If you wish your Opt-Out report to reflect only contacts associated with certain schools, use the check boxes under School to select all those which apply. If any contact is not specifically associated with a school, checking any boxes will eliminate them from the results.
You can use the Sort By drop-downs to create a sort order for viewing the report if desired. This can be altered on-the-fly from within the report as well.
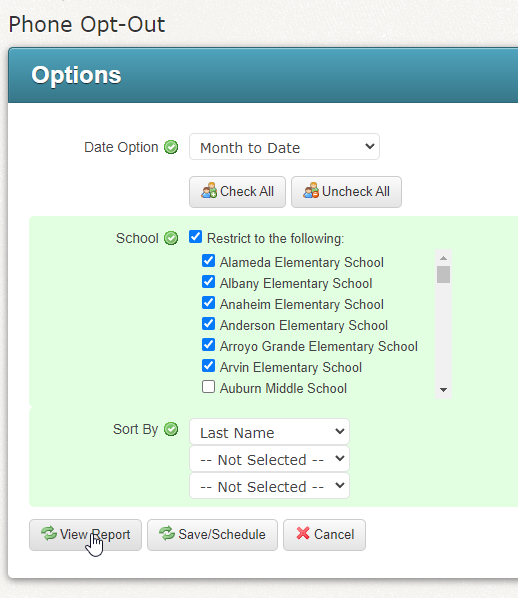
Click View Report to see the report.
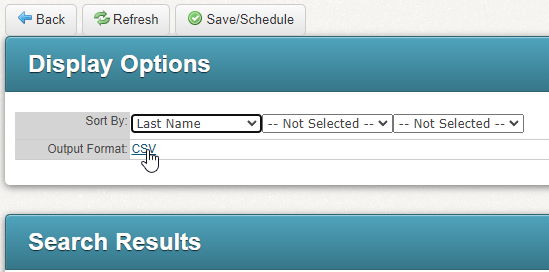
If you would like to run the report in the future, click Save/Schedule.
To download the report, click the CSV link.
Under Search Results you will see a list of all Opt-Out requests.
Opt-Out of All Phone Notifications
The most common and easiest types of requests are those asking to be opted out of all future voice calls. When the Phone Opt-Out report shows Block requested by recipient, this means the recipient pressed 3 and wishes not to receive any other phone notifications to the number shown in the report.
The options to add numbers to your account’s Block List are found in the System tab under the Blocked Lists sub-tab.
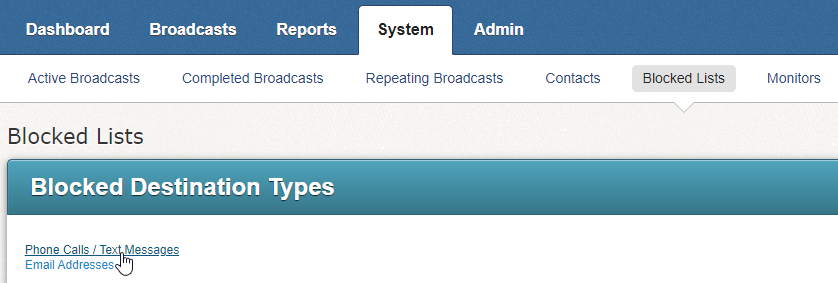
Click Phone Calls / Text Messages.
Select Block Calls Only as this is only a request to block voice calls, and SMS and Email blocks have their own methods of requesting to opt-out.
Add the 10-digit phone number in the Phone field.
Enter a Reason for why the number is being blocked.
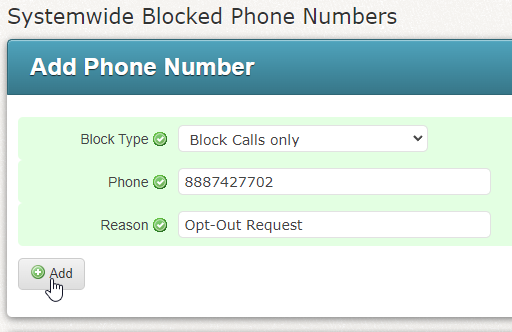
Click Add.
The number and information will be added to the Blocked Phones list.
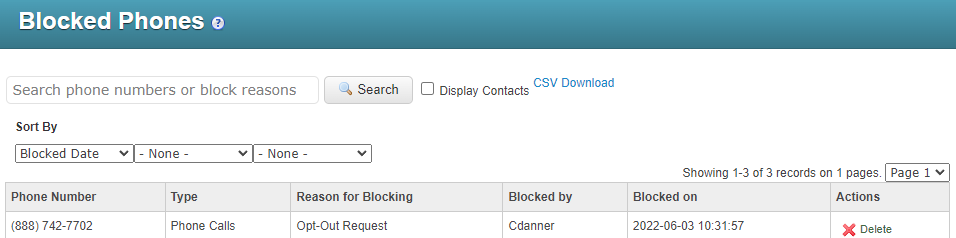
Note: Not all user accounts will have access to adding numbers to the Blocked List. Contact your system administrator concerning access to this feature. Numbers which have been added to the SchoolMessenger Communicate Blocked List can be removed at any time, should the recipient change their mind or if a mistake is identified.
Opt-Out of Specific Notification Types
When recipients unsubscribe from specific broadcast types or send a request to unsubscribe from All but Emergency Priority calls, you will make adjustments to that recipient’s preferences in their Contact Details.
Click the System tab and then the Contacts sub-tab.
Select Search for Person as your Search Option
Enter a name, phone number, email address or unique ID for the contact you are looking for.
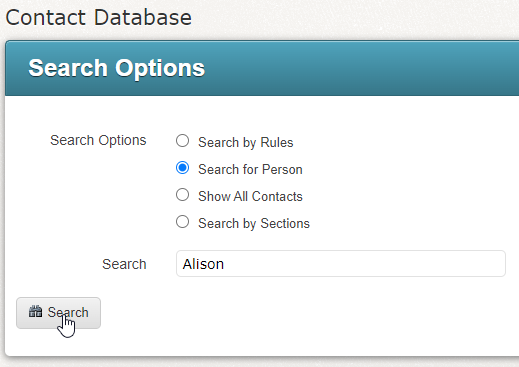
Click Search.
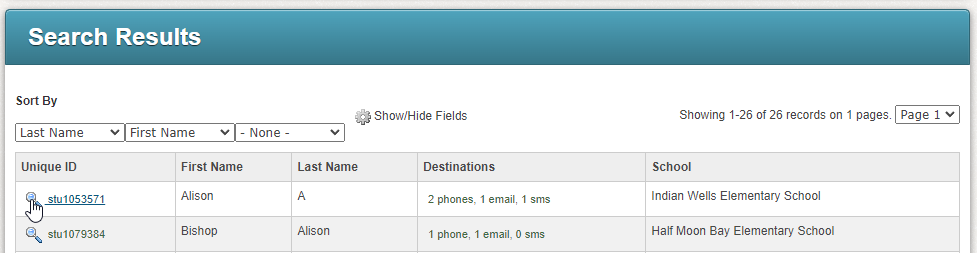
Click the lens icon to view that contact’s details.
Click Edit at the top or bottom of this screen.
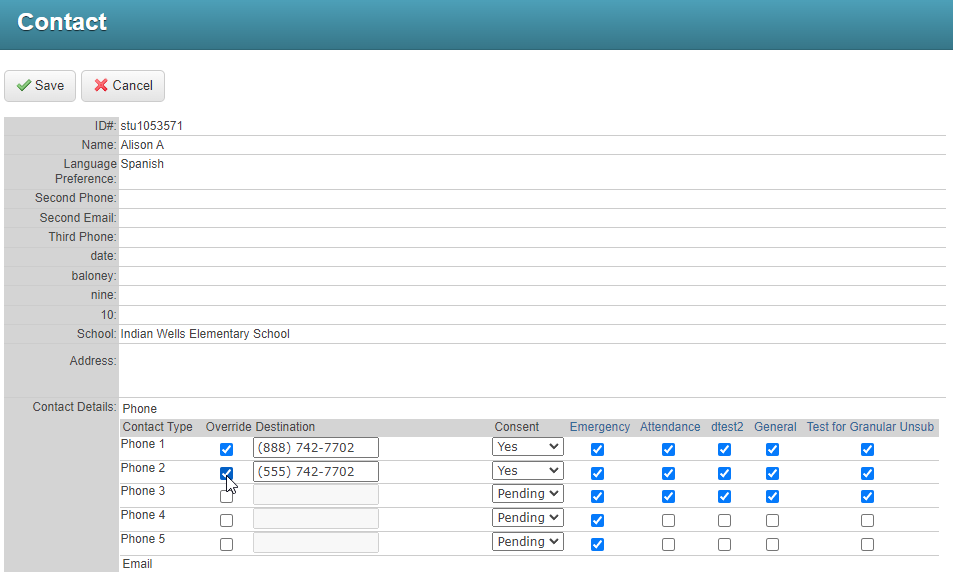
Uncheck any phone numbers that the user has opted out of.
When you have finished making your changes, click Save.
If your account is configured for the Guardian Data Model, you will also want to look at the Guardians section and click the View icon in the Actions column to locate the phone number.
Option 3: Automated Adjustments
This is the option where unsubscribe and block requests are automatically updated by the system.
If a recipient presses 5 during a message and then presses option 3, Communicate will automatically put them on your accounts Blocked List. If they unsubscribe from a specific type of broadcast by pressing 1, or from all but emergency broadcasts by pressing 2, those preferences will be automatically set by the system.
You will still be able to view reports or opt-outs and preferences, just as with Option 2, above, but you will not need to make any manual adjustments yourself.
Note: You always have the full ability to make manual adjustments to blocked numbers and preferences should a recipient notify you that a change has been made by mistake or that they have changed their mind about receiving calls.
Preparing Your School Community
While creating a clear Intro Message informing your call recipients of the Voice Call Opt-Out feature is the first and most important step in implementing this important feature, you may also wish to enact a campaign to inform all of your school community members as well. Things like a letter sent home and an email about this feature and how it works can also be a big help – especially for those who have been receiving voice messages from you for a while, as they may have become accustomed to skipping or ignoring the intro message.
We also suggest that you make sure to reinforce a few of the facts about this feature:
Requests to opt-out may not be instantaneous. Let people know that your organization processes requests on a regular basis, and to please send their request again should they feel it is not being processed in a timely manner.
Opt-out requests only apply to the number on which they submit the request.
Voice Call opt-out requests only apply to voice broadcast messages, not SMS Text or Email.
Please call the school if you wish to be opted back in or feel your number has been opted out by mistake.