
Your Account Settings enable you to set different preferences for your personal interface and how your account relates to other users.
To access your Account Settings:
-
Click the down-facing arrow in the upper-right corner of Schoology.
-
Select Settings.
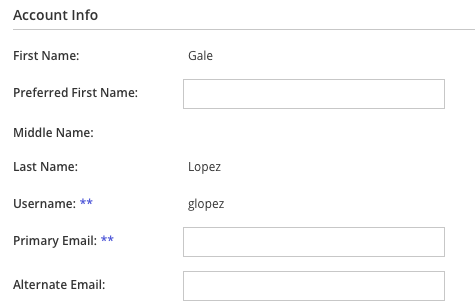
Account info
Edit your name
Depending on the permissions enabled in your account, you can change the name you display to other Schoology users. Select the arrow at the top right of the page next to your name and then select Account Settings. The display names you can customize may include:
-
Title: This refers to any prefix you’d want to include in your name (Mr., Mrs., Ms., etc.).
-
First Name: This field should already include the name with which you signed up for Schoology.
-
Preferred First Name: If your organization's system administrator has enabled this permission, you can choose a different name to display wherever your name appears, either by itself or in addition to the name in the First Name field.
-
Middle Name: This field may already be filled, though it is not required.
-
Last Name: This field should already include the name with which you signed up for Schoology.
-
Username: This field is necessary for users who sign into Schoology using a username. Users may sign up for Schoology with either a username or an email address.
Primary and secondary email addresses
-
Primary Email: This field lists the email address under which you are registered in Schoology. All designated Notifications will be sent to this email address. You may also log in to Schoology using this email address.
-
Alternate Email: This field lists an optional, secondary email address. Notifications will also be sent to this email address.
If you notice that you are not receiving email alerts when you would expect them, you may have an issue with your primary email that requires your attention. Check with your email provider to confirm any issues (for example, check if the emails are in your spam folder). If you continue to experience issues with receiving notifications, talk to your child's instructor or your Support Contact.
Timezone
If your Schoology account is not currently set to the correct timezone, you can correct it by scrolling through the drop-down menu.
Once you have adjusted the settings, don’t forget to click Save Changes to complete.
Set your default account
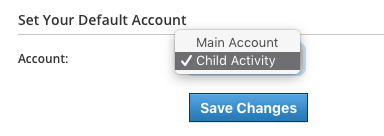
This determines the first page you see when you log in to your Schoology account. You can toggle into your child’s account at any time, to stay updated on his or her schoolwork and activity.
From the Set Default Account menu:
-
Select Main Account if you would like to see your own personal account when you log in.
-
Select Child’s Activity if you want to automatically start in your child’s account when you log in.
Account password
Depending on the way you log in, your login information will display either your email or your school and username information.
To create a new password:
-
Click the down-facing arrow in the top right corner of Schoology
-
Select Settings in the drop-down menu.
-
Click the Change your password link underneath Account Password.
-
Type in your current password.
-
Type in your new password and confirm it (must be different than the current one).
-
Click Submit to complete.

-
Schoology requires passwords to be a minimum length of 12 characters.
-
We recommend that you keep your password in a safe place and that you never divulge your account information to anyone. This precaution is especially important for users who sign in using a username because they will not be able to retrieve a forgotten password via email.
Share your Schoology calendar
You can access your Schoology calendar information from a different calendar program by enabling this option in your Account Settings. Once enabled, Schoology will provide an iCal link that will allow you to share your Schoology Calendar with the calendar tool of your choice. Below are instructions for sharing your calendar:

iOS device
-
Tap Settings.
-
Tap Calendar.
-
Tap Accounts.
-
Tap Add Account.
-
Tap Other.
-
Tap Add Subscribed Calendar.
-
Paste the link copied above into the Server field.
-
Tap Next to complete.
Outlook 2007/2010 (has native iCal support)
-
Email the link copied above to the account you check on Outlook.
-
Click the webcal link in the email on Outlook.
-
An Outlook box should appear asking you to Add this Internet Calendar to Outlook and Subscribe to Updates.
-
Click Yes, and the calendar is automatically added to Outlook.
Google Calendar & Android Devices
-
Sign in to your Google Calendar account.
-
In My Calendars, click the + icon and select From URL.
-
Paste the link copied above into the URL of calendar field.
-
Click Add calendar to complete.
Windows Live:
-
Sign in to your Windows Live account.
-
Go to Calendar.
-
Click Discover Calendars.
-
In Import Calendar on the left, click From Web.
-
In the Link to Calendar field, paste the URL copied above.
-
In the Calendar Name field, enter a name for the calendar.
-
Click Import.
Mac Calendar:
-
Open Calendar.
-
Click File at the top and select New Calendar Subscription.
-
Paste the URL copied above.
-
Click Subscribe.
-
Adjust the name, location, and other settings.
-
Click Ok to complete.
The Share Your Schoology Calendar setting only works if you have at least one entry in your Schoology Calendar. If the calendar is blank, you cannot link it or access it from other calendars, and an error message displays when you try.
Link account
If you have another Parent account in Schoology, you can link your accounts to toggle between children from the down-facing arrow on the top right of Schoology. By keeping both accounts, and linking them together, you can access all content from a single login. The feature allows each school to manage your parent account settings appropriately, and to communicate with you seamlessly.

To link an account, follow these steps:
-
Click the arrow in the upper right of the page of the Parent account you'd like to keep primary (you will be using this account to log in to Schoology).
-
Click Settings in the drop-down menu.
-
Scroll near the bottom of the Account Settings page and click Link Accounts.
-
Enter the Email or Username of the Parent account at the other school.
-
Enter the Password of the other Parent account.
-
Click Link Account to complete.
Select a Primary email address for linked accounts
A list of your primary account and linked account(s) will appear in the Link Account area upon completion. If you have multiple primary email addresses for these accounts, enable the feature to Select a primary email address. This feature allows email notifications for each linked account to go to the primary email address listed in this area.
Merge account
If you have a duplicate account on Schoology, you can merge your old account into your current account. Keep in mind that by doing this, the merged account will be deleted after all your created content is moved into the current account.

To merge an account, follow these steps:
-
Log in to the account you plan to keep.
-
Click the down-facing arrow in the upper right of the page and select Settings.
-
Scroll near the bottom of the Account Settings page.
-
Click Merge Accounts.
-
Enter the Email or Username and the Password of the desired account.
-
Click Validate Account, and wait for the merge to complete.
Please do not merge your account if you have multiple accounts for schools in which your children are enrolled. Instead, use the Link Accounts feature above. If you encounter an error message, "Sorry, you are not allowed to merge subscribed accounts into this account," your previous account is registered to a school with a system administrator. Contact your Support Contact for assistance.
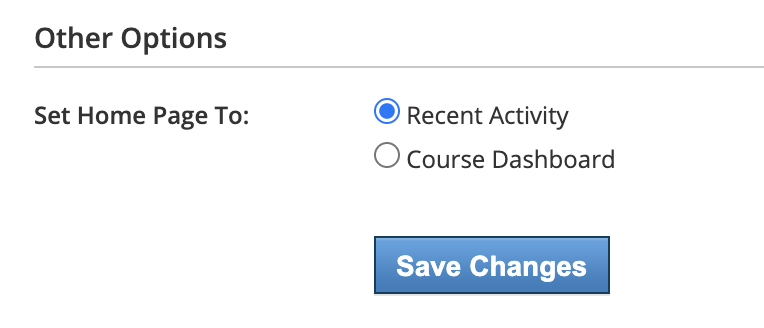
Other options
Set the default home page for your account to display Recent Activity or the Course Dashboard.
Your child's school may also set the default home page for all user accounts. This setting applies to all users who have not customized the setting in their own Account Settings. Once a user has set the default view in their own Account Settings, that selection overrides any system-level default.
-
Click the down-facing arrow in the upper right corner of your account and select Settings.
-
Scroll down to Other Options at the bottom of the page.
-
Under Set Home Page To:—select Recent Activity or Course Dashboard.
-
Click Save Changes to apply.