Blueprint
Create a blueprint
First, define the properties of the blueprint. The mode and status are indicated as New.
From the main navigation menu, choose Tests, then New Blueprint.
Enter the necessary information.
Click Save.
Add standards
After creating a blueprint, search for and add standards to the blueprint.
Select Auto Save to automatically save your progress.
Select Auto Calculate to pre-populate the question interaction counts for each standard. These are evenly distributed by default. Otherwise, all values are set to zero.
To begin searching for standards, click Search. Locate standards by code or description.
Click Select to attach a standard to the blueprint.
After you add a standard, you can search for standards from the main blueprint area.
Select the Use Filters checkbox in the search bar to limit the standard search results to those that apply to the course type, courses, and grade levels defined for the blueprint. This currently applies to Florida standards only.Click Add for each additional standard to include on the blueprint.
Configure interactions
After you select the standards, you must configure the number of interactions and their required attributes.
Adjust the display before configuring the interactions.
Choose the Mobile or Spreadsheet display.
Use the toggle to switch the count format between numbers and percentages.
Add at least one, but no more than two Item attributes.
For each standard, adjust the total number of aligned questions (and IPE, if used). Ensure the total for all standards matches the total defined for the blueprint.
Configure the counts for the interactions and attributes one standard at a time. Ensure the total for each grouping matches the total number of interactions defined for that standard.
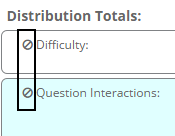
You can reset the counts to zero for any attribute by clicking the reset icon preceding the attribute name.

After configuring a standard, click the lock icon to lock the values before moving on to the next standard.
If you do not lock the values, the changes to the counts for the next standard will also adjust the standards you have already completed.Click the pencil icon to add notes. The notes are distributed to the course teachers who can use them to create a comprehensive course assessment outline.
After configuring and locking each standard, click Save.
The saved blueprint should be in Verifiable status with all action buttons available.
If Verify is unavailable, review the counts for the standards to locate possible errors.
The number of items for all standards must match the total number of items designated for the blueprint. You must select at least one interaction attribute. Highlighted fields indicate errors.
Assign permissions and verify blueprint
After you create a blueprint, click Permissions to set access for the blueprint. Provide Read permissions for the authors and review boards assigned to the items for the blueprint.
Permission levels for blueprints are as follows:
Read allows users to display or copy the blueprint
Update grants Read permissions to users and allows them to edit and verify the blueprint.
Admin provides the ability to assign or update permissions or to delete the blueprint.
Once you are ready to create Item Assignments for the blueprint, click Verify.
