Document Container Guide
The Document Container allows users to upload files and make those files available to some or all users on the site. This manual will guide you through how to upload files, how to store files in organized folders, how to create links to resources on the internet, and how to make changes to resources within the Document Container.
Add a Document Container Page
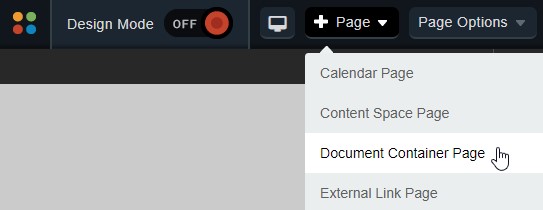
Go to Page on the Administrative Toolbar and click Document Container Page.
Enter a name in the Page Name field for your new page.
The Page URL field will automatically be filled in. The Page URL is used to build the Friendly URL used to access the page. If you wish to make modifications to the Page URL, click the Lock icon and then you can change the text. Keep in mind that only alphanumeric characters, underscores and dashes can be used. Any other characters will be automatically removed.
By default, you will be assigned as the Page Owner. If you wish to set someone else as the owner, click the Profile icon.
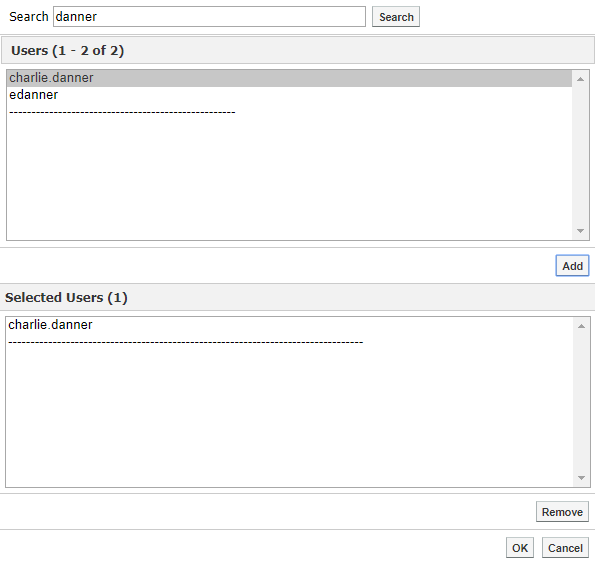
When the User Picker opens, choose the user you wish to make the owner, and click Add then click OK.
If you want to set the page as the user's homepage in their user profile, select Replace Page Owner's website with this page.
Note: On some sites, you may also have a Category drop-down that you can use to select a category for the page.
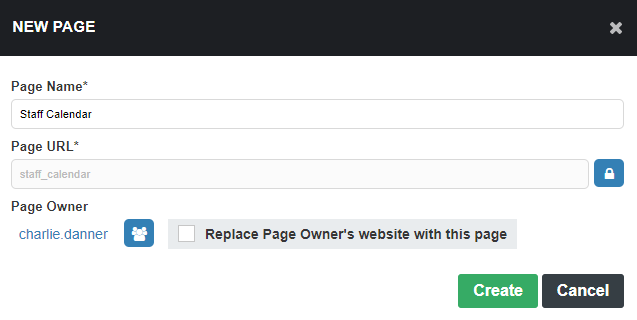
Click Create to create the Document Container page.
Add Files
To add files to your container, click + Add and then click File.

Once selected, an upload box will appear on the page. To add files to upload, click and drag the files you wish to upload into the upload box. You can drag files one at a time or select a group of files to drag in the box all at once. You can also drag and drop folders into the upload box.
In addition to dragging and dropping, you can also use Add Files to select files you wish to upload.

After you have selected all the files you wish to upload, click Start Upload.
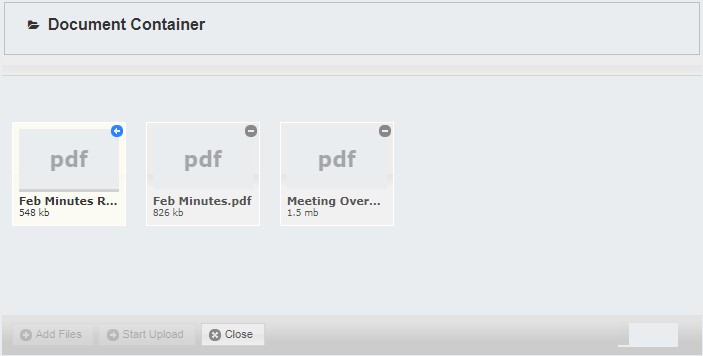
After the files have finished uploading, click Close.
Create Folders
To create a folder for your files, click Add and then click Folder.

Enter a Folder Name to be displayed within the document container.
You can also provide an optional Description of the folder.
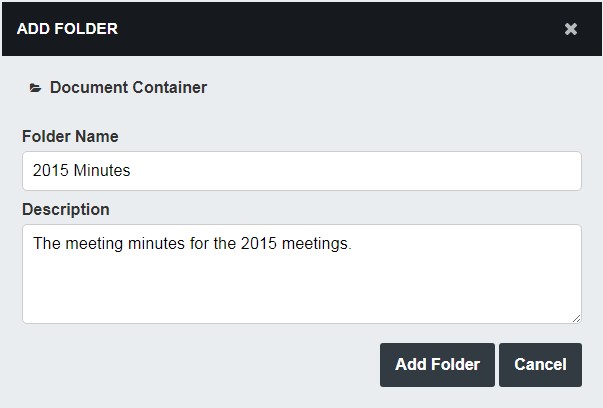
Click Add Folder to create the folder.
Create Links
To create a hyperlink, click Add and then click Link.

Give your link a Link Name to be displayed in the document container.
Type in the full URL that you wish to link to in the URL field.
If you wish, you can provide an optional Description to let others know more about the link.
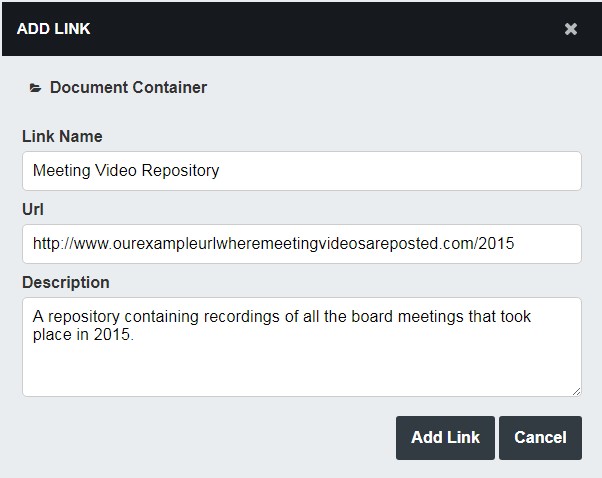
Click Add Link to create the link.
Search for a Resource
In addition to browsing through the document container, you can search for a specific resource you wish to find.
To search for a file, begin typing in the name of a file in the Search box. As you type, only the files that match what you have typed will appear. The search will look for matching files, folders and links within the current folder as well as any sub-folders. This means that if you search from the top-level of the container, the entire container will be searched.
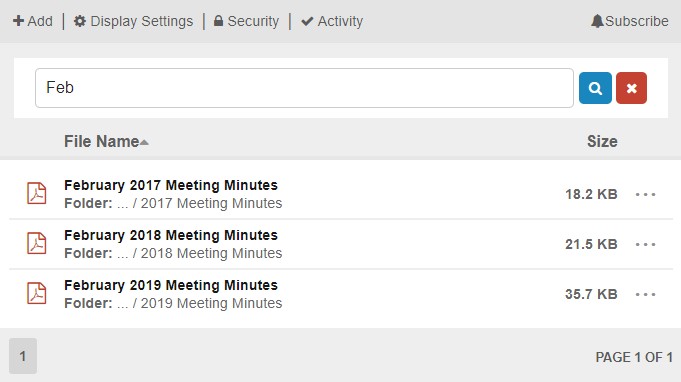
Typing a full or partial name of a file in the Search box and click the Search icon to run your search.
Note: When you search a container, the search will normally only look at the name of the resource. However if you have the display settings set to include usernames, you can also search for files that have been uploaded by a particular user.
Sort Resources
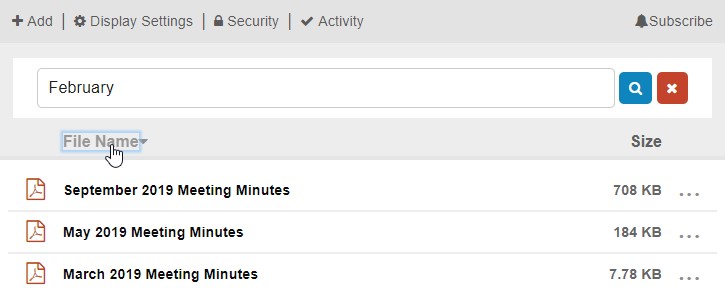
Users have the ability to sort resources by File Name, User, Size and Date Modified.
Note: By default, only File Name and Size are available to a container. However, you can use Display Settings to add the User and Modified fields. Users are not able to sort by fields that are not visible. For more information on configuring which fields appear, please see the Configuring Document Container Fields section.
To sort the contents of the container by a property, click on File Name, Size, User or Modified. This will sort the container by the given item in ascending order. Clicking the item again will sort the contents in descending order.
Manage a Resource
When you click on a file or link within the document container, you will see a number of options available to you. As a guest, you can copy a link, subscribe for updates and download the actual files. These options are also available to a user with full control over the resource, but those users have additional options, including editing, moving, and deleting resources, viewing activity and editing file security.
To access these options for a file or link, click on the name of the object. To access these options for a folder, click the More icon to the right of the folder.

Copy a Link
To copy a link to a file, folder, or link, click on the resource and then click Copy Link.

This will copy the link to your clipboard so you can paste it elsewhere.
Edit a Resource
You may wish to change the Name or the Description of your resource. To do so, click on the resource and then click Edit.
You will be taken to the edit window, where you can make changes to the name and description of your resource. In the case of a link, you will also be able to update the URL field.
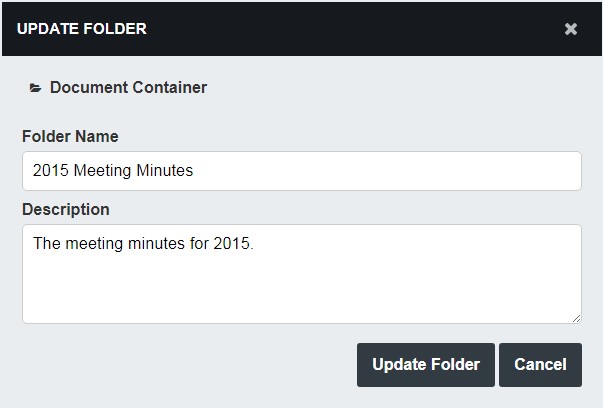
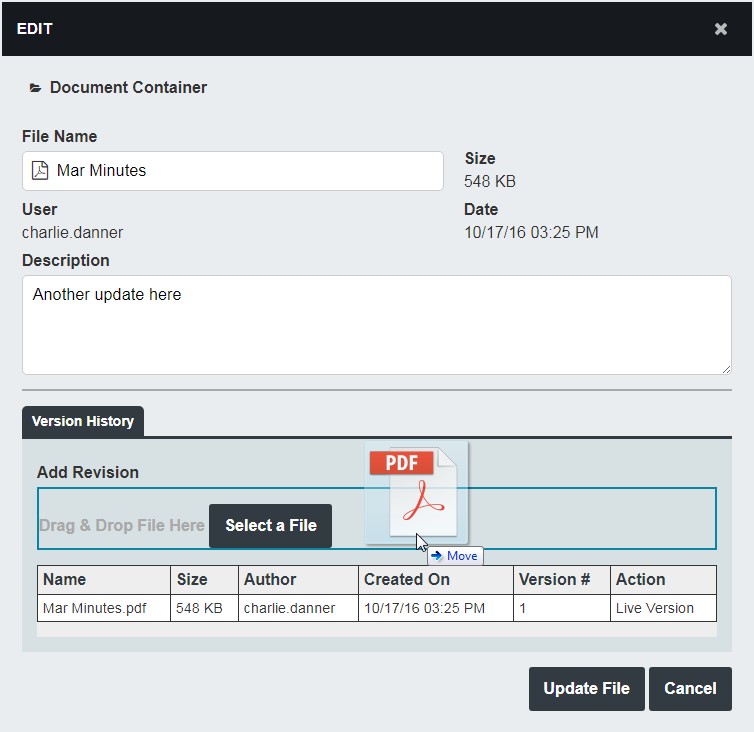
When editing a file, you will also be able to see the version history of the file.
If you have an updated version of the file that you wish to share, you can use the Add Revision interface to add your new version of the file. Either click Select a File or drag and drop your file into the Drag & Drop File Here box to upload the new version of the file.
Once you have uploaded the new version of the file, you can see it is now the Live Version. This means that when users download the file from the container, this is the version of the file they will be downloading.
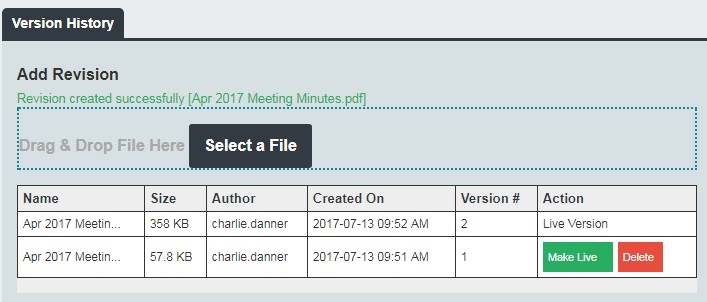
If you wish to make another version of the file active, click Make Live next to the desired version. You can also click Delete next to any non-live version of the file to permanently remove that version.
When you have finished your changes, click the Update button.
Move a File or Folder
If you are wishing to move just a single file, folder or link, you can also click the More icon to the right of the resource and then click the Move To… option.

If you are within a sub-folder and you wish to move the resource to a higher level within the container, use the breadcrumb to choose the level above your desired destination. For example, in the screenshot below, if you wanted to move the file to the main Document Container level, you would click Top Level and then click Select to the right of Document Container.
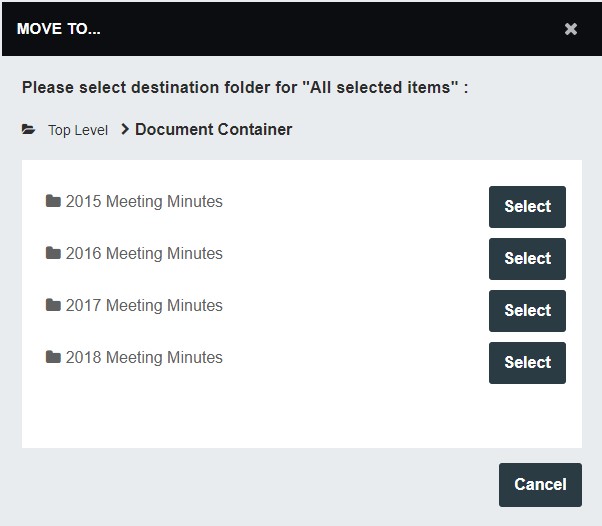
Once you are at the desired level, click Select to the right of your destination folder.
You can also move a resource into a folder by dragging and dropping the resource into the desired folder on the page.

Delete a Resource
If you wish to remove a resource from your container, click on the resource and click Delete.
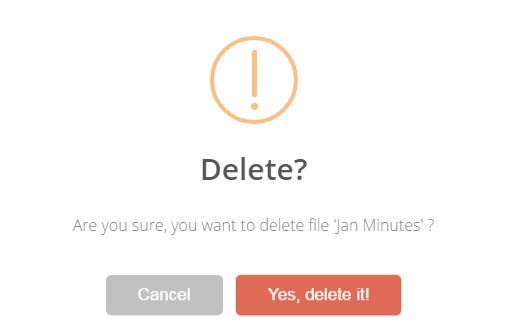
Confirm your decision by clicking Yes, delete it! in the confirmation window. Once deleted, the items are permanently removed, so only delete files you are sure you will no longer need.
Download a File
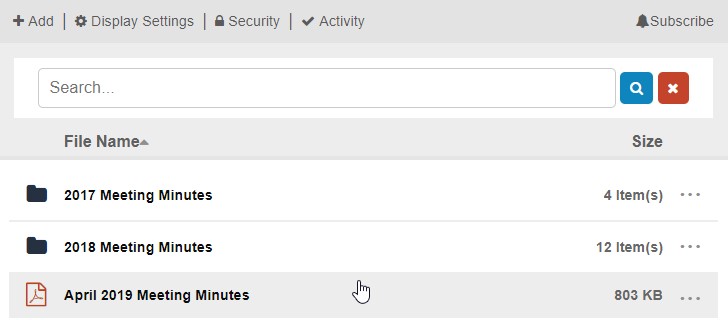
If you wish to download a file, click on the name of the file. Alternatively, you can download the file by clicking the More icon to the right of the file's name and then clicking Download.
Subscribe to a Document Container
If you want to be notified of any files, folders or links being added or updated on a container, you can use the Subscribe button on the top right of the container.

If you wish to be notified when changes are made only for a specific file, folder or link you can click on the resource and then choose Subscribe.

If you are signed in, you will be able to choose if the alert is for My alert online (accessible at /alerts) or Email Alerts.
Fill out the desired Title and Email Address for your alert.
Use the Email Type drop-down, choose if you want the emails sent with HTML or Text formatting.
Use the Frequency drop-down to choose if you wish to receive immediate alerts about any update or if you would like to get daily or weekly summaries of any updates.
If you are not signed in, you will also need to check the I’m not a robot option for the reCAPTCHA.
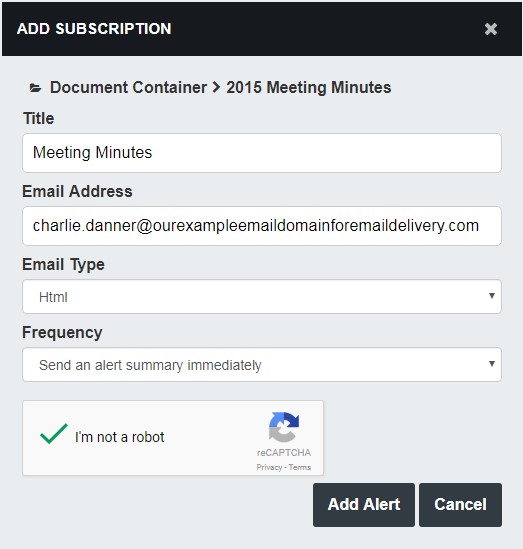
Click Add Alert to confirm your alert settings.
View Resource Activity
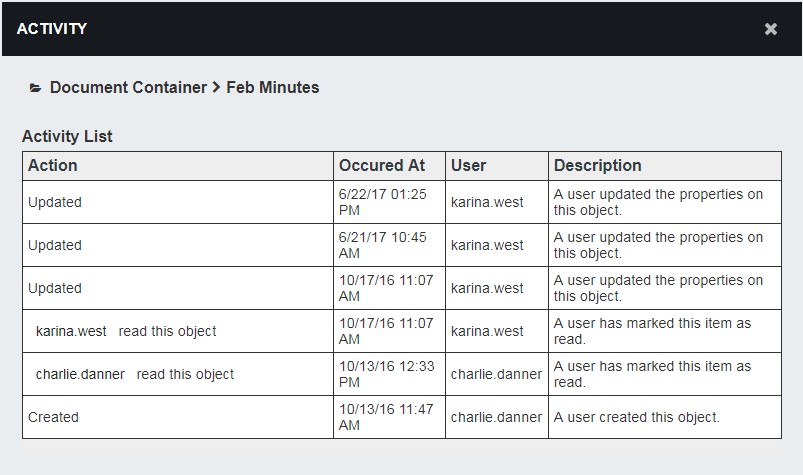
To view activity from signed-in users on a resource, click on the resource and then click on Activity.
Set Security on a Resource
To change the security settings on a resource, click on the resource and then click Security.
From the Direct Permissions tab, you can see users that have been assigned permissions to the file. To add permissions for additional users, click Add.

In the user picker window that appears, search for the users or groups that you wish to use. Click the user(s) or group(s) you wish to select and click Add.
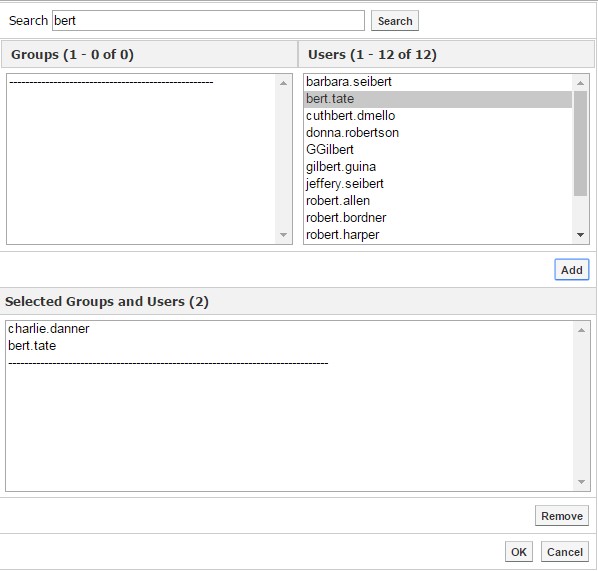
Once you have added all desired users and groups, click OK.
To change the permission for a user or group under Direct Permissions click the + to the left of their name and specify the permissions you wish to apply.
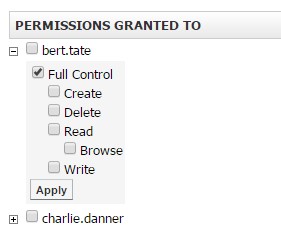
Once you have selected all the options you wish to grant, click Apply.
If you wish to limit access to the resource so that only users and groups listed in the Direct Permissions can access the file (as well as users in the Administrators group on your site), under Inherit Permissions uncheck the option to Allow inheritable permissions from parent to propagate to this object and click Apply.

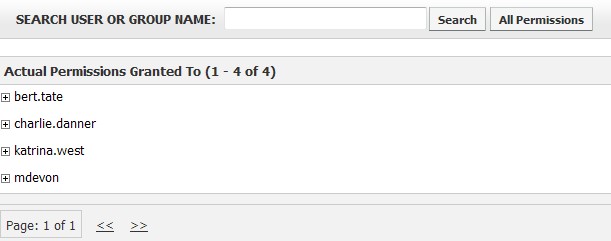
To view all permissions that are being applied to a resource, click on the Actual Permissions tab. Here you will see a list of all users on the site that have been granted permission to access your file, including those that may have inherited the permission because they have been granted access at the page or site level (for cases where you have not unchecked the option to inherit permissions.
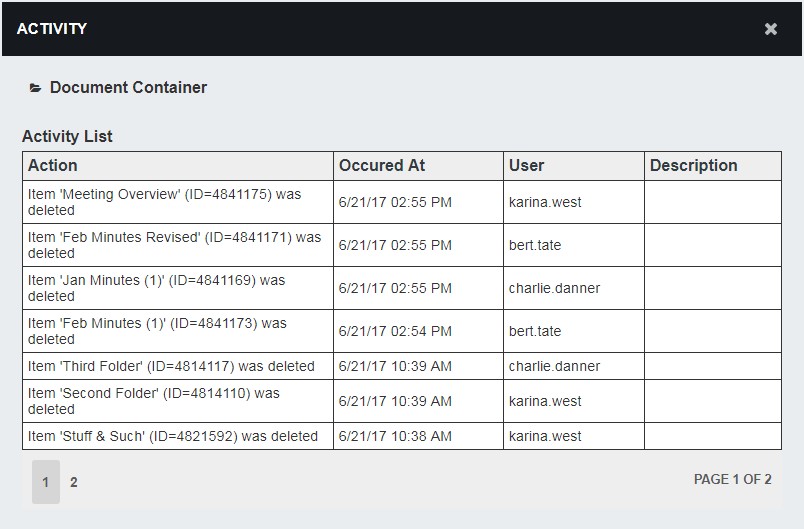
View Container Activity
To view activity from signed-in users on a container, click on Activity.
Set Security on a Container
To change the security settings on a resource, click on the resource and then click Security.
From the Direct Permissions tab, you can see users that have been assigned permissions to the file. To add permissions for additional users, click Add.
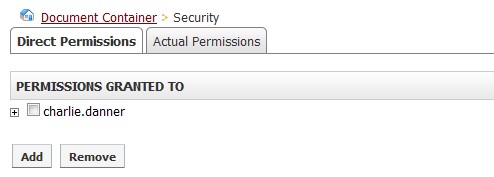
In the user picker window that appears, search for the users or groups that you wish to use. Click the user(s) or group(s) you wish to select and click Add.
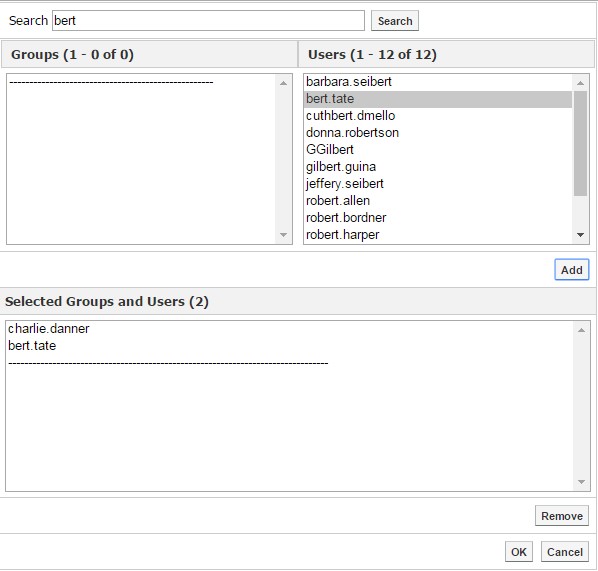
Once you have added all desired users and groups, click OK.
To change the permission for a user or group under Direct Permissions click the + to the left of their name and specify the permissions you wish to apply.
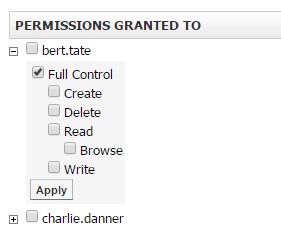
Once you have selected all the options you wish to grant, click Apply.
If you wish to limit access to the container so that only users and groups listed in the Direct Permissions can access the file (as well as users in the Administrators group on your site), under Inherit Permissions uncheck the option to Allow inheritable permissions from parent to propagate to this object and click Apply.

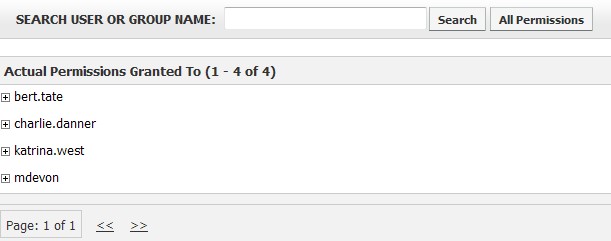
To view all permissions that are being applied to a resource, click on the Actual Permissions tab. Here you will see a list of all users on the site that have been granted permission to access your file, including those that may have inherited the permission because they have been granted access at the page or site level (for cases where you have not unchecked the option to inherit permissions.
Configure Document Container Fields
Administrators have the ability to determine how the Document Container is rendered throughout the site. They can also allow many of these settings to be configured on a per-container basis.
Configure Display Settings on a Container
If the administrators have enabled the appropriate setting, users with full control on a container will see an option called Display Settings. By clicking on this option, they can control which fields are displayed in the container as well as the default sort option that will be used when viewing the container.
To access these settings from the container, click Display Settings. If you do not see this option, you can speak with your administrators about the possibility of enabling this option.
When clicking Display Settings you will see the following options.
Data Columns: You can use these checkboxes to hide one or more fields within the document container.
Sort by column: Set the sorting default of the items in the document container.
Sort by order: Choose if items should be sorted by ascending or descending order by default.
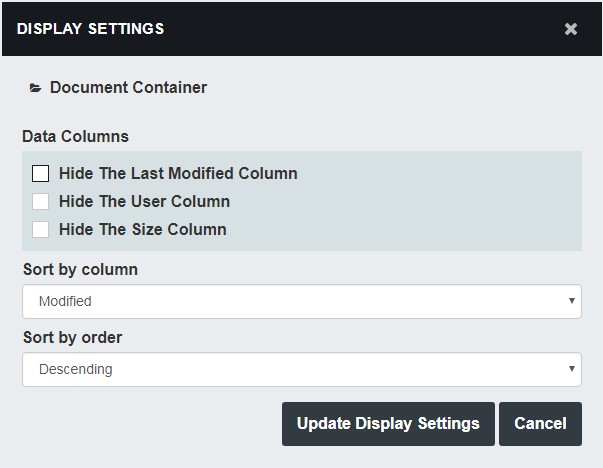
To save your changes, click Update Display Settings.
Configure Default Display Settings for All Containers
If you are an administrator, you have the ability to configure the display settings for all containers on the site. You can also add the Display Settings option to containers so that users with full control on the containers can choose how to display their container contents.
To access the document containers settings, click Collaboration Server Settings under Collaboration Server Administration on the System Administration page. Choose the Content Manager tab.
The customizable settings include:
Data Columns: Allows administrators to determine which document container fields to display for visitors of the site. You can use these options to hide one or more fields within the document containers.
Default Sort: Set the sorting default of the items in the document container.
Maximum File Upload: Administrators can set the maximum file upload size for users. You cannot increase the file size to a value higher than the default maximum. Additional Settings:
Show above settings on each container: This option will add a new tab called Display Settings to each document container on the site. You will then be able to use that tab to configure the Data Columns, Default Sort and Maximum File Upload on individual document containers on the site.
Disable the File Details Page: Instead of viewing the File Details when you click on a file in a document container, you will be able to download the file directly if this option is checked. This allows users to download files with one fewer click.
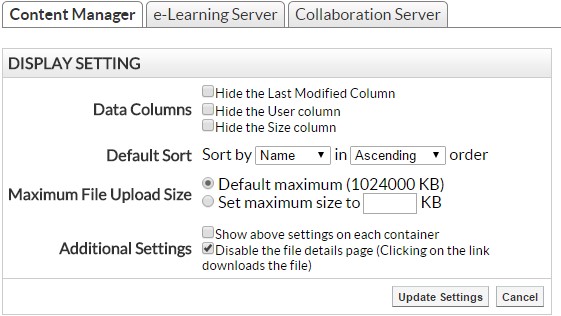
Click Update Settings when ready to save your changes.
