Adding Attachments to Your Materials
The Attachments toolbar is on the bottom of the Description field when you create or edit materials in Courses, Groups, or Resources.
Use the toolbar to attach different types of files to your item:
- Files
- Links
- Resources
- Audio/Video Recording
- External Tools
Attaching Files
While there is no limit to the number of files you can attach to materials in Schoology, you must upload each file individually. Schoology has a size limit of 512 MB per file.
Supported file types | |
Images | *.jpg, *.gif, *.png, *.jpeg |
Media (audio and/or video) | *.flv, *.mp4, *.mp3, *.mov, *.m4v, *.m4a, |
Files | *.doc *.docx, *.pdf, *.ppt, *.xls |
Drag and Drop File Upload: You can attach files directly to your materials using the drag and drop function. Drag a file from your computer or local network and drop it anywhere on the toolbar to add it as an attachment:
You can also click the File icon in the Attachments toolbar to browse your computer or local network for files.
To delete a file:
- Click x to the far right of the attachment from the Edit window.
- Click Save Changes to complete.
-or-
- From the assignment's main page, hover the cursor to the far right of the attachment and click x.
- Click Delete to complete.
Attaching Links
Click the Link icon to enter a URL or link to another Course Material.
To link to another Course Material:
Select Course Material from the Link to section.
Use the search bar to search for specific Course Material, or click on a folder to access its contents.
Select a course material, then click Select.
Optional: Select to have the link open in a new tab.
Enter a title for your material in the Text to Display field.
Click Insert.
Attaching Resources
Click the Resource icon to attach a Link or File saved to your Schoology Personal or Group Resources, or to attach a file from your Schoology Resource Apps.
Only files or links can be attached to assignments. Other items in your resources such as pages, folders, or assessments cannot be attached to assignments.
Attaching an Audio/Video Recording
Instructors in Enterprise accounts may record an audio or video file to attach to their materials.
Please ensure you have the latest version of your browser installed as well as the updated versions of our System Requirements.
To record an audio or video file:
- Click the microphone icon in the rich text editor window.
- Click:
- Audio Only to record an audio file.
- Audio & Video to record a video file. You must have a webcam or camera on your device to record a video file.
- When using the recorder for the first time, the browser will display a prompt to allow the microphone or camera. Click Allow to continue using the recorder.
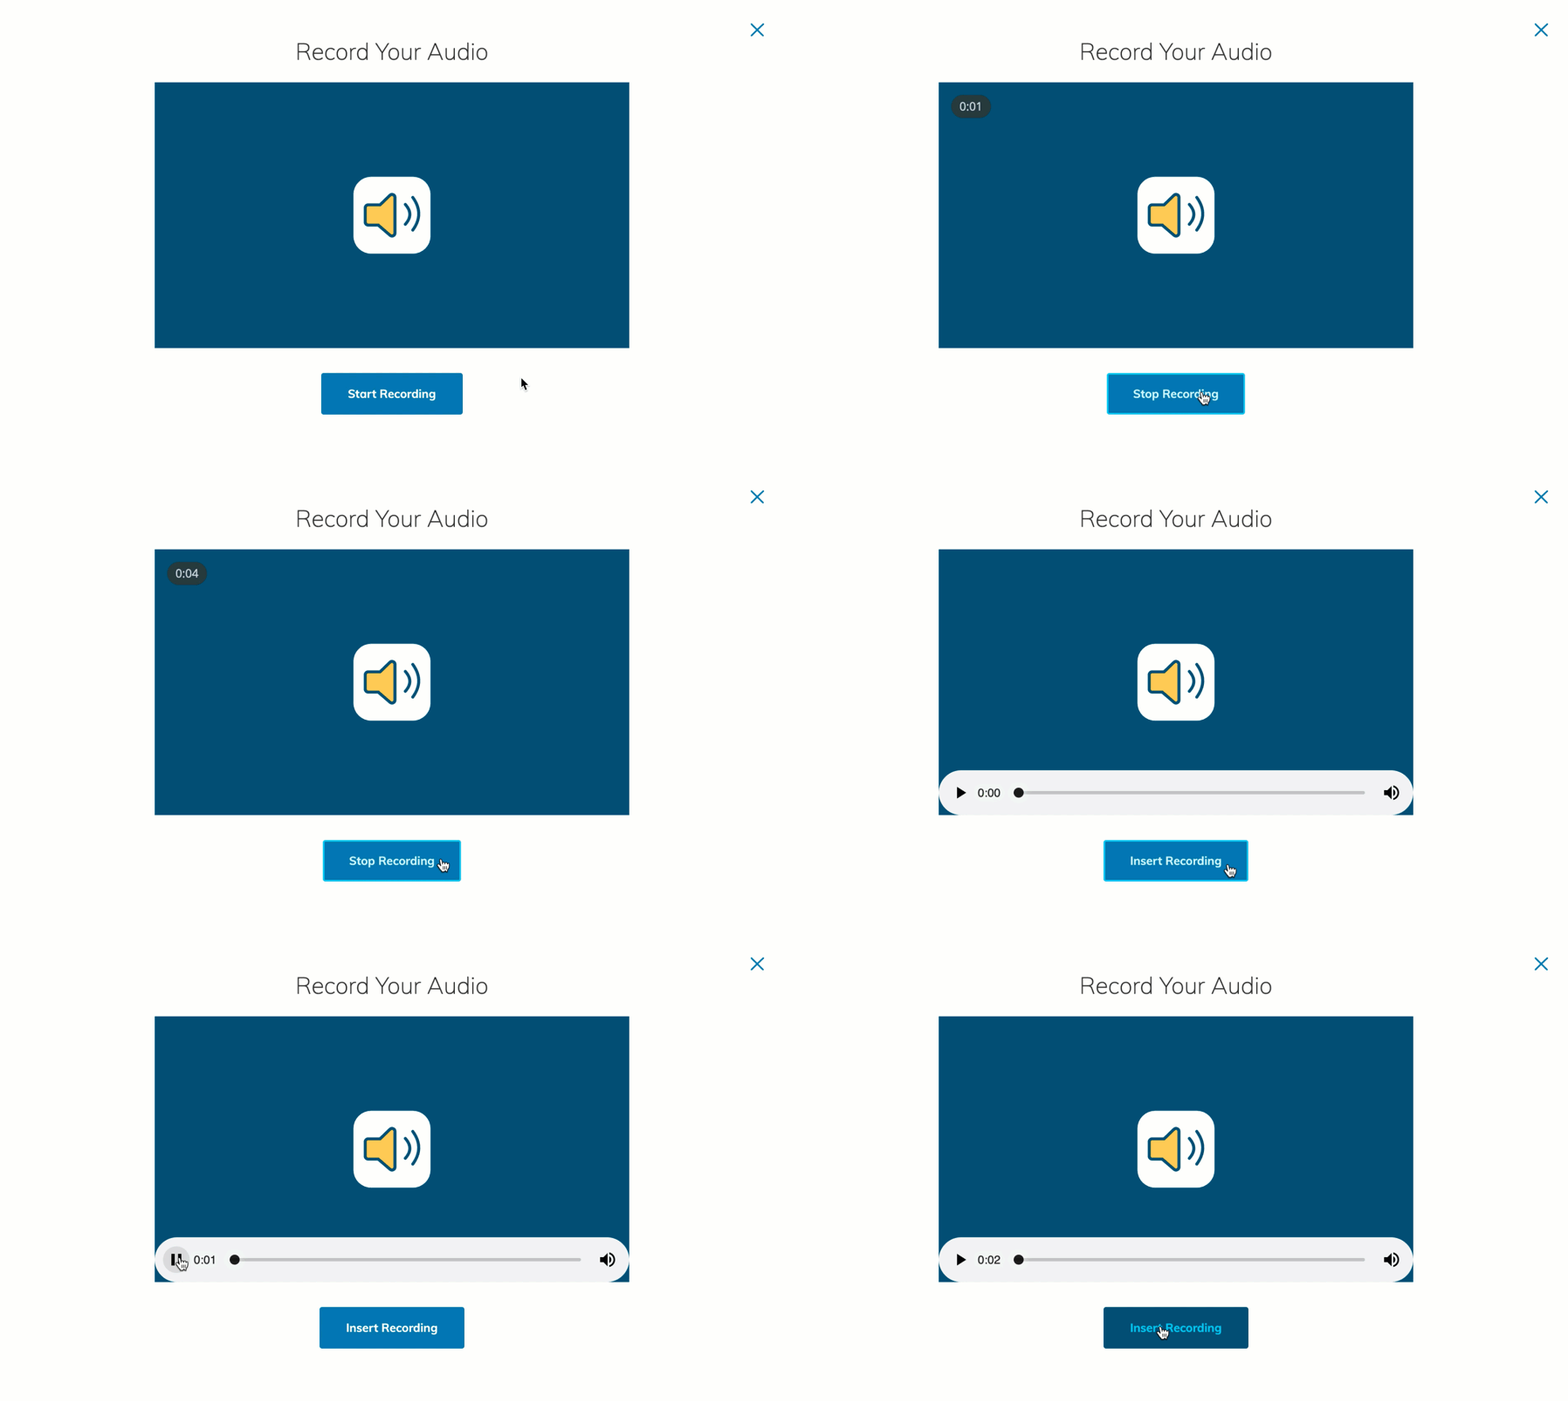
Click Start Recording to begin your recording:

The audio recorder does not begin until you click Record, and it detects sounds. It may take significant noise - for example, clapping your hands, or tapping the microphone, for the recording to detect the 'start' sound and begin recording.
- Click Stop Recording to end your recording.
- To preview your recording before attaching it to the material, click the play button after the recording has ended.
Click Insert Recording to attach your recording to the update.
- The recorder uploads the file during recording so there is less processing time when the video or audio recording has been completed.
- When the file is attached, it will be converted into a readable format. Please allow time for the conversion to complete.
Attaching an External Tool
Click the Ruler icon to attach an external tool to your Materials.
