Course and Group Profile Photos
All courses and groups have a default image as the profile picture. As a Course or Group Admin, you can leave this default image, choose from a set of available images, or upload an image to serve as the profile photo for your course or group.
Customizing the profile images for your courses and groups can help users quickly identify your course or group when displaying the image tiles within the Course Dashboard, as well as the Courses and Groups drop-down menus.
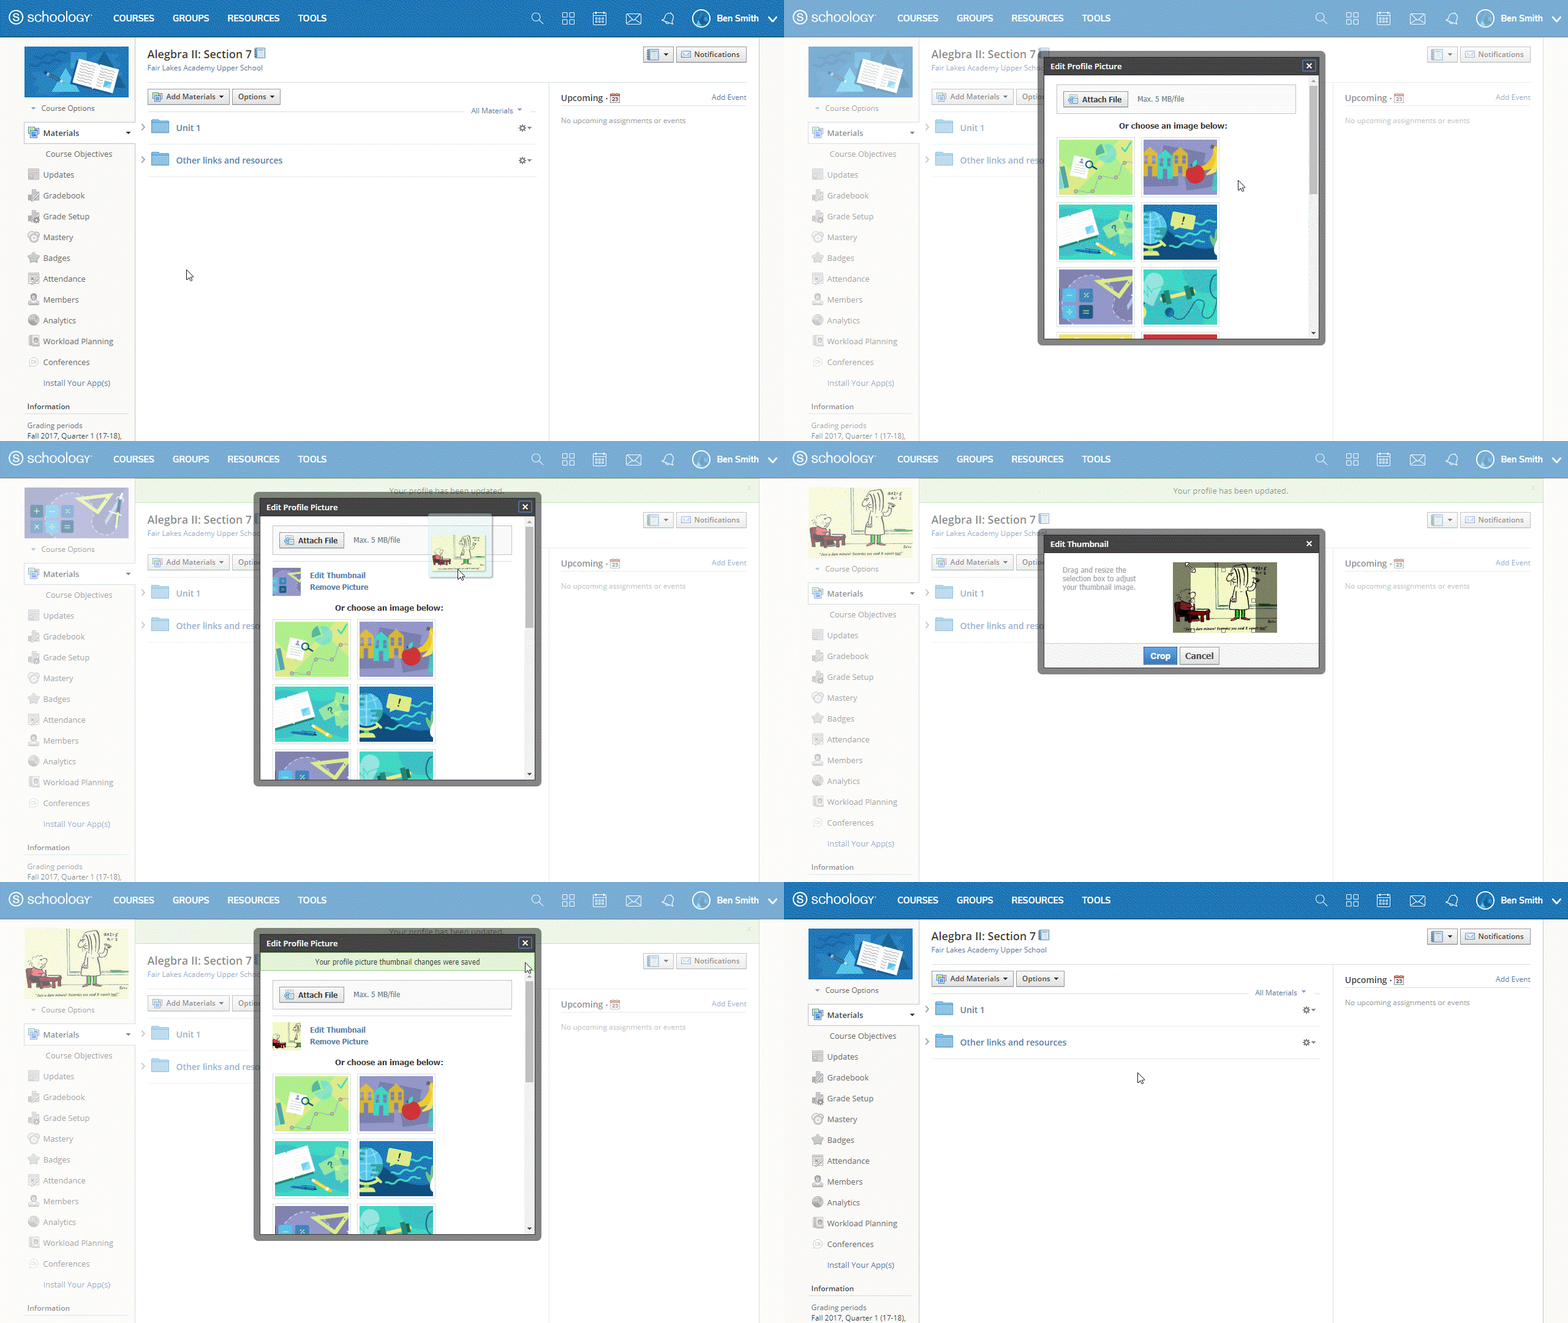
Setting a Profile Photo in a Course or Group
- Navigate to the desired course or group profile.
- Move the pointer over the image and click Edit Picture.
- Select one of the preset images or click Attach File to select and upload an image from your device.
- Optional: Click Edit Thumbnail to drag and resize the thumbnail version of the image. This is not the same thumbnail that displays in the Courses or Groups drop-down menu.
- Once the picture has successfully been updated, a banner will display on the course:

Remove a profile photo
- Navigate to the desired course or group profile.
- Move the pointer over the image and click Edit Picture.
- Click Remove Picture.
- The profile image reverts back to the original default image.
Ideal Photo Sizes for Courses and Groups
The tile images in the Courses and Groups drop-down menus will resize with your screen. These menus were built to be responsive, so there is not a hard-and-fast specification.
If you have specific content that you would like to remain visible in the drop-down menus, the best option is to create an image that is square with the desired content centered vertically and horizontally. For example, if you have a 350 x 350 pixel square image and place the content in the center (350 px by 100 px) of the image, the content should remain visible from the drop-down menu.
