Create assessments in your Schoology course to measure students’ understanding of the material or gauge their readiness for class. Assessments are automatically graded unless they include subjective questions, such as short-answer or essay items. This gives you quick, actionable feedback to help shape your upcoming lessons.
You can also override grades, rescore submissions, use rubrics, and adjust a variety of settings to fit your assessment needs.
Assessments must be created, edited, and graded in the web version of Schoology. Students can complete and submit assessments from mobile devices.
Create an assessment
-
Navigate to a course.
-
Select Add Materials and choose Add Assessment.
-
From Create Assessment, fill out the form.
-
Enter an assessment Name.
-
Select a Due Date to place the assessment in the Course Calendar and Upcoming area.
-
Choose when students have access to the assessment. Disable is the default option. If students can open it and the Start New Attempt button is unavailable, check if you need to switch this setting to one of the Enable options. Enabling Submissions is a separate process from the publishing feature in the Options row.
-
Set a Password that students must enter to begin the test.
-
Set the number of points the assessment is worth in the course gradebook.
-
Select a Grading category.
-
Select a Grading period.
-
Set the assessment as a midterm or final.
-
Set a Factor.
-
Check Collected to remove the ability to add a traditional score for the assessment to the gradebook.
-
Select a Grading scale.
-
Choose advanced options. Refer to Advanced option details for more information.
-
-
Click Create to complete.
You can also create an assessment within a course folder or add it to a folder after creating it.
If the total points set for the assessment do not match the combined points of all questions, question point values are automatically adjusted for students during the assessment attempt.
Advanced option details
|
Option |
Description |
|---|---|
|
Individually Assign |
Make the assessment available to specific course members or grading groups. |
|
Published to Students |
Show or hide the assessment from students. Assessments are published by default and are immediately available to students. |
|
Grade Statistics Disabled |
Allow students to access their grade statistics, including max points, highest grade, lowest grade, average, standard deviation, median, and mode. |
|
Count in Grade Enabled |
Include the assessment in final grade calculations. If Count in Grade is disabled and the assessment is synced to PowerSchool SIS, the same setting is disabled in the PowerTeacher Pro gradebook. Other SIS integrations do not honor this setting during sync. |
|
Copy to Courses |
Create a copy of the assessment in another course. |
Manage an assessment
After creating the assessment, click the gear icon from the course Materials page or click Actions and select an option.
|
Option |
Description |
|---|---|
|
Edit |
Update the assessment settings, including grading options. |
|
Publish/Unpublish |
Assessments are published by default. Select Unpublish to hide an assessment from students or Publish to make it available. |
|
Move |
Move the assessment to a different course. |
|
Copy to Course |
Create a copy of the assessment in a different course. |
|
Delete |
Delete the assessment. |
|
Save to Resources |
Save the assessment to your Personal or Group Resources area. |
Assessment setup
Use the Setup area to add assessment details and manage settings. Click Save to apply your changes.
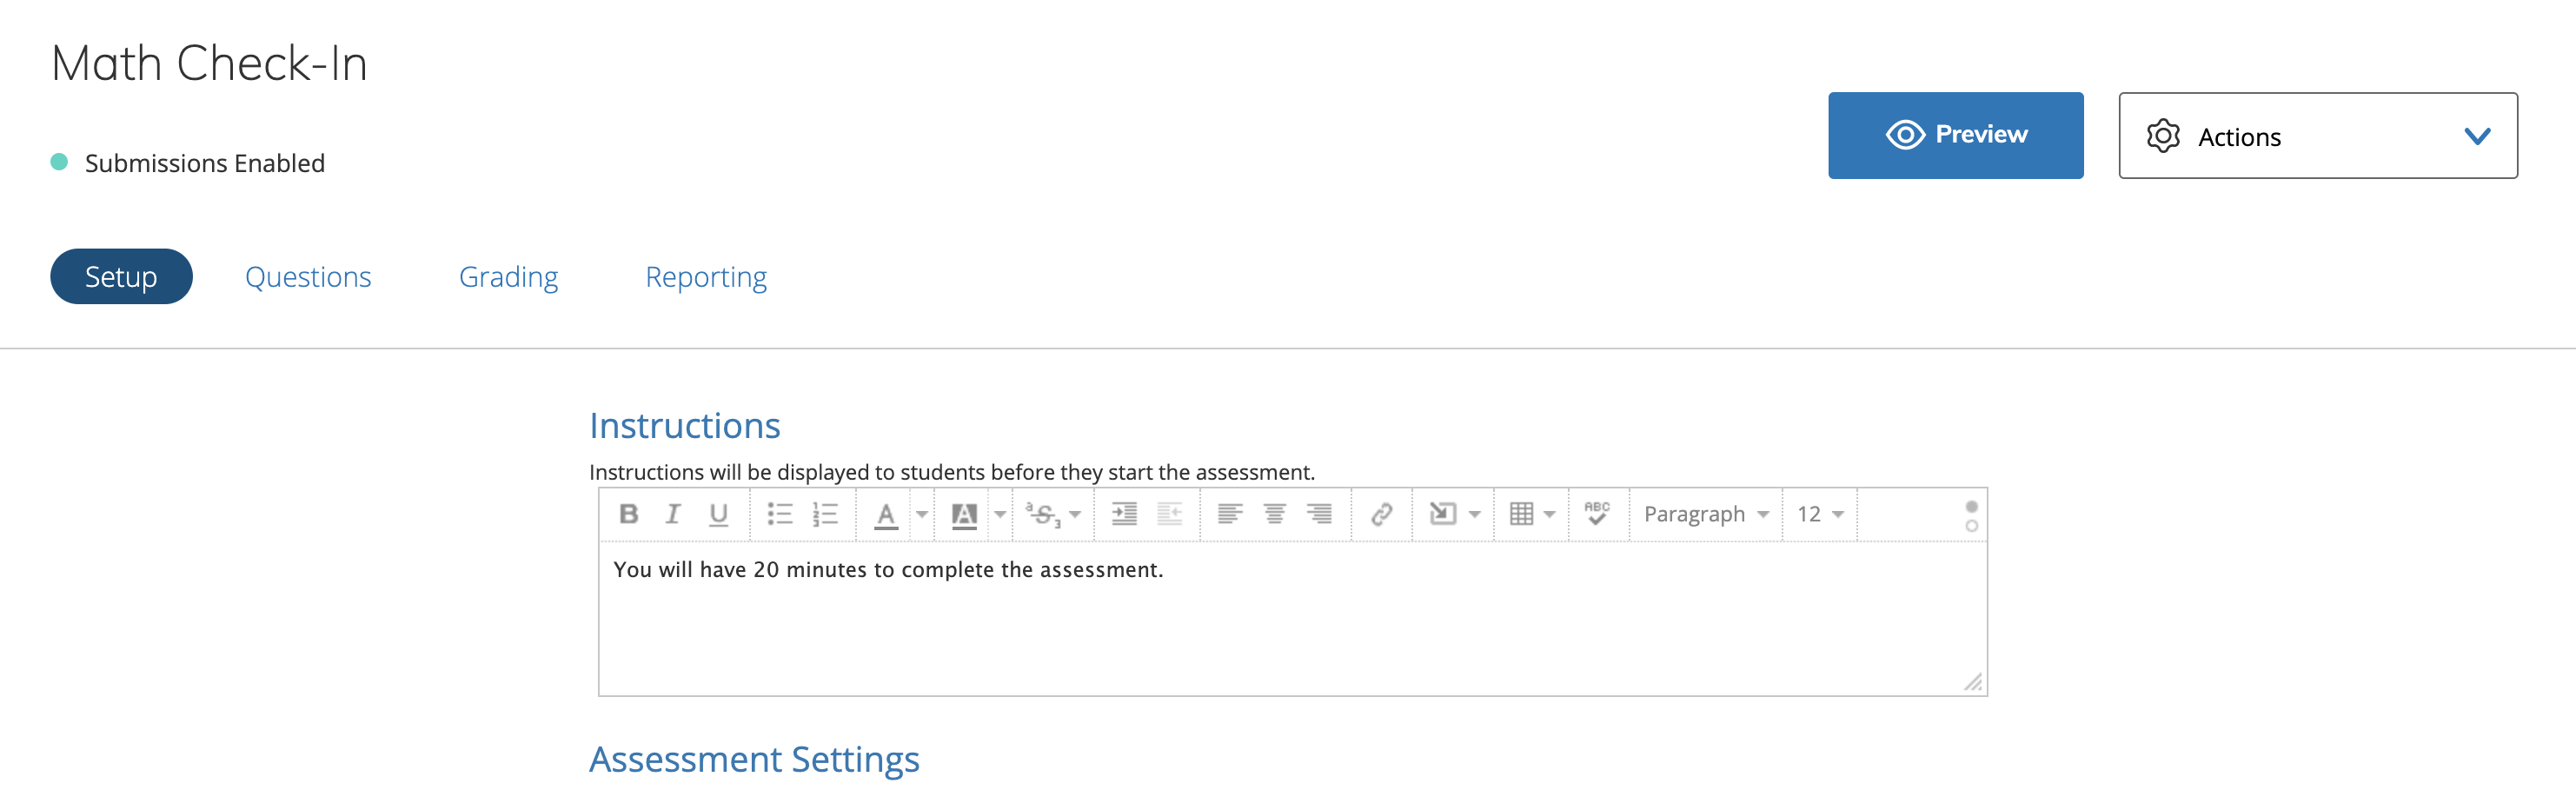
Instructions
Enter instructions that display to students before they start the assessment. Use the rich text editor to format the instructions and add additional components such as tables, images, LaTex symbols, and other options.
Assessment settings details
|
Assessment setting |
Description |
|---|---|
|
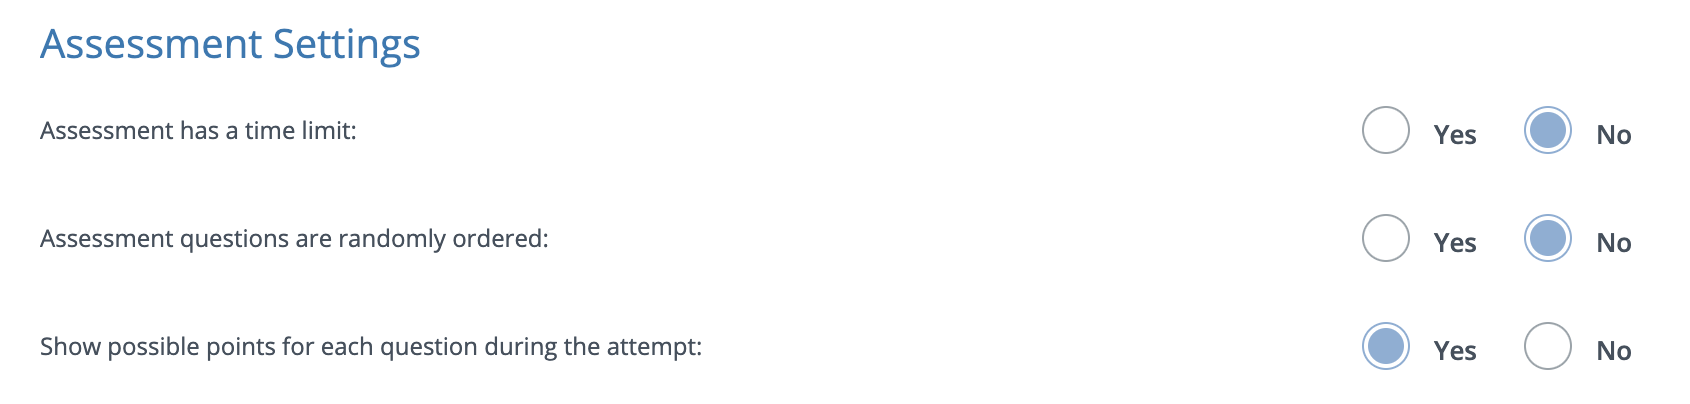
Assessment has a time limit |
Set a time limit for the assessment. If a student does not finish before the time expires, the assessment is automatically submitted with the answers completed. |
|
Assessment questions are randomly ordered |
Display questions in a different, randomly selected order for each student. |
|
Show possible points for each question during the attempt |
Show or hide each question’s point value while students are taking the assessment. |
Changes to Assessment Settings apply to all future attempts and any attempts currently in progress. Changes do not affect attempts that have already been submitted.
If your organization uses Respondus LockDown Browser, you can require students to take an assessment using LockDown Browser.
Assessment toolbar details
|
Assessment toolbar |
Description |
|---|---|
|
Students can flag questions for review |
Allow students to mark questions they want to revisit during the assessment. |
|
Students can eliminate answer choices |
Let students cross out answer options to help narrow down the correct answer |
|
Students can use a calculator during attempt |
Provide a built-in basic or scientific calculator during the assessment. |
|
Students can use a ruler during attempt |
Provide a built-in ruler (6 inches or 15 centimeters) during the assessment. |
|
Students can use a protractor during attempt |
Provide a built-in protractor during the assessment. |
|
Students can use text to speech toolbar with screen masking during attempt |
Allow students to use Text to Speech and Line Reader/Screen Masking tools. This option is available only if your organization uses AMP. |
|
Students can highlight text |
Allow students to select and highlight text in multiple colors. |
|
Students can use a notepad |
Allow students to use a notepad to take notes during the assessment. |
To enable a calculator, ruler, or protractor for a specific question, rather than the entire assessment, refer to Question-level assessment tools.
Student settings details
|
Student setting |
Description |
|---|---|
|
Allow students to view results after an attempt is submitted
|
Controls whether students can review their assessment after submission.
|
|
Number of attempts a student can submit |
Set how many times students are allowed to attempt the assessment. |
|
Final grade is determined by |
If multiple attempts are allowed, choose whether the gradebook records the highest or most recent score. |
You can make changes to these settings at any time, and they will apply to past, in progress, and future assessment attempts.
For example, if you want to prevent students from reviewing correct answers until all assessment sections have been completed, set Allow students to view results after an attempt is submitted to No while students are taking the assessment. After all submissions are complete and grading is finished, change the setting to Yes with correct answers. Students can then review their results with the correct answers.
Assessment questions
Use the Questions area to add questions to the assessment and manage question settings.
Each assessment can include up to 200 questions.
If you use a grading rubric, set it to Show to students. This allows students to review the rubric with their submission after they begin the assessment, since each attempt uses a specific version of the assessment.
Create a question
-
From Create Item, select a question type.
Refer to the Assessment question type article for detailed information about each question type. -
Enter the Question Setup and Correct Answer Setup details.
-
Optionally, enter Author Notes to explain scoring decisions or why certain answer choices are incorrect. This information will not display to students.
-
Optionally, add a Learning Objective to the question.
-
Click Save.
Add questions from an item bank to an assessment
After you create an item bank in Schoology, you can use it to build assessments. You can add individual questions or create a randomized block from one or more item banks.
Questions added from item banks are copied, not linked. Changes made to items in a bank do not update questions already added to an assessment.
-
From your course, create an assessment or open an existing assessment.
-
Select Questions.
-
Choose Add From Item Bank.
-
Navigate to the item bank you want to use.
-
Select each item to import. Alternatively, choose Select all to add all items.
-
Enter the Set Points for each item. If none is set, it defaults to 1.
-
Selected items are highlighted for easy reference.
-
Use the links to explore multiple item banks and select items from several banks.
-
-
Click Add Items.
-
Optionally, drag and drop any item to reorder it.
Add a random selection of items from one or more item banks to an assessment
You can add a random selection of items from one or more item banks so that each student receives a unique set of questions.
-
In your course, create a new assessment or open an existing assessment.
-
Select Questions.
-
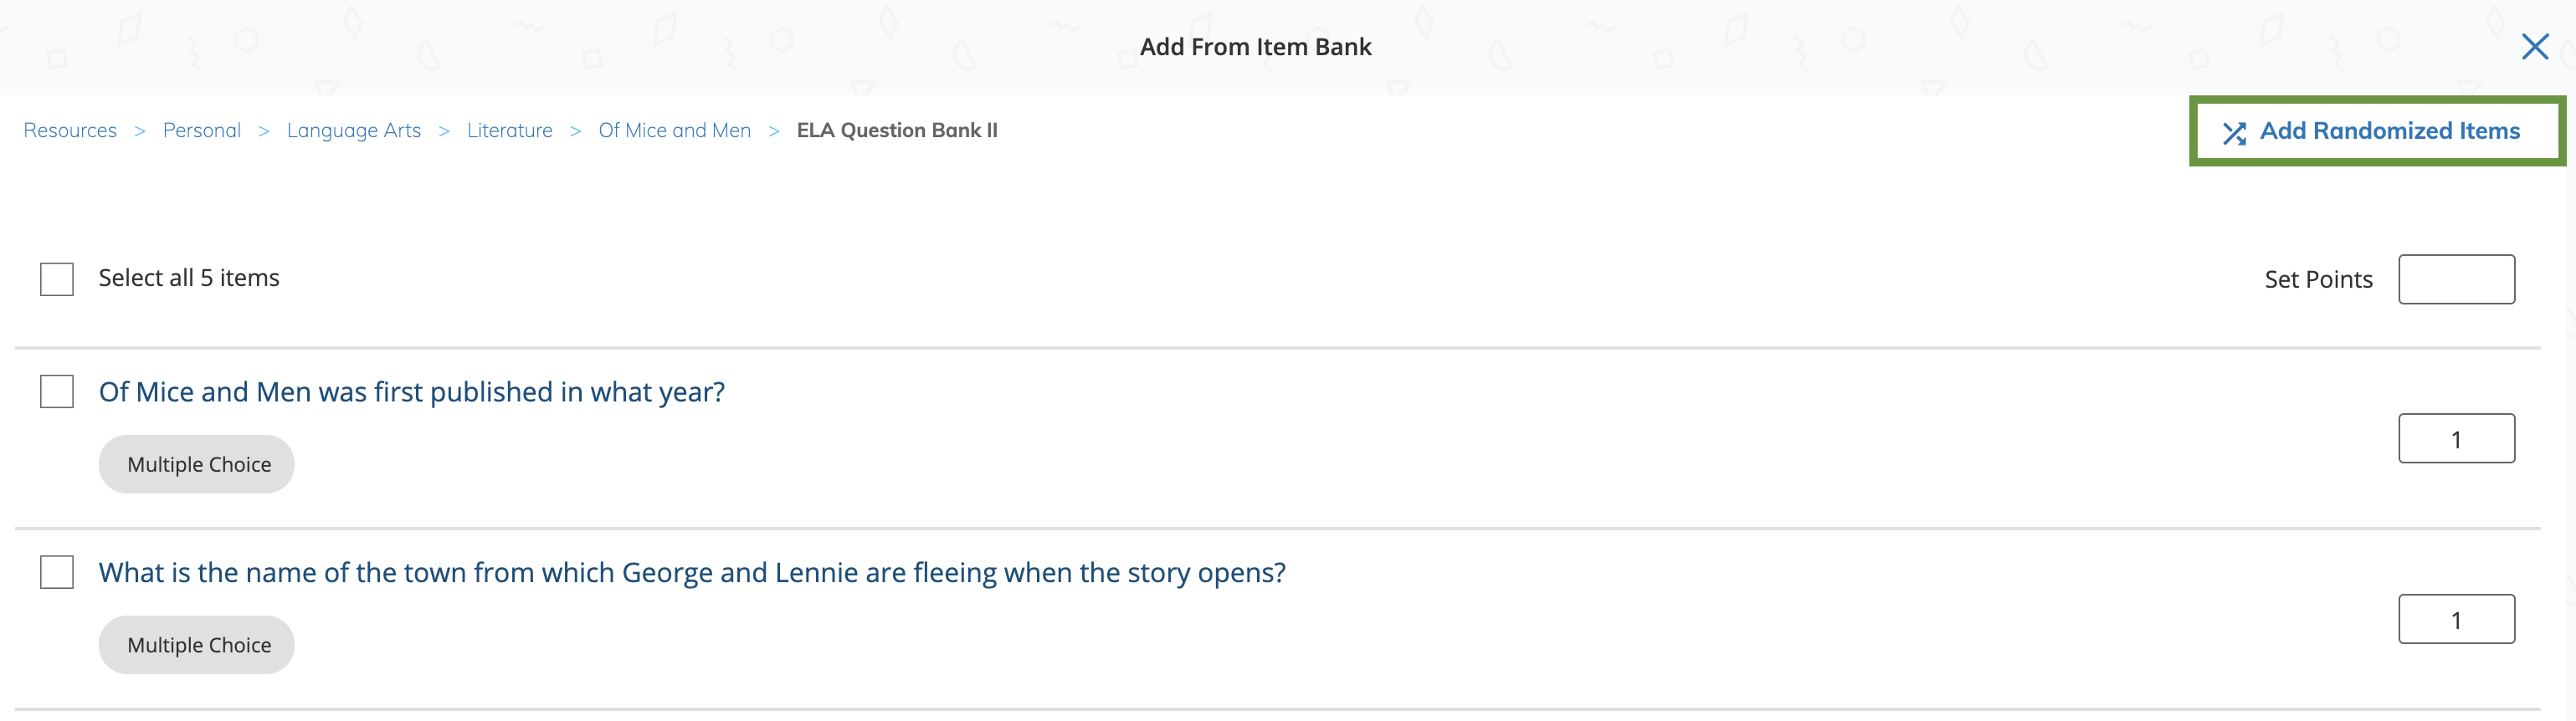
Choose Add From Item Bank.
-
Navigate to the item bank you want to use.
-
Click Add Randomized Items.
-
From Add Randomized Items, enter:
-
The number of items to generate from the bank.
-
The point value for each item.
-
-
Click Add Items.
-
After adding randomized items, you cannot add individual questions in the same selection sequence. To add individual items, complete the randomized selection first, then follow the steps to add individual questions.
-
You can include both randomized items and individual items from the same item bank. Individually added items are excluded from the randomized set.
-
Selected items are highlighted for ease of reference. Use the navigation links to select items from multiple banks.
-
-
Click Add Items to complete. Each set of randomized items is displayed as a single block in the Questions area.
Each student receives a unique set of items, displayed in random order, so no two assessments are identical—even if some items overlap.
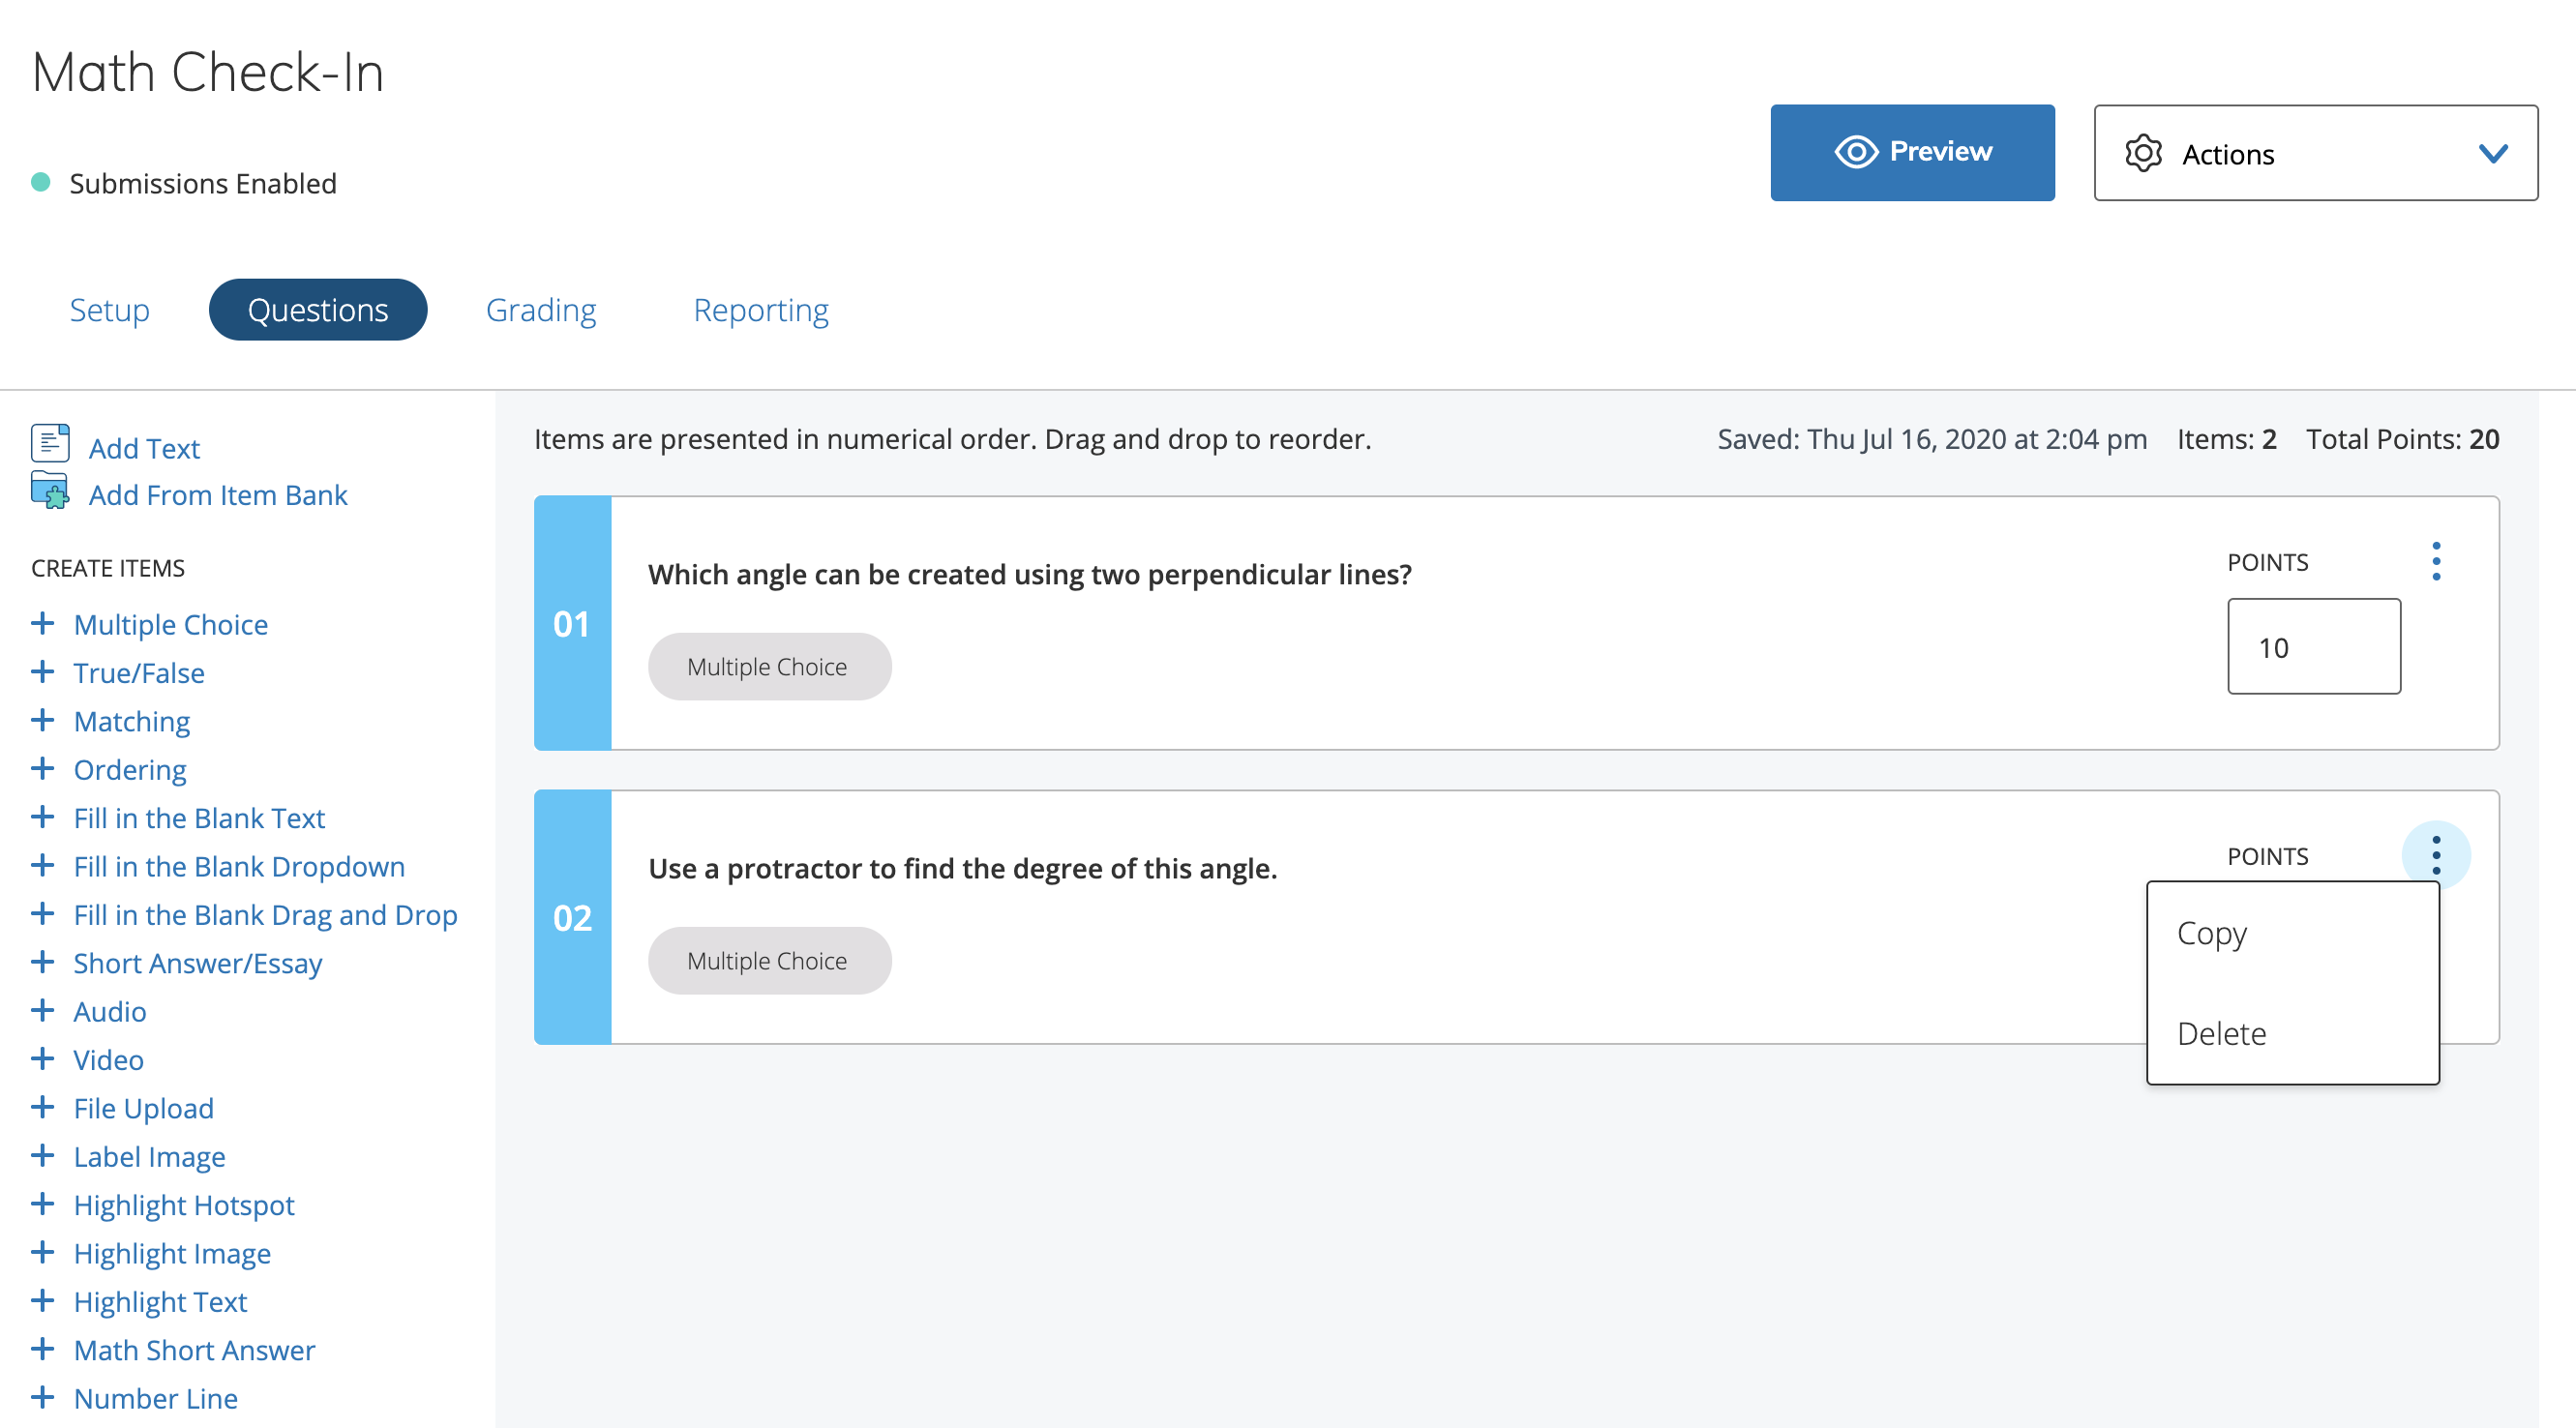
Manage assessment questions
After adding questions to your assessment, review them in the Questions area.
-
Enter the points for each question.
-
A tally of the total number of questions and points is displayed at the top of the assessment.
If the total points set for the assessment don’t match the sum of all question points, the system adjusts each question’s points for students during the attempt.
Alternatively, if students can review their submissions, they will see the point value you set for each question, not the gradebook-adjusted points.
Hover over the More Options menu in each question and select an option.
|
More options |
Description |
|---|---|
|
Copy |
Creates a copy of the question in the assessment. The copied question’s name includes COPY, for example COPY – Test Question. |
|
Delete |
Removes the question from the assessment. Deleted questions cannot be restored. |
|
Edit |
Modify the number of randomized items to generate from an item bank and the points assigned to each item. |
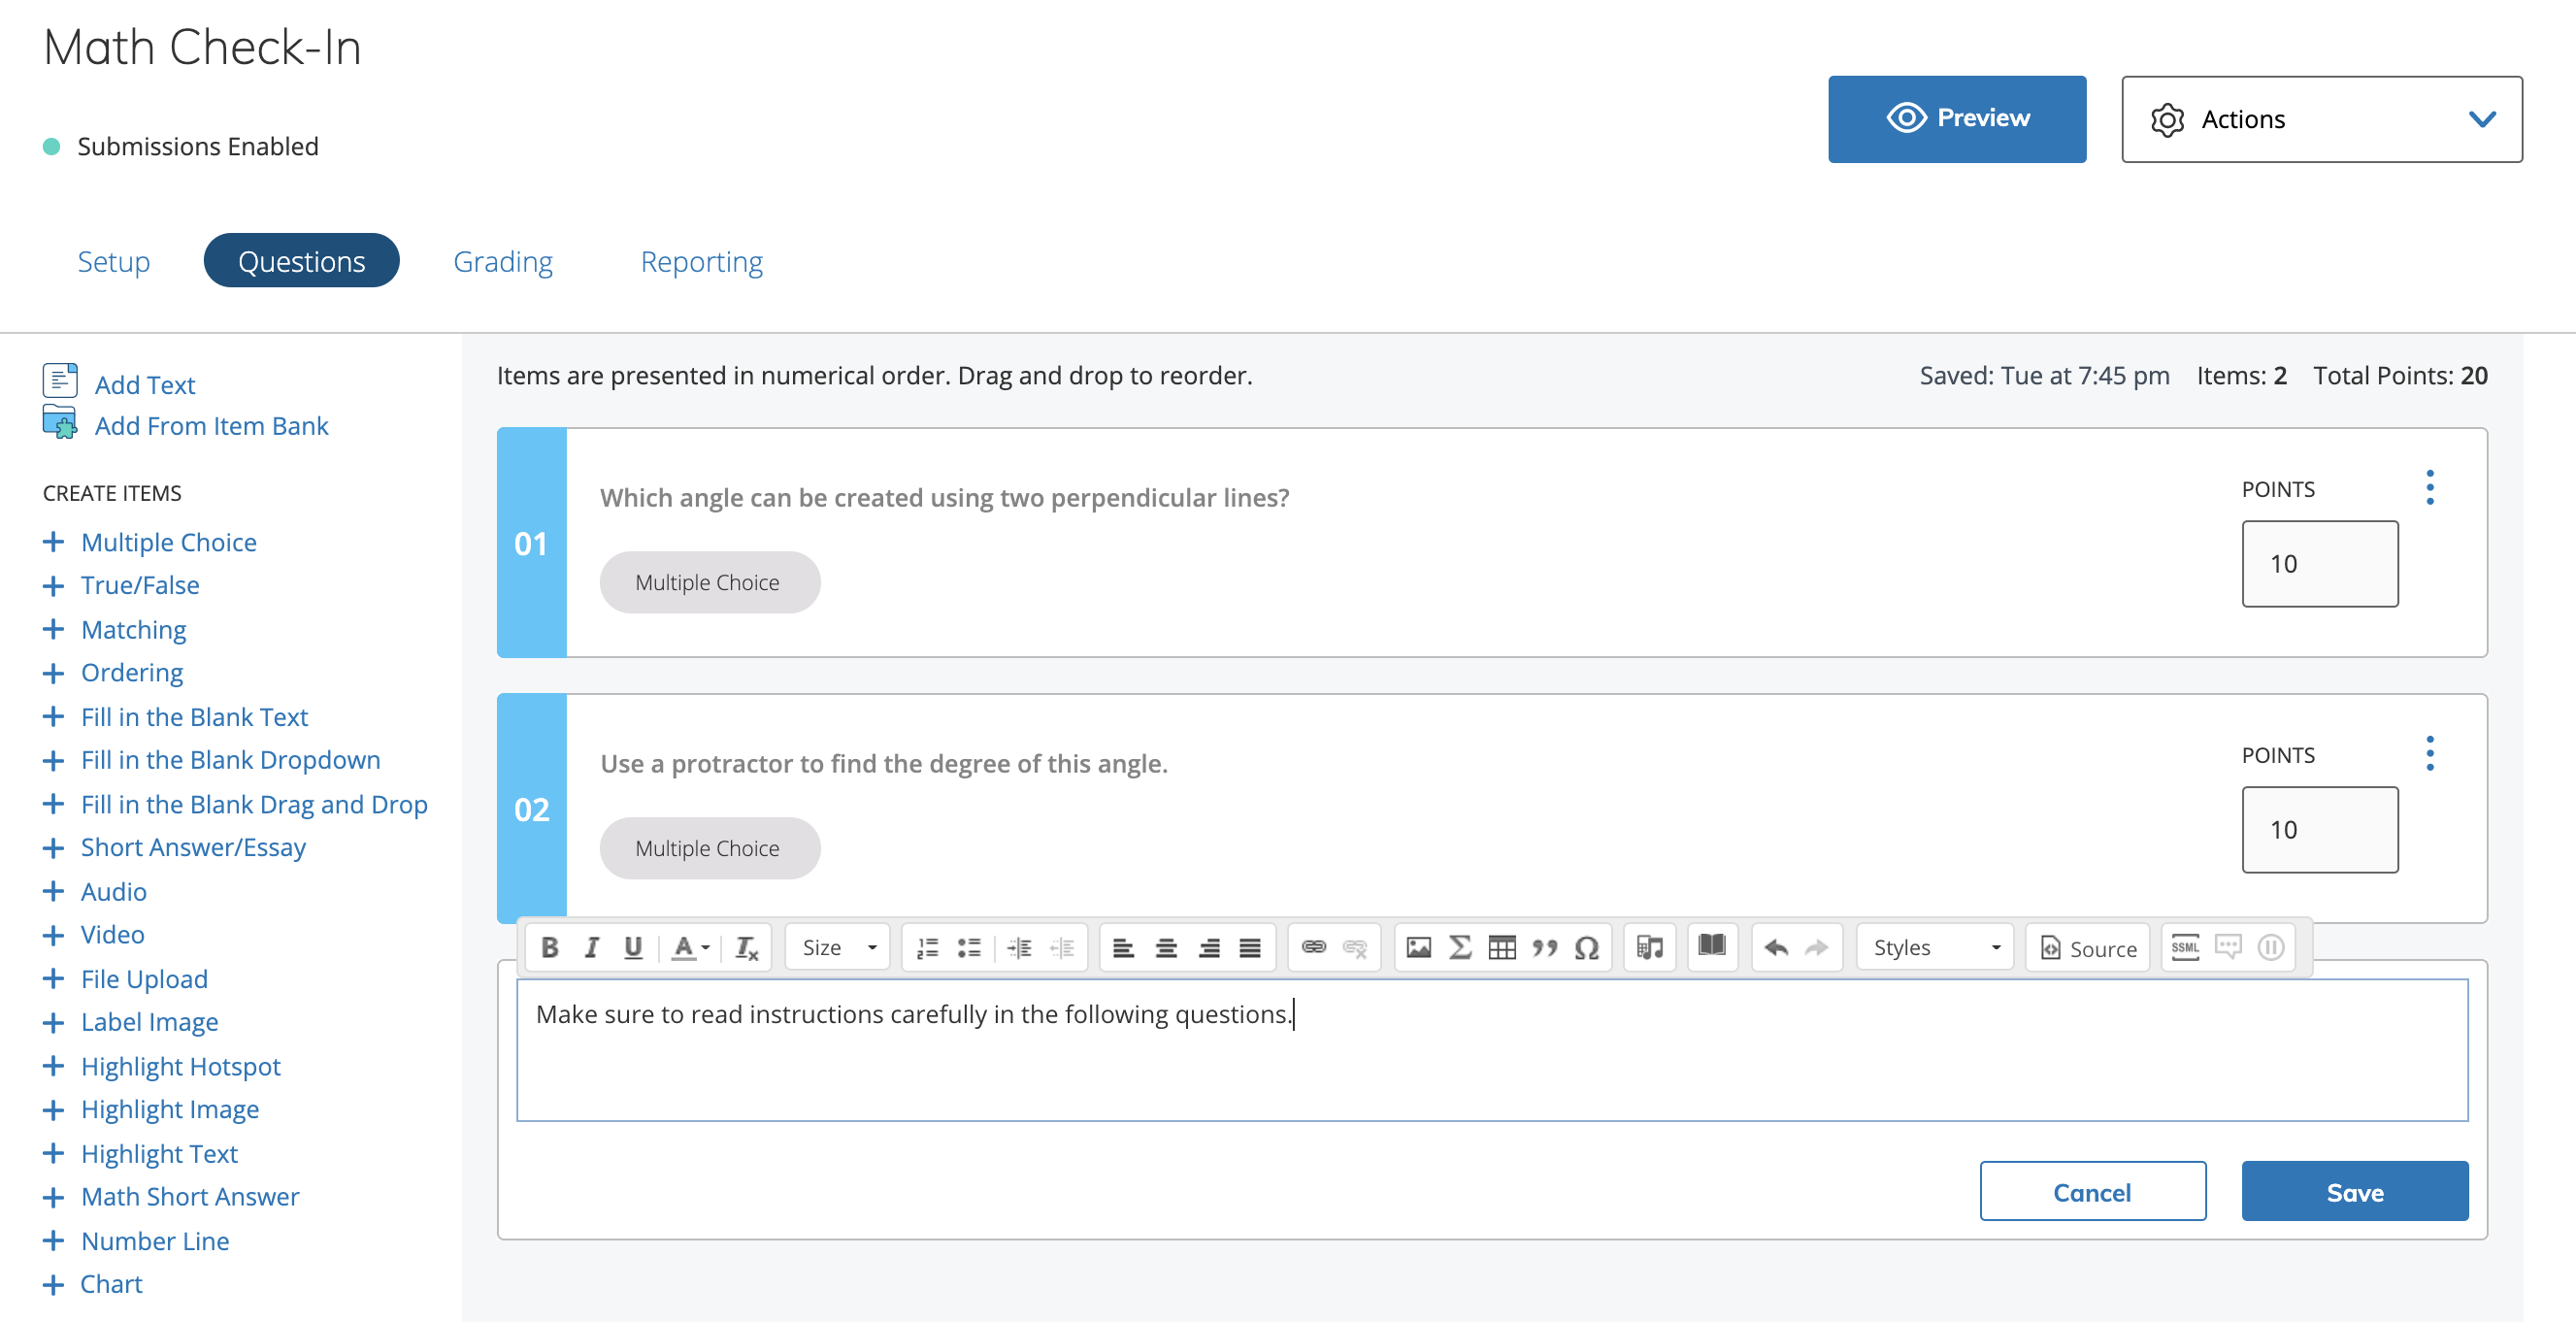
Click Add Text to insert additional instructions anywhere in the assessment. For example, use text blocks to divide the assessment into sections and provide guidance for each section. Each question and text block appears on its own page for students during the assessment.
Student view
Students can access the assessment from anywhere they can access other graded materials:
-
The Materials list on the main Course page.
-
The Upcoming feed.
-
The Calendar.
-
The Notifications feed.
The student experience for assessments is also supported on the native Schoology mobile apps. Specific guides are available for iOS and Android users.
Students click Start Attempt to begin the assessment.
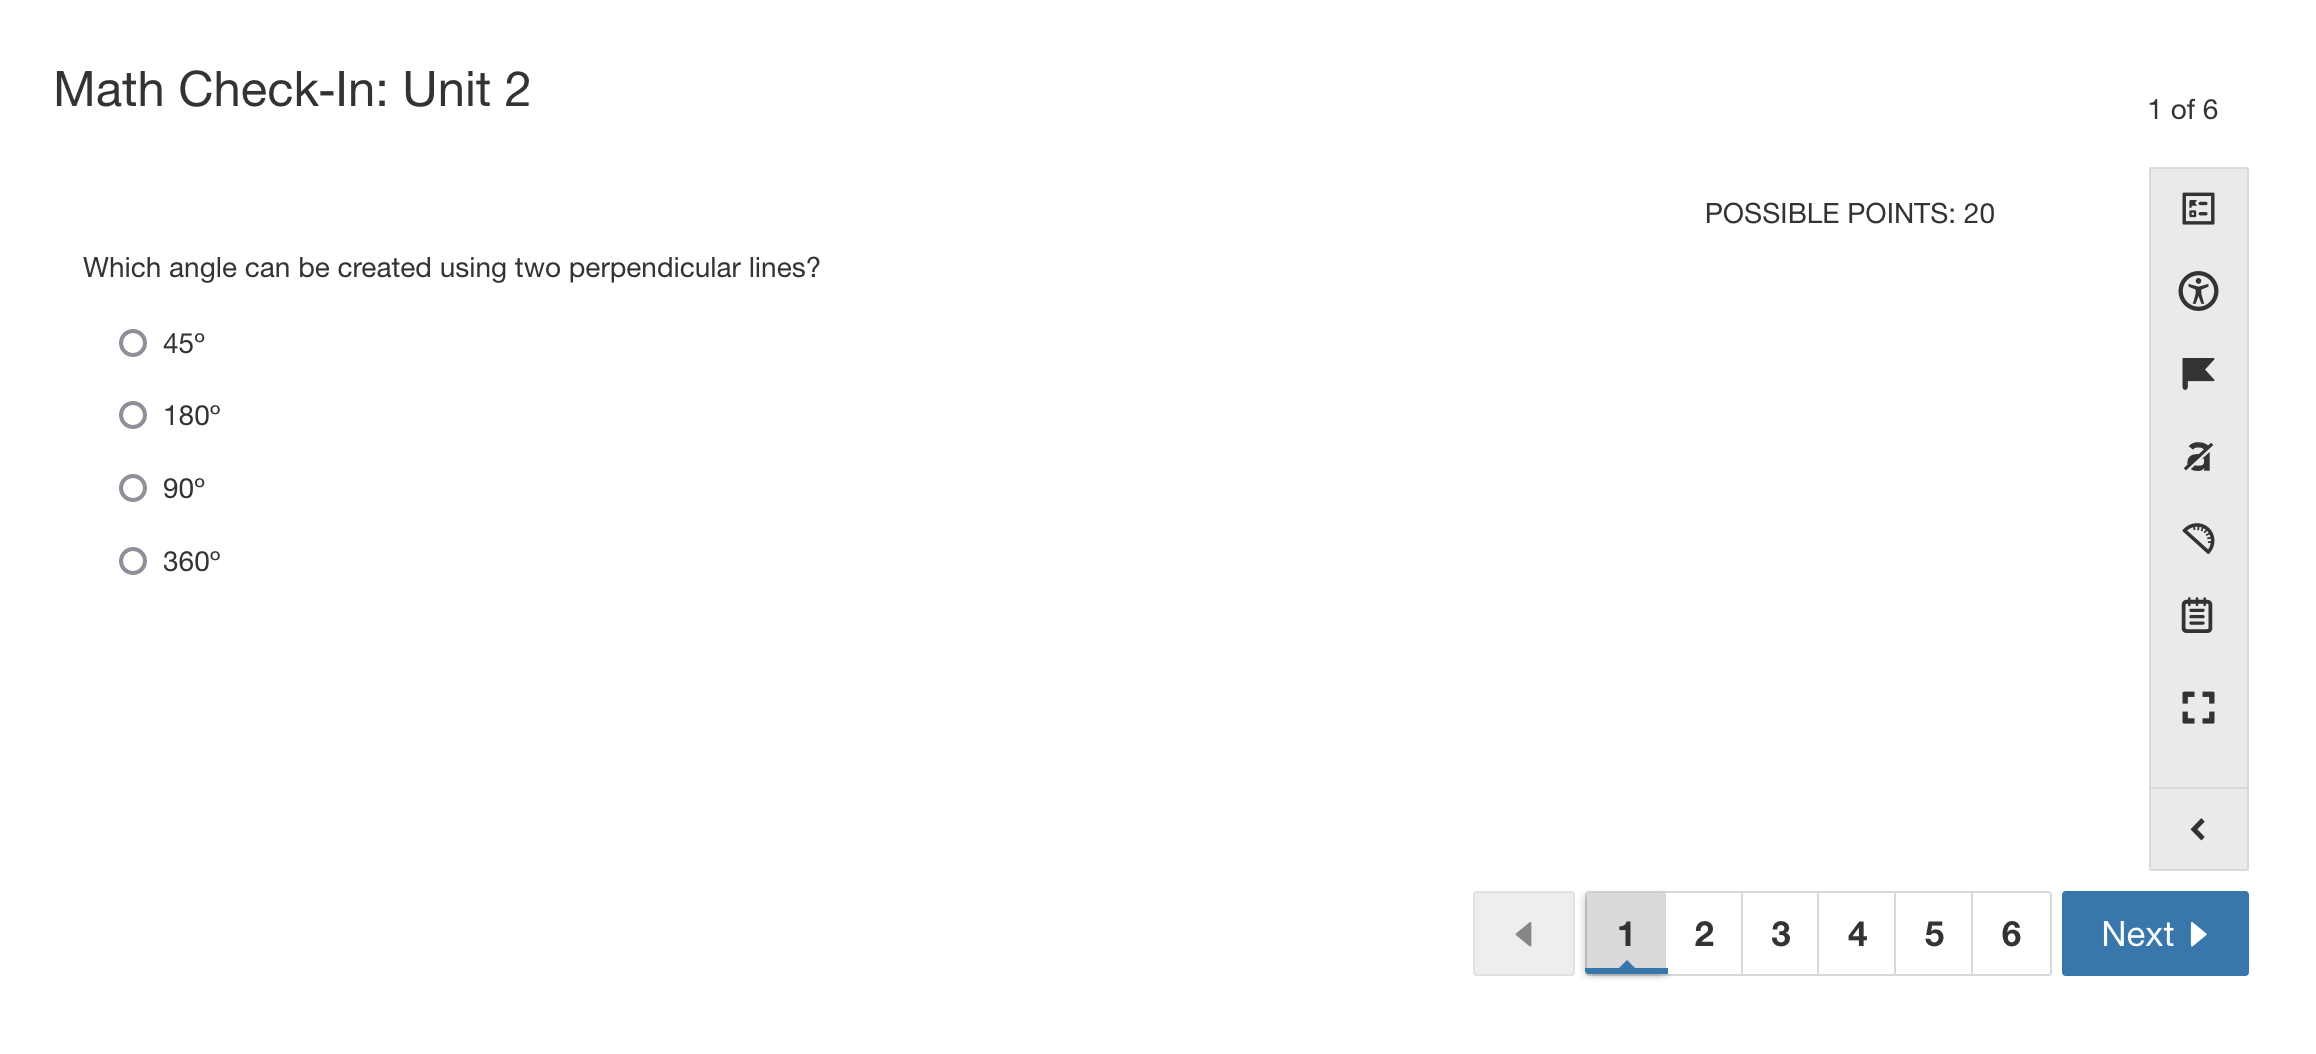
Taking the assessment
Students can navigate the assessment by:
-
Clicking question numbers along the bottom of the screen
-
Using the tab and arrow keys on the keyboard
Students may only have one attempt in progress at a time.
Depending on the question type, students can interact in different ways:
-
Drag and drop for ordering, matching, labeling an image, and more.
-
Rich text editor for short answers, essay questions, and more.
-
Math keyboards for math short answers.
-
Button selector for multiple choice, true or false, and more.
-
Drawing tool to highlight an image and more.
Each of these functions may also be completed using the keyboard’s tab, arrow, and enter keys.
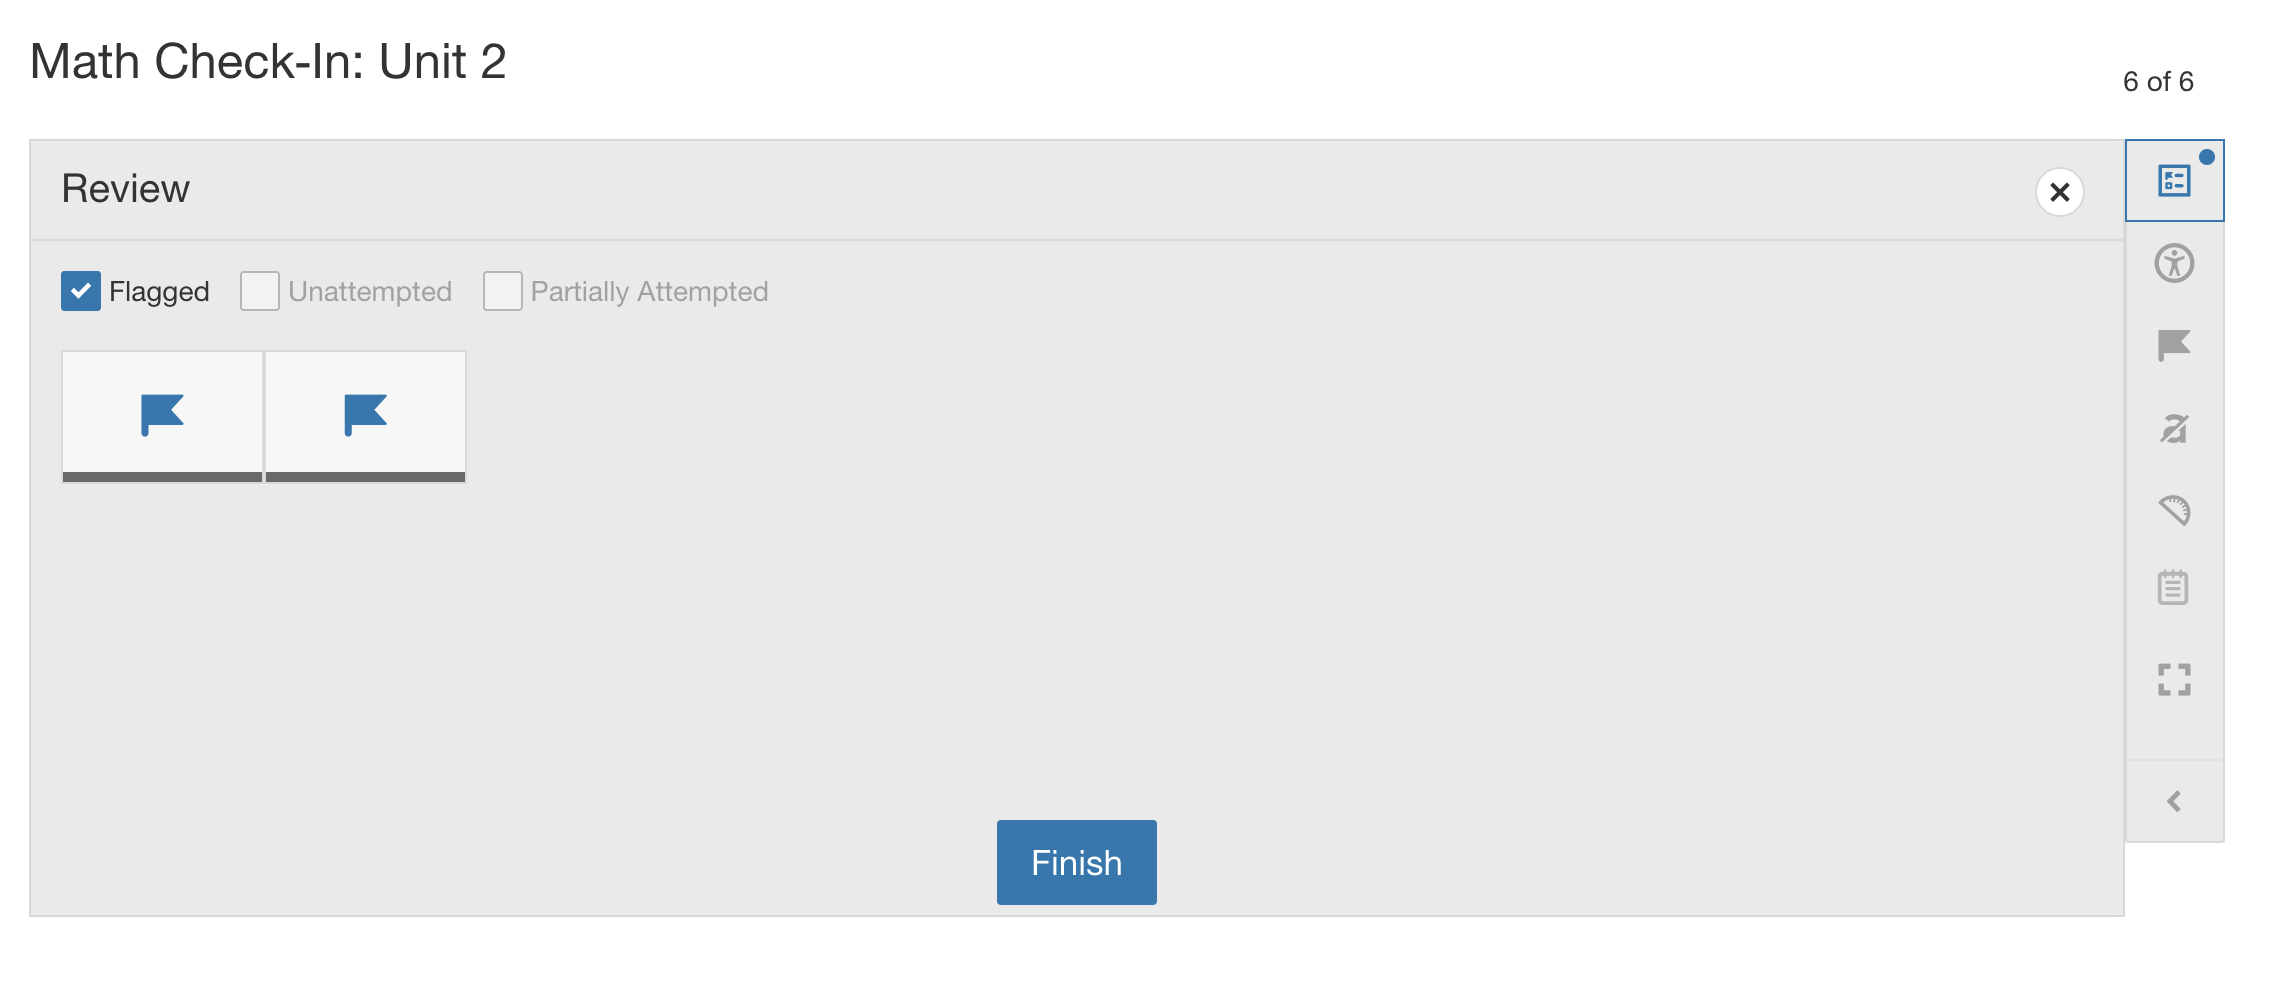
As students answer questions, their work saves automatically. Students can submit completed attempts from the review screen, which students can open at any time:
-
Click the review icon from the margin menu.
-
Click Review in the navigation bar at the end of the screen.
Students can access additional accessibility features by clicking the accessibility icon, including:
-
Adjusting color contrast
-
Changing font size
Students can also click the Full Screen icon to display the assessment in full-screen mode.
Students can flag questions to review them later:
-
Click the flag icon on any question to mark it.
-
Click the flag icon again to remove the flag.
-
Flagged questions appear on the Review screen when the Flagged box is selected.
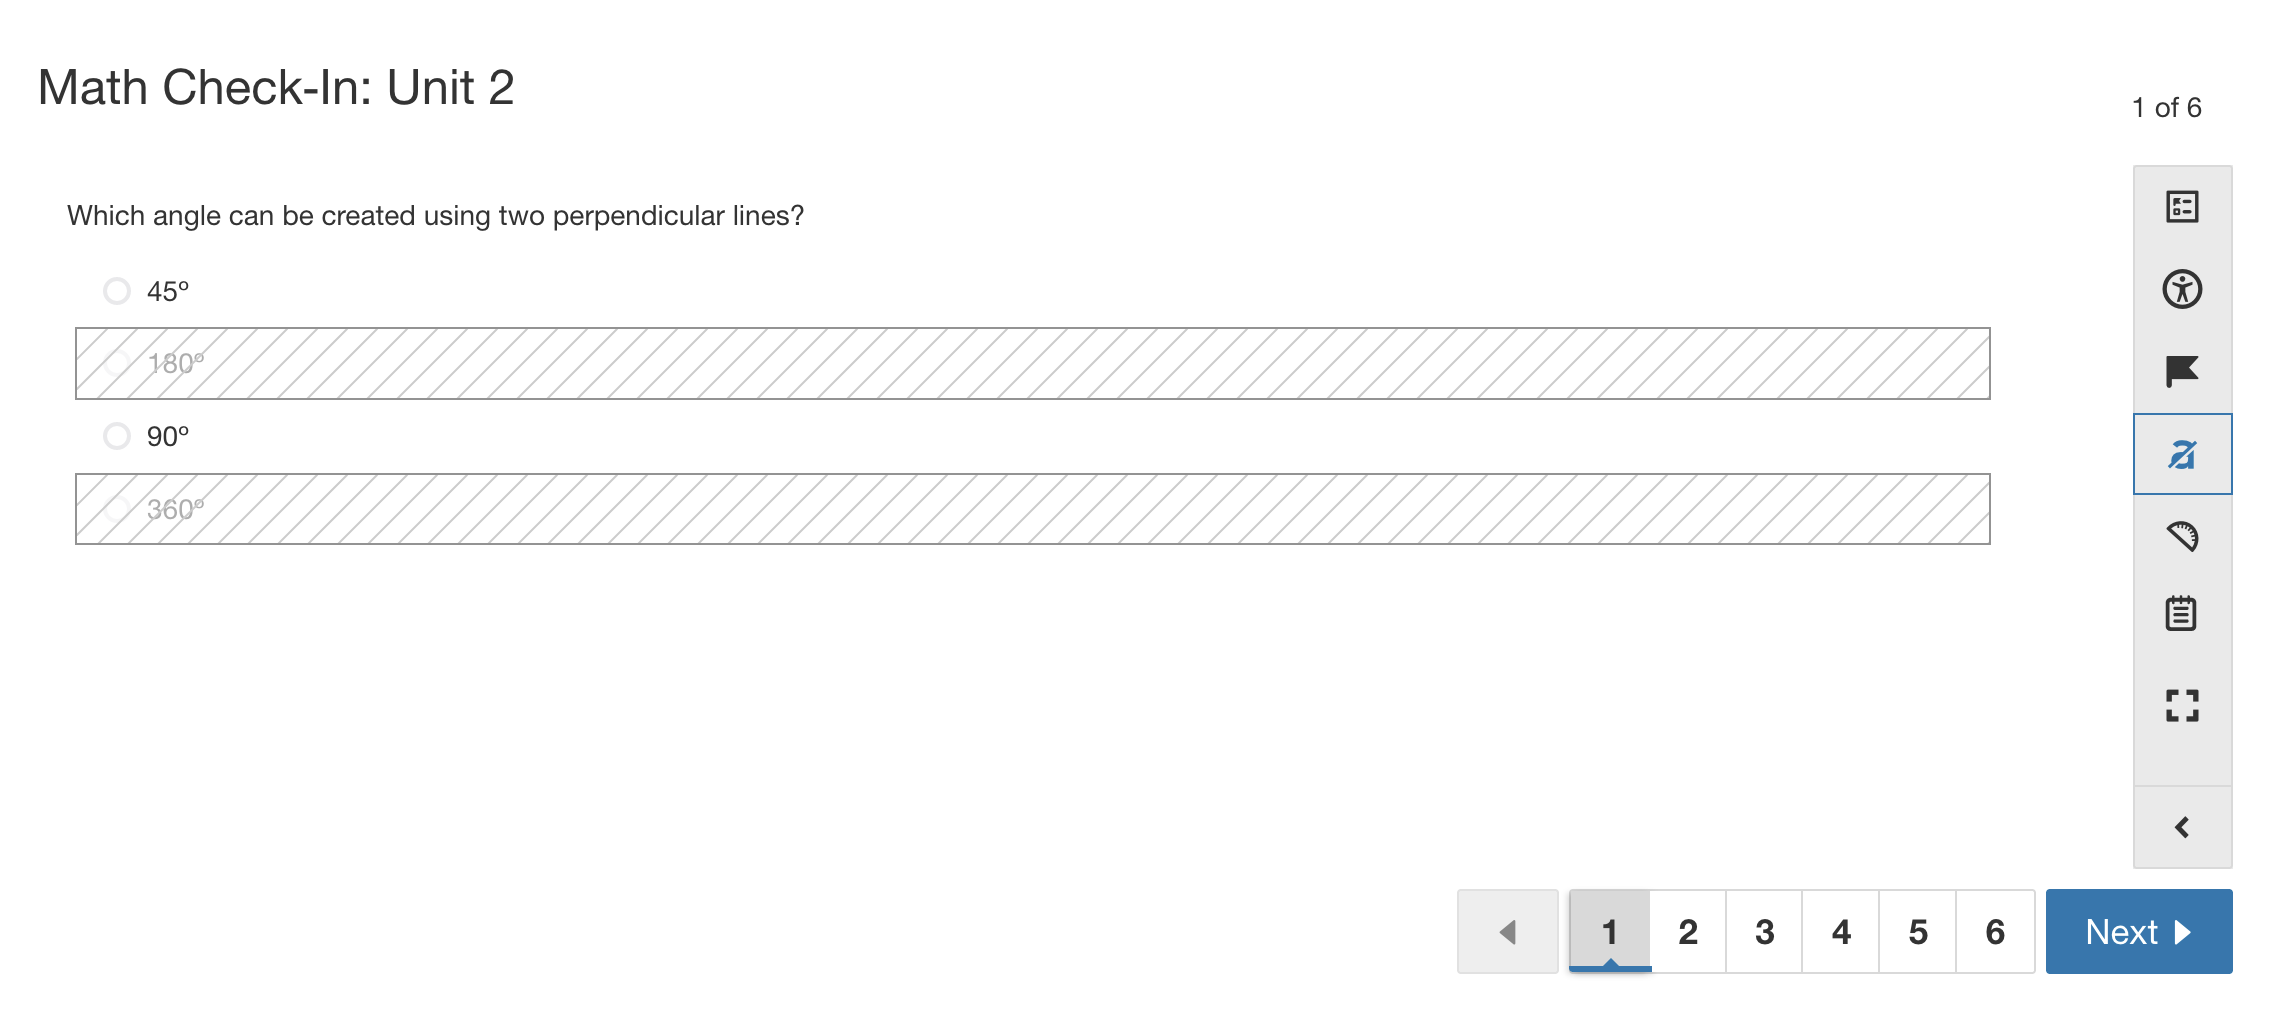
Students can use the Eliminate Choices tool to rule out incorrect answers:
-
Click the eliminate choices icon.
-
Click any answer choice to mark it as eliminated.
This helps students narrow down options and focus on finding the correct answer.
Students can use the protractor tool to populate the screen while attempting the assessment:

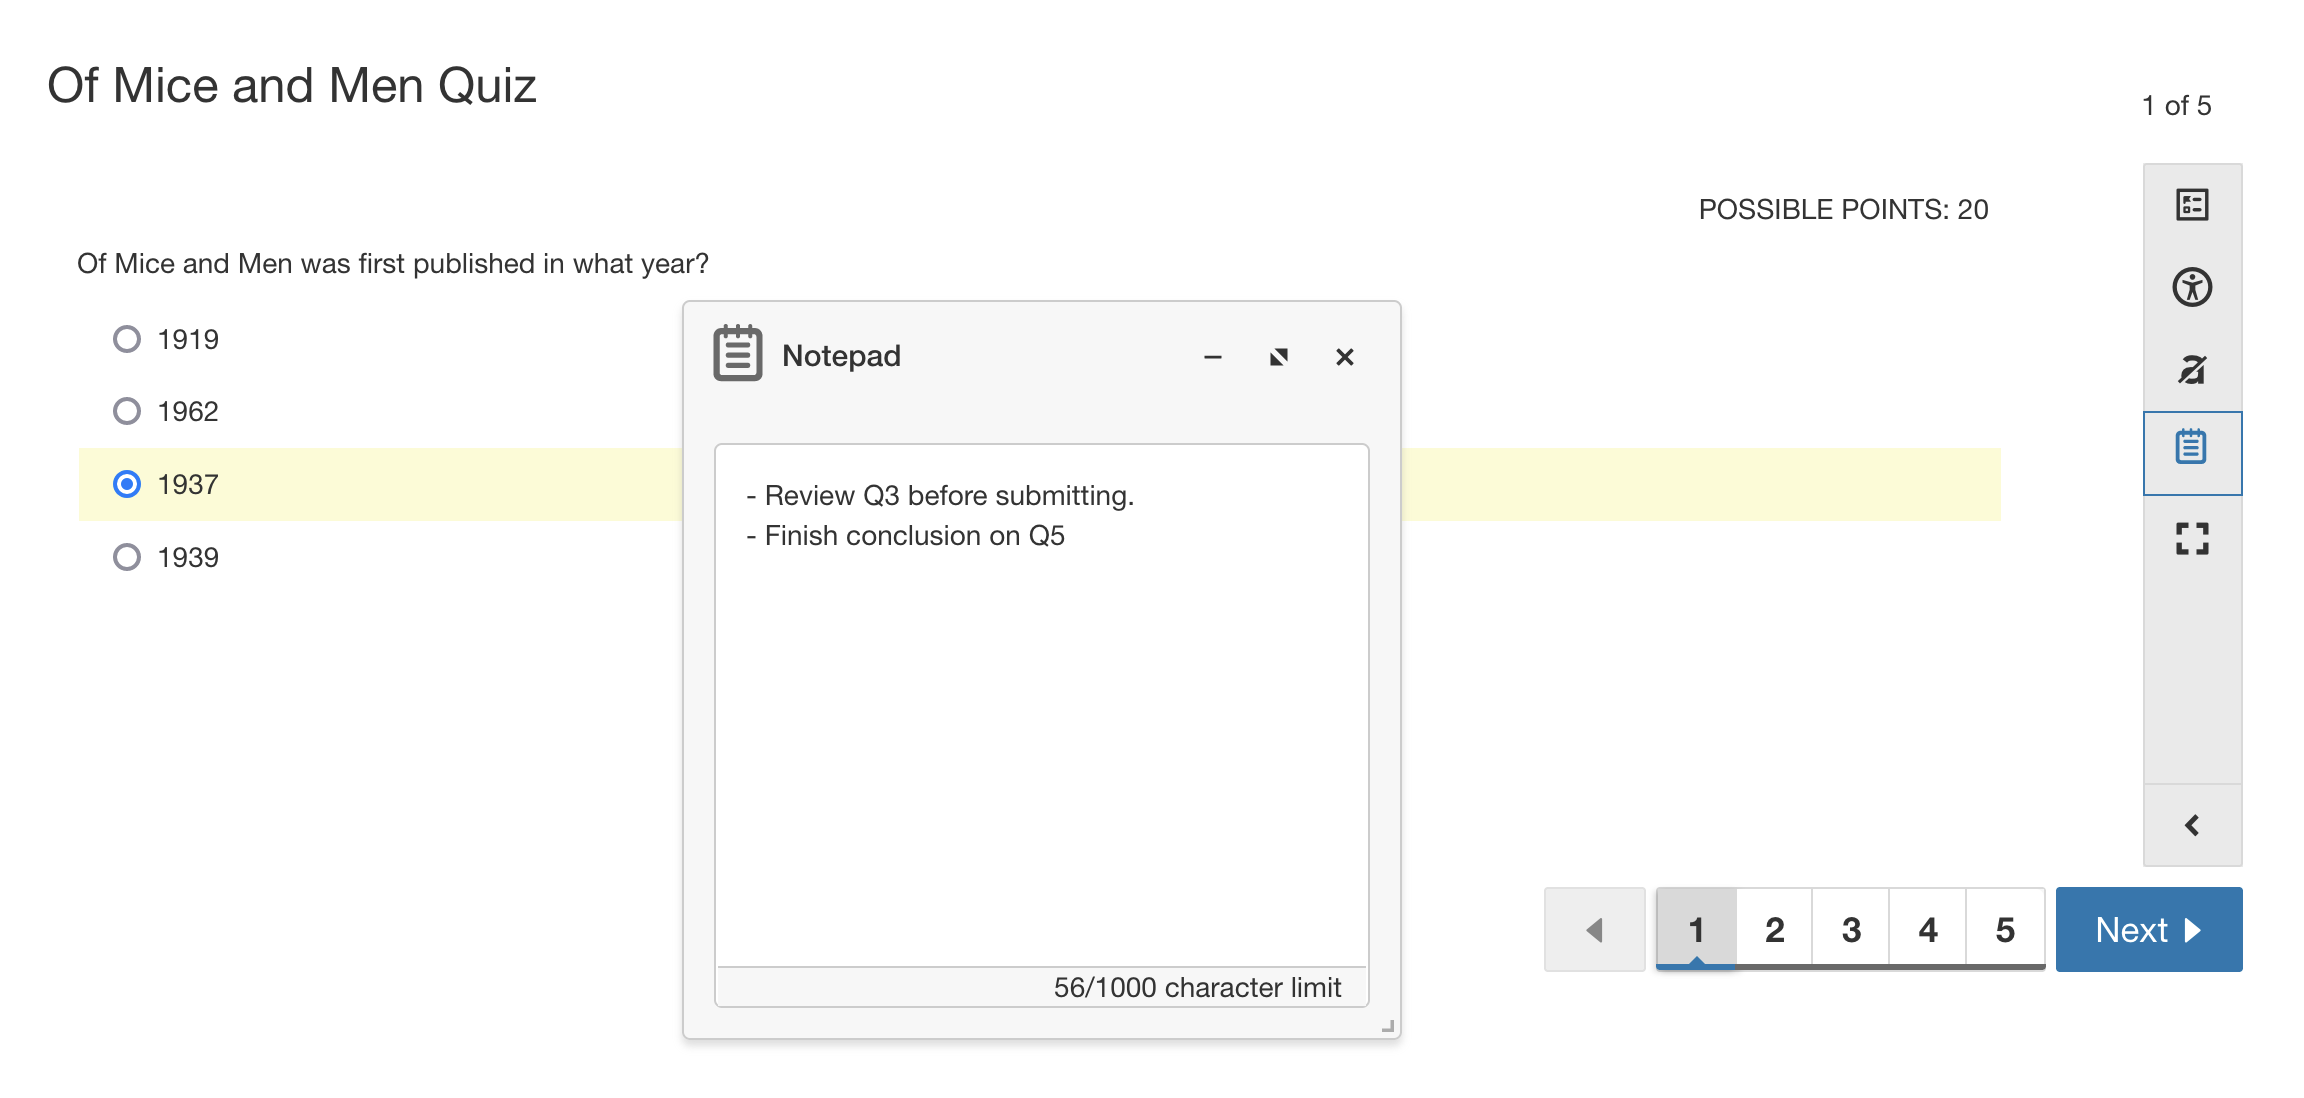
Students can use the Notepad tool to take notes during an assessment.
For subjective questions aligned with a rubric, the rubric icon and link are displayed in the margin so students can click to review it.

Review grades and submissions
After students complete an assessment, grades for assessments without subjective questions (short-answer or essay-type questions) are displayed in the student's Grades area.
Additionally, students can review submissions from the assessments page. If multiple attempts are allowed, the number of submitted and remaining attempts displays to the student. For example, if you’ve allowed three attempts, the following message is displayed for students who have completed one attempt: You have made 1 of 3 attempts. You have 2 remaining. Students can only have one attempt in progress at a time.
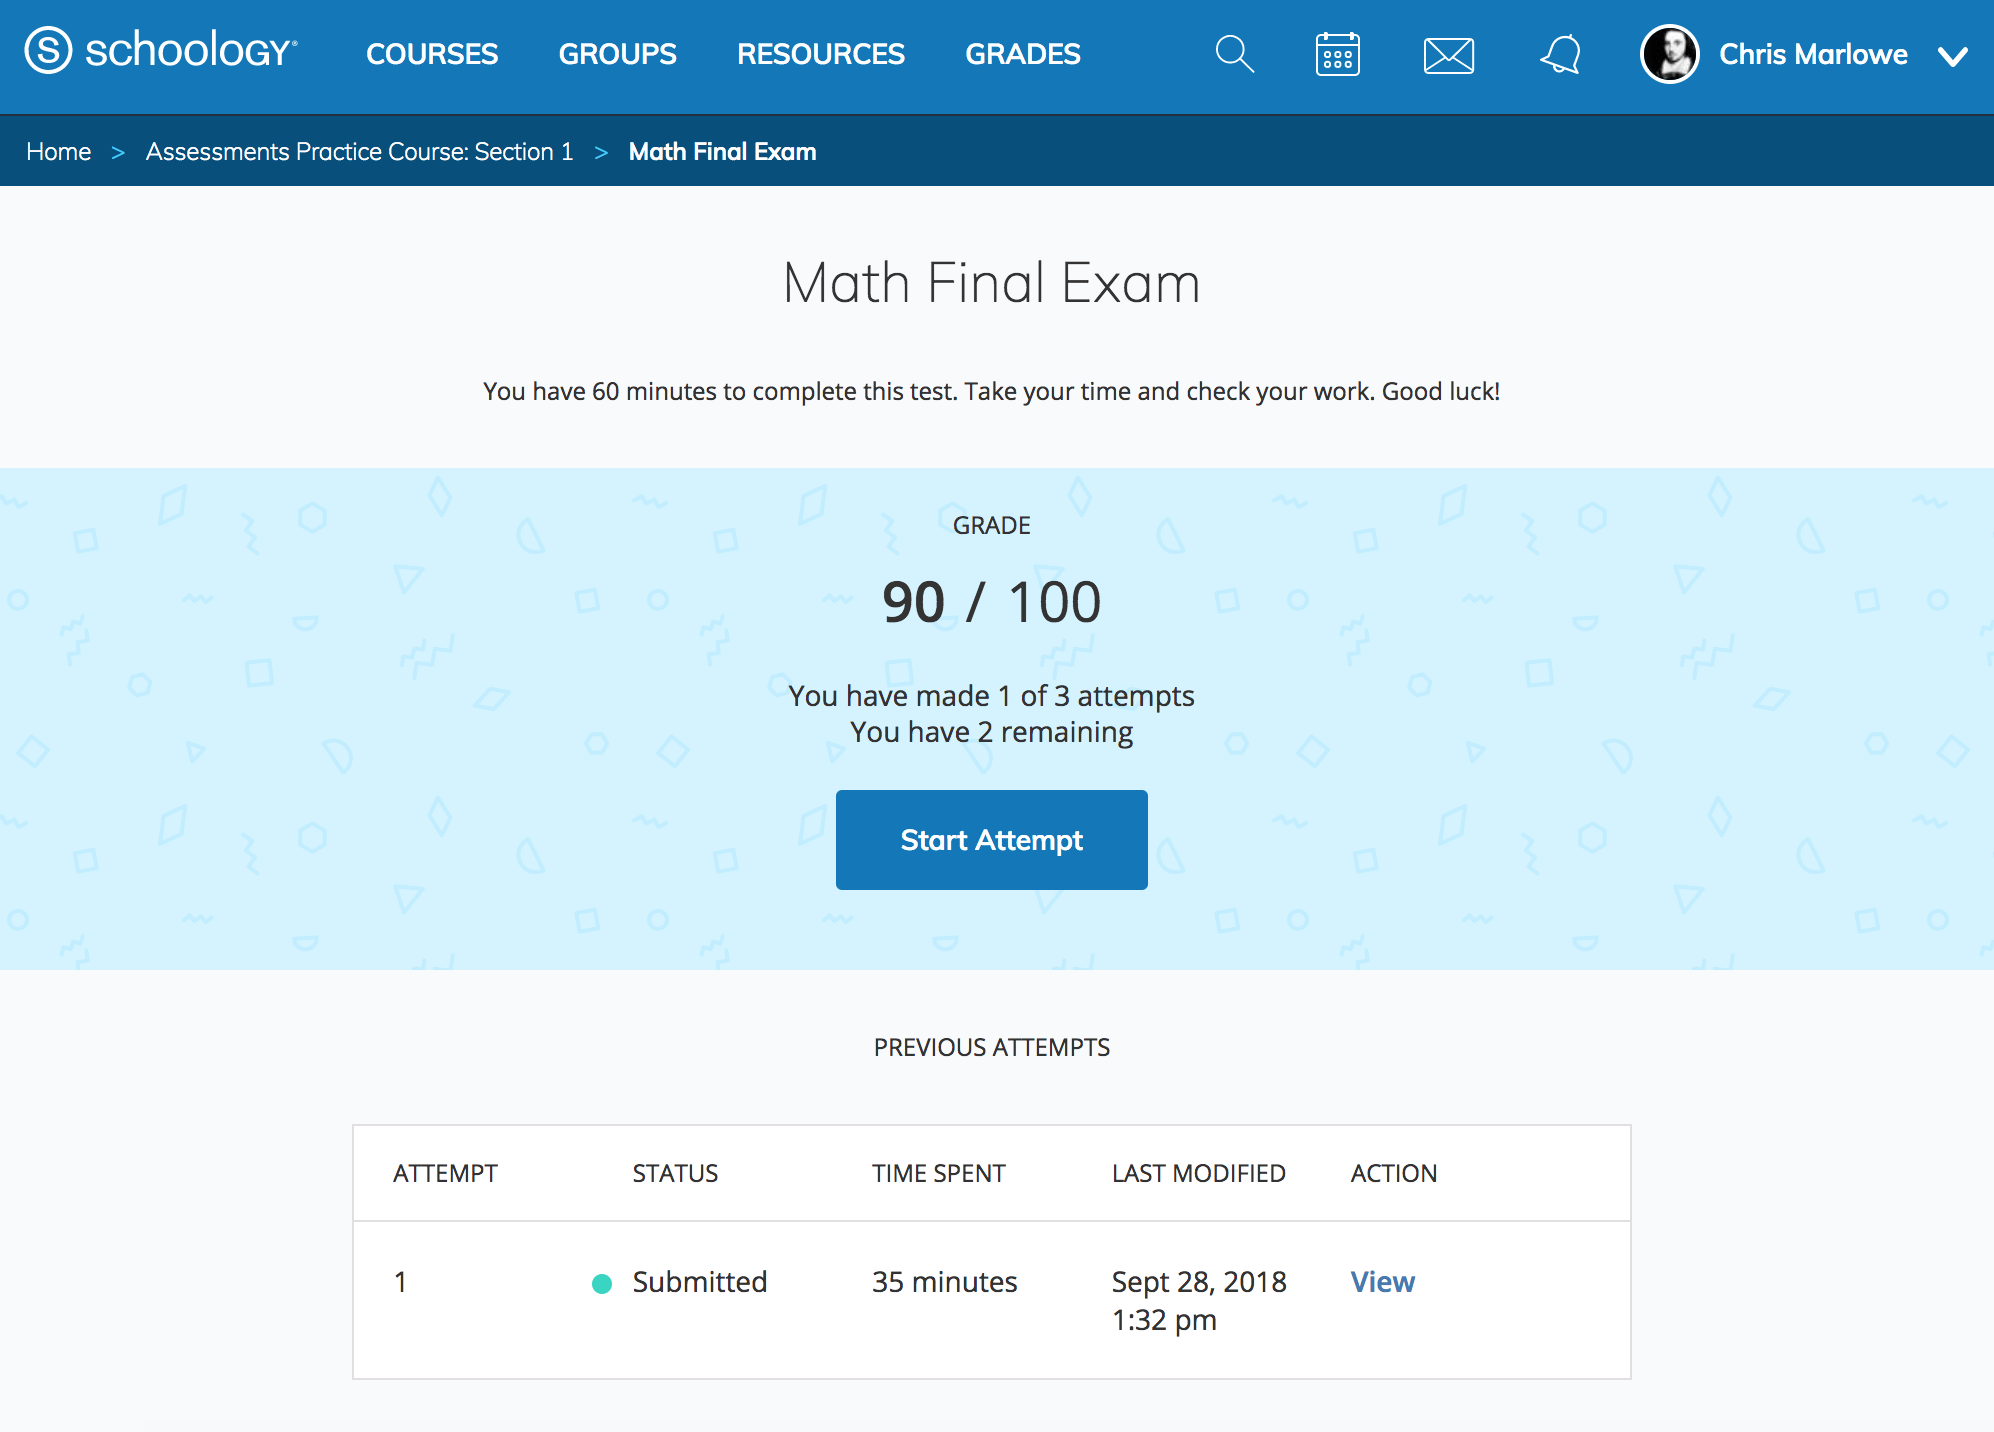
The Previous Attempts table displays all previously submitted assessments with the following details:
-
Attempt: The attempt number, with the most recently started attempt listed first.
-
Status: Shows In Progress or Submitted. The Needs Grading status is not displayed for students.
-
Time Spent: The total time spent on the attempt.
-
Last Modified: The date and time the student last worked on the attempt. This is especially helpful for resumable attempts, so students can see when they last made changes.
-
Action: If students have permission to view submissions, they can select View to open a completed attempt or Resume to open and continue taking an assessment in progress. Currently, all In Progress assessment attempts are resumable.
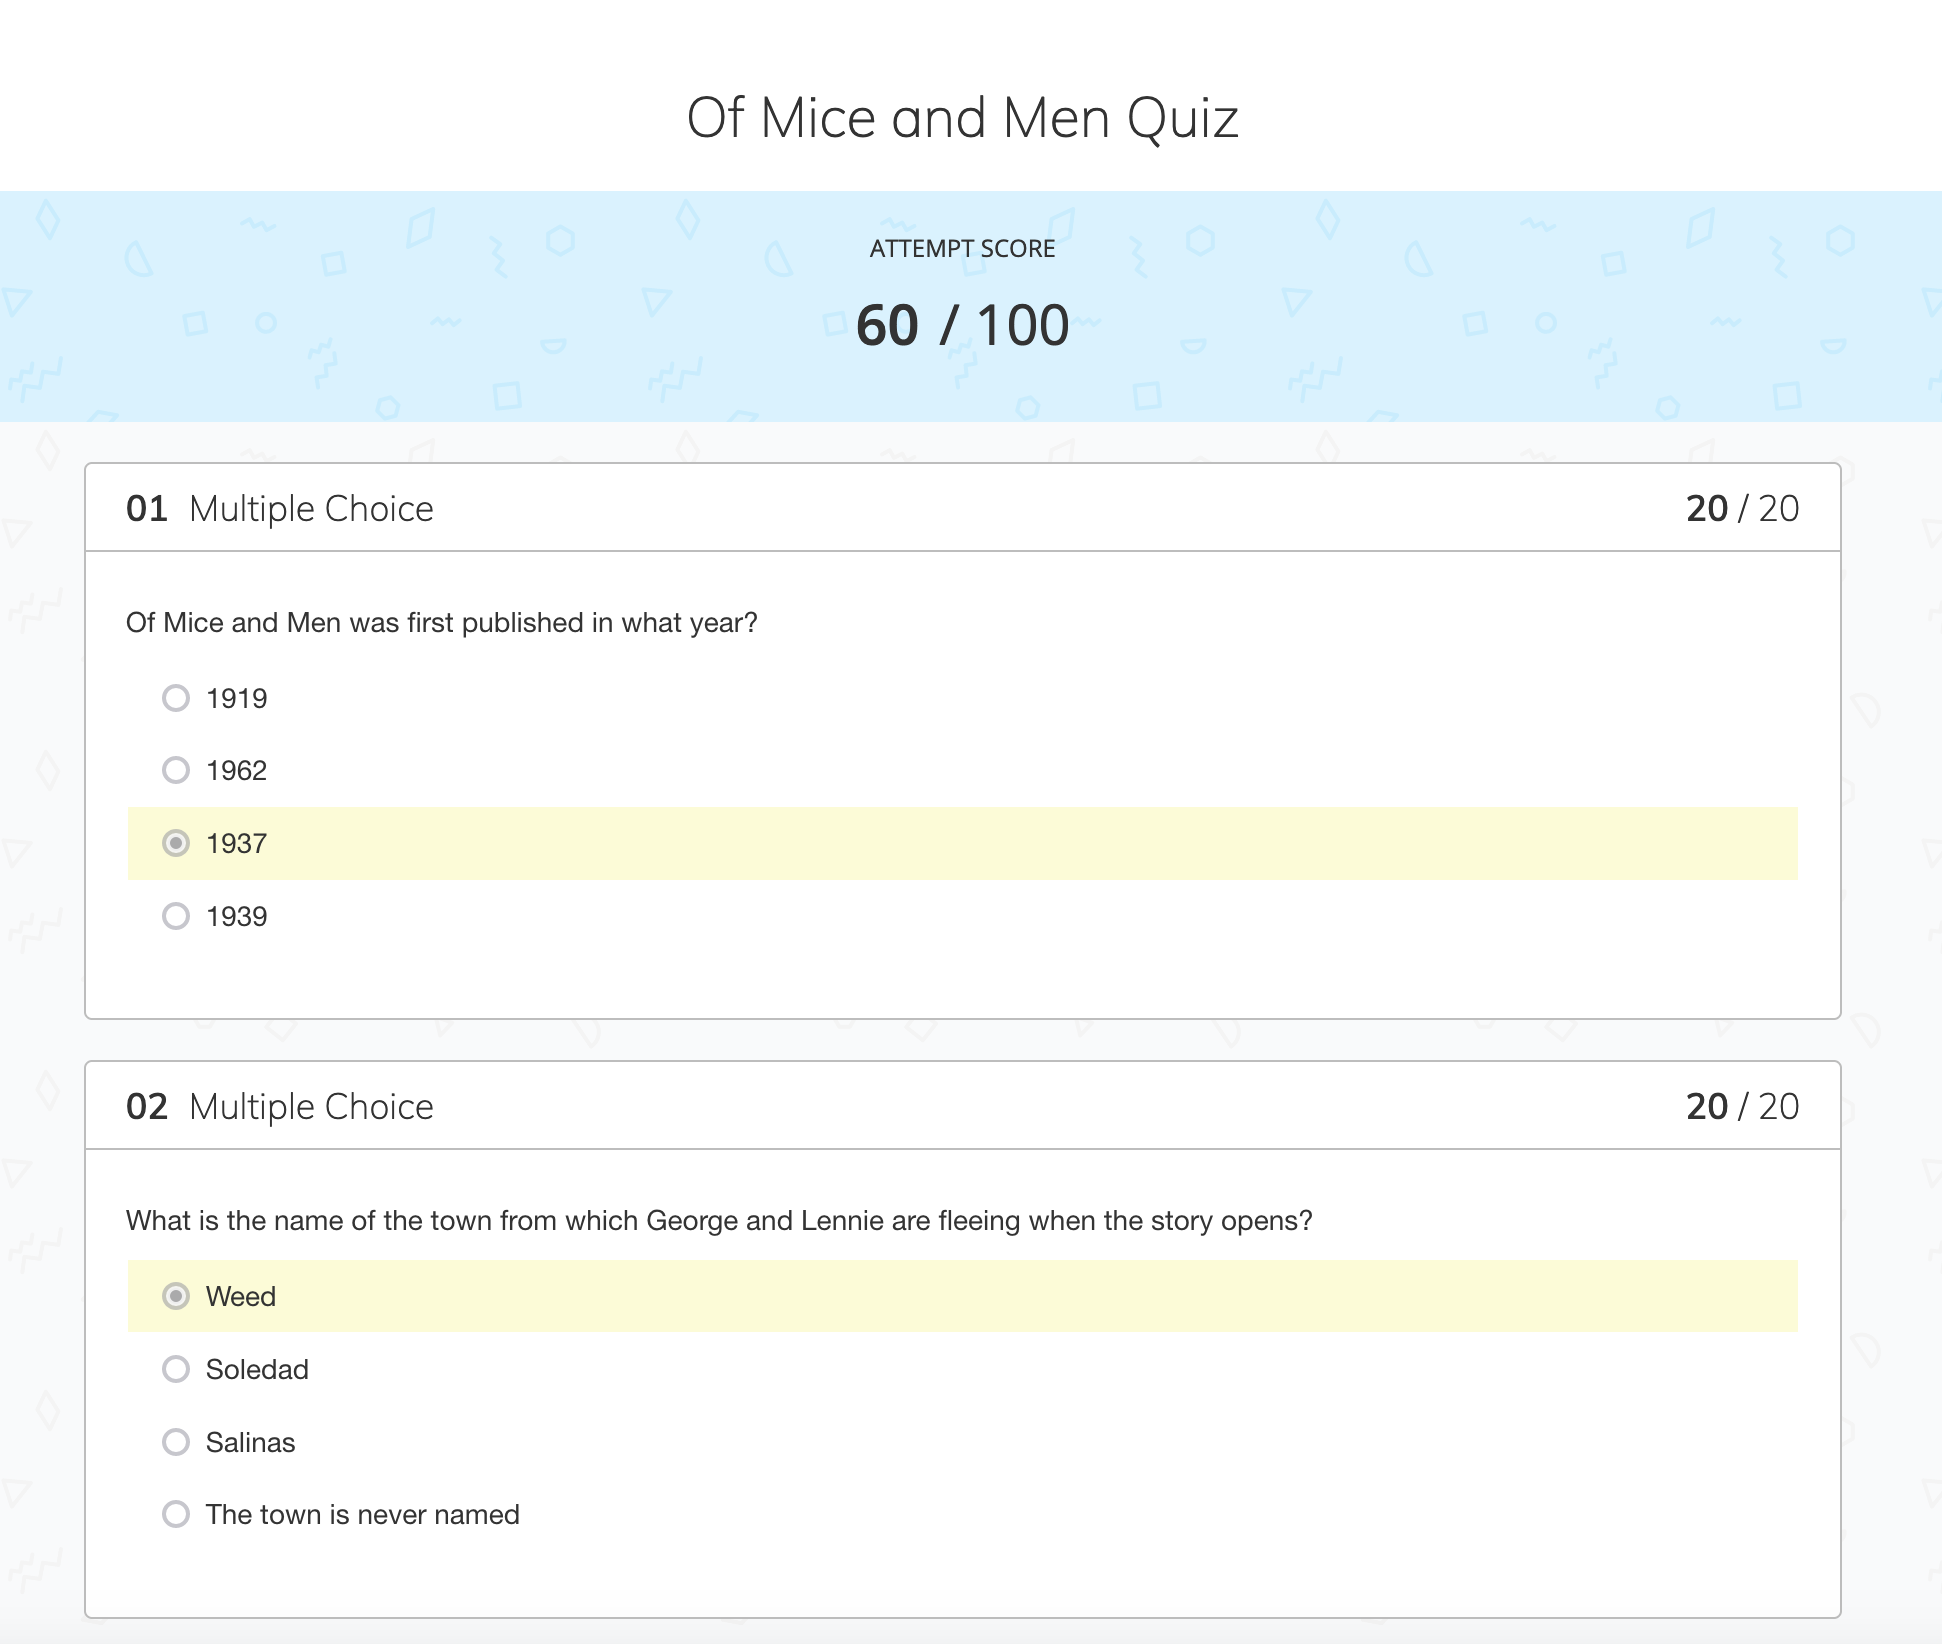
The submissions page displays the points earned out of the total possible points for each question and the total score earned for the assessment. This allows students to clearly see how their performance breaks down by question and overall.
Grading assessments
After students complete the assessment, you can grade their submissions from the Grading area.
You can grade the assessment in two ways:
-
By student
-
By question
-
To grade by question, refer to the article, Grade by question for assessments.
-
Grade by student
-
Open the assessment and click By Student from the Grading area.
-
Select the student submission you want to grade in the table. Alternatively, open the student’s assessment from the gradebook by clicking the puzzle piece icon in the cell for that student and assessment.
Instructors can also enter submissions on behalf of students using Observational Grading for Assessments.
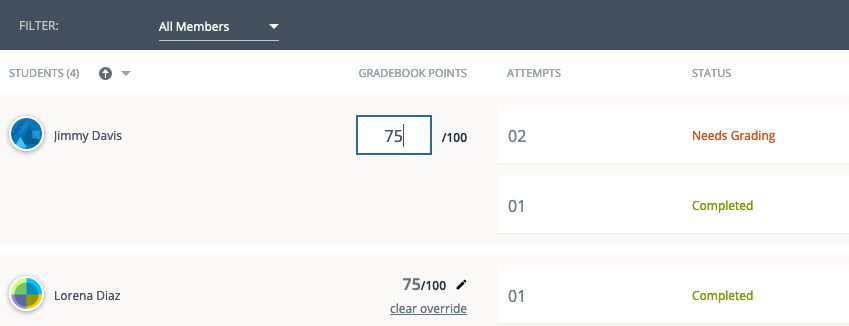
By student table
The By Student area displays information about students and their assessment attempts.
-
Use the Filter menu to show all students or only those who haven’t submitted.
-
The total number of assigned students is displayed with the Students column label. Use the column list to sort by first name or last name, in alphabetical or reverse order.
-
The Gradebook Points column shows each student’s score out of the total possible points.
-
A dash (—) is displayed for unsubmitted or ungraded attempts.
-
If multiple attempts are allowed, the score shown reflects the version selected in Final grade is determined by in the Student Settings area: Highest score or Last score. This is the score that appears in the student view and the course gradebook.
-
-
The Attempts column indicates the attempt number for each assessment, with the most recent attempt first.
-
The Last Modified column indicates the date and time the student last worked on the attempt. Helpful for resumable attempts.
-
The Elapsed Time column indicates the total time spent on the attempt.
-
Open the More options (three vertical dots) menu for a student to choose:
-
Unsubmit to move a submitted attempt back to In Progress so the student can continue working.
-
Submit to finalize an in-progress attempt and move it to Completed. The student can no longer resume the attempt.
-
Delete to permanently removes a student’s submission, which is useful if you want to allow a retake without changing attempt settings for the class. Deleted submissions cannot be restored.
-
If the total points set when creating the assessment differ from the combined points of all questions, scores are scaled automatically.
Example:
-
Assessment value: 100 points
-
Total question points: 90
-
Student score: 75/90
-
Gradebook displays: 83.3/100
You can override a score by clicking the value in Gradebook Points and entering a new score. Select Clear override to remove the manual entry.
Submission statuses
|
Submission status |
Details |
|---|---|
|
Scores pending |
The system is automatically grading objective questions. Most scores process within a few seconds. If processing exceeds 2 minutes, contact PowerSchool Support. |
|
In progress |
The student has started but has not submitted the assessment. |
|
Needs grading |
The assessment includes subjective questions that require instructor grading. |
|
Completed |
|
Grade a student attempt from the assessment
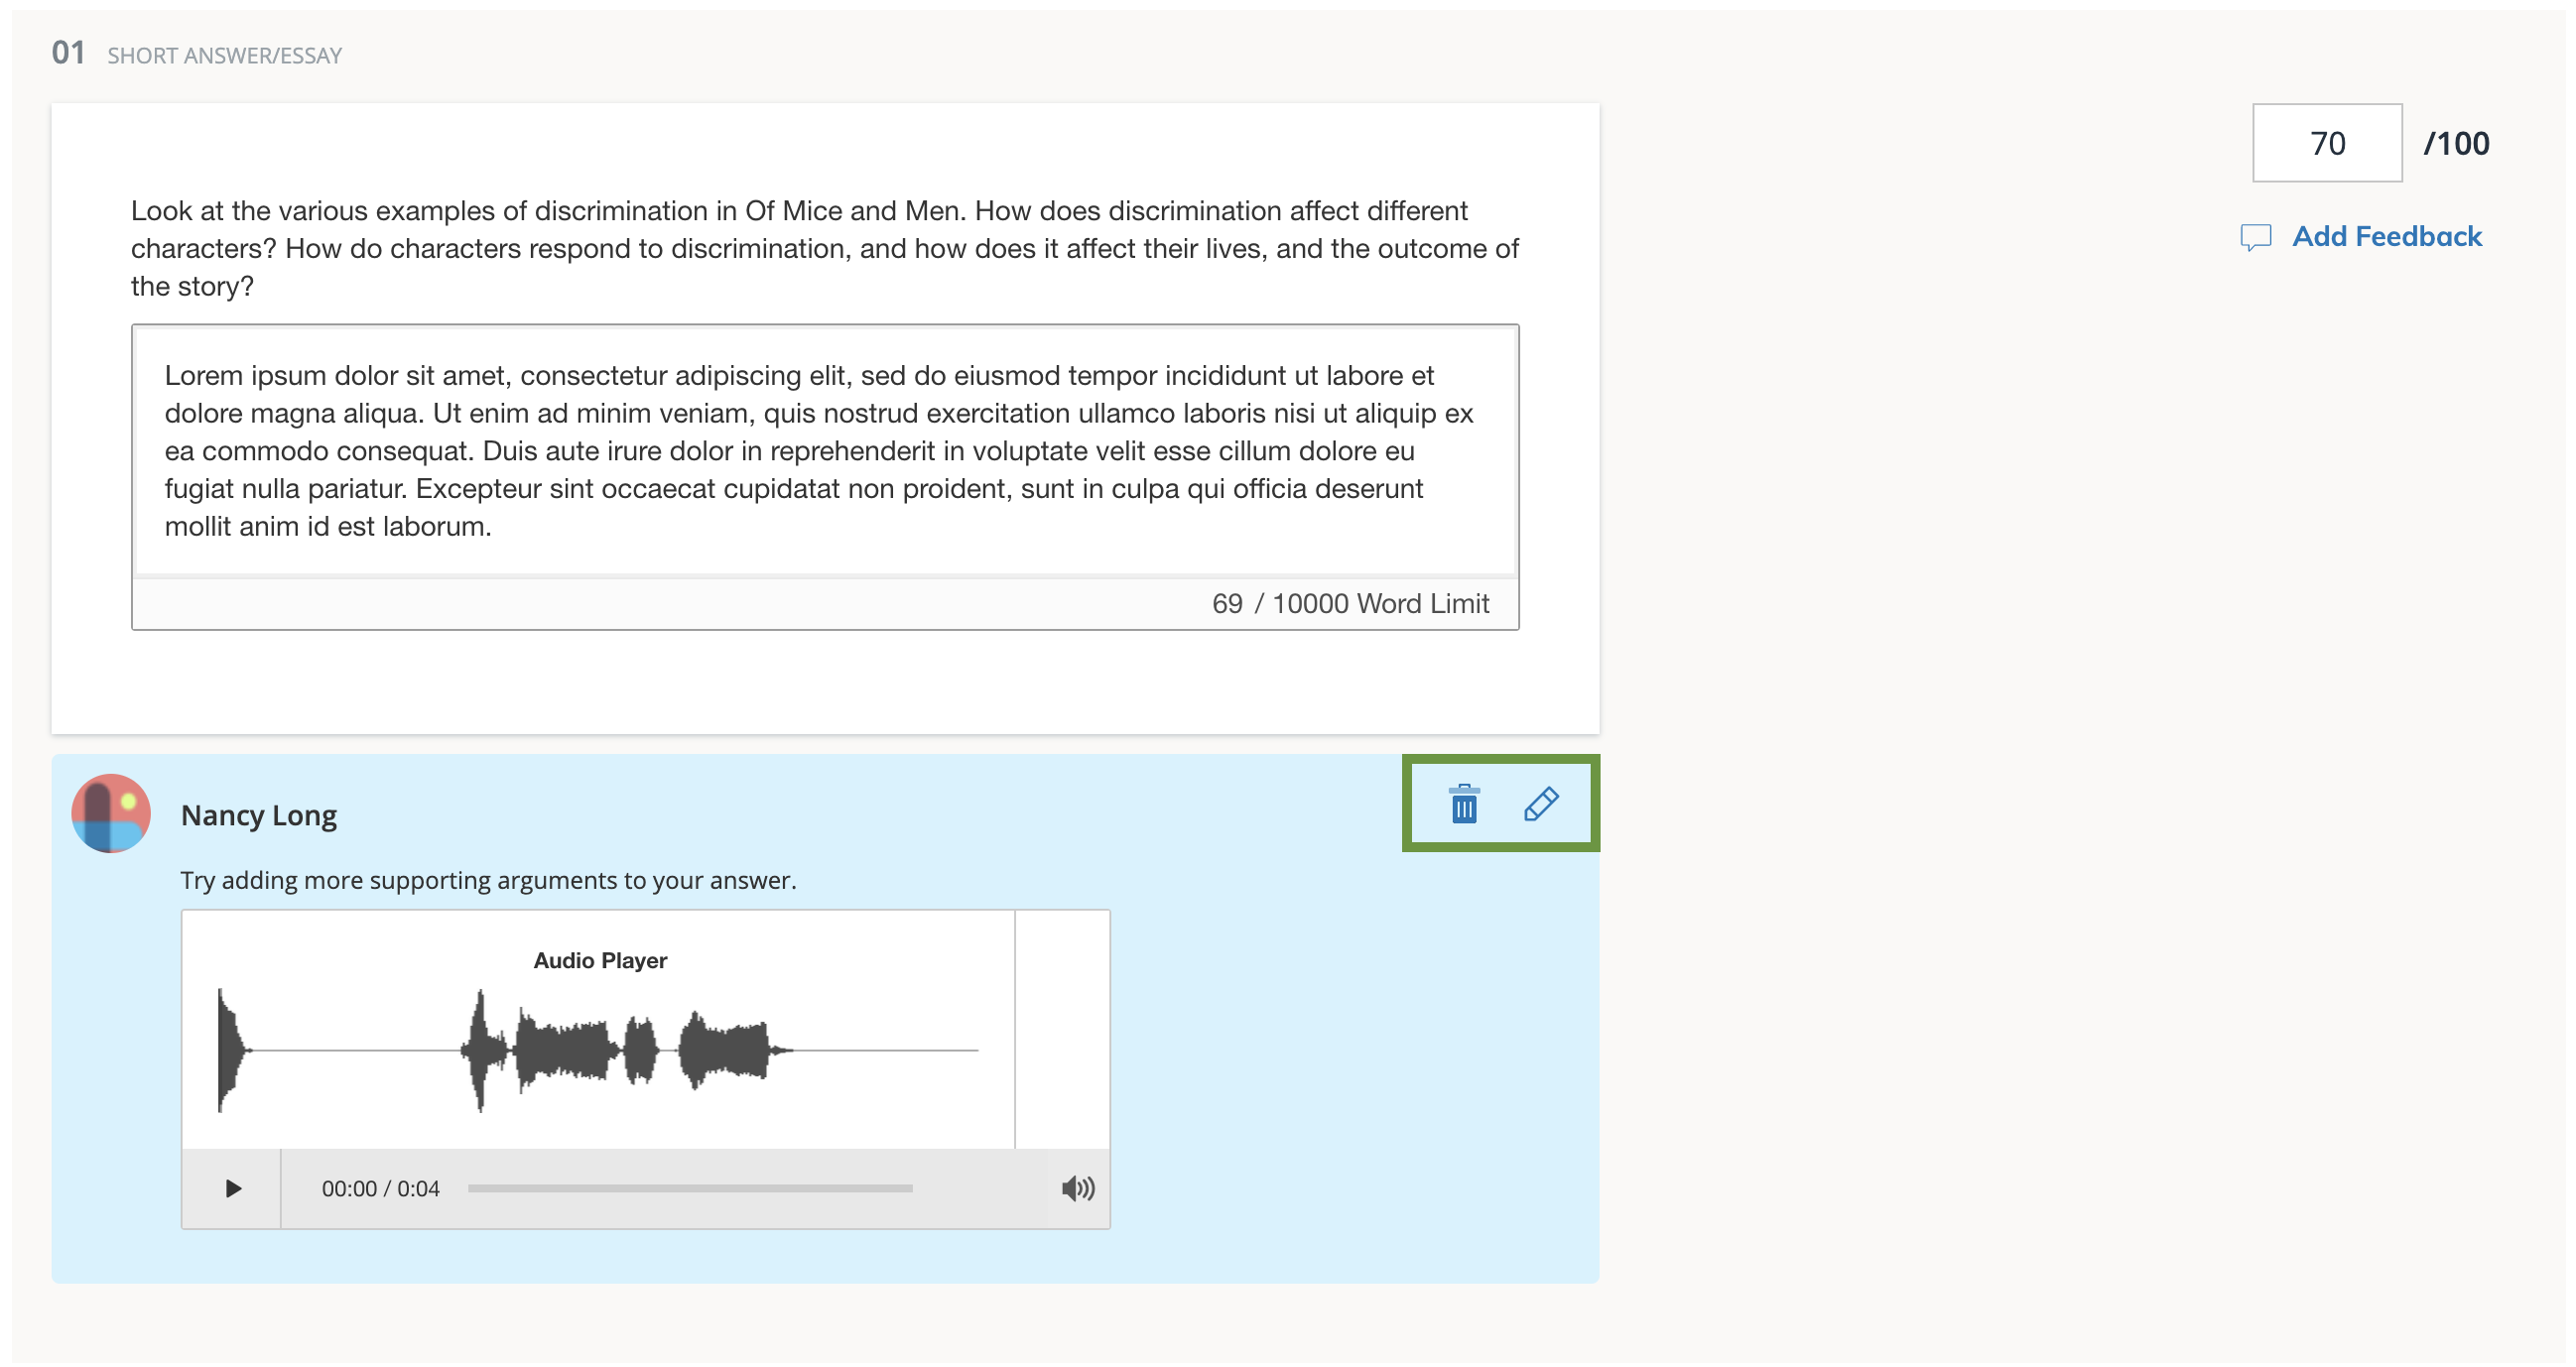
Click anywhere on a student’s submitted attempt to open it for grading. Add or adjust scores in the box that corresponds to the student responses.
-
Grade any subjective questions that require manual scoring.
-
Overwrite auto-scored questions.
-
Select clear override to remove a manual score. If the question already had an automatically calculated score, remove the override to revert to this score.
The Attempt Score field updates automatically as you add or adjust question scores.
-
The attempt score is the total points earned out of the points possible for that submission.
-
You cannot edit the attempt score directly.
-
To change a student’s attempt score, adjust the points for one or more individual questions.
-
To change a student’s overall assessment grade, update the Gradebook Points from the By Student view or the Course Gradebook.
-
If you update the correct answer setup after students have submitted an assessment, for example, by changing the correct answer, you can choose to automatically rescore existing submissions, so scores reflect the update.
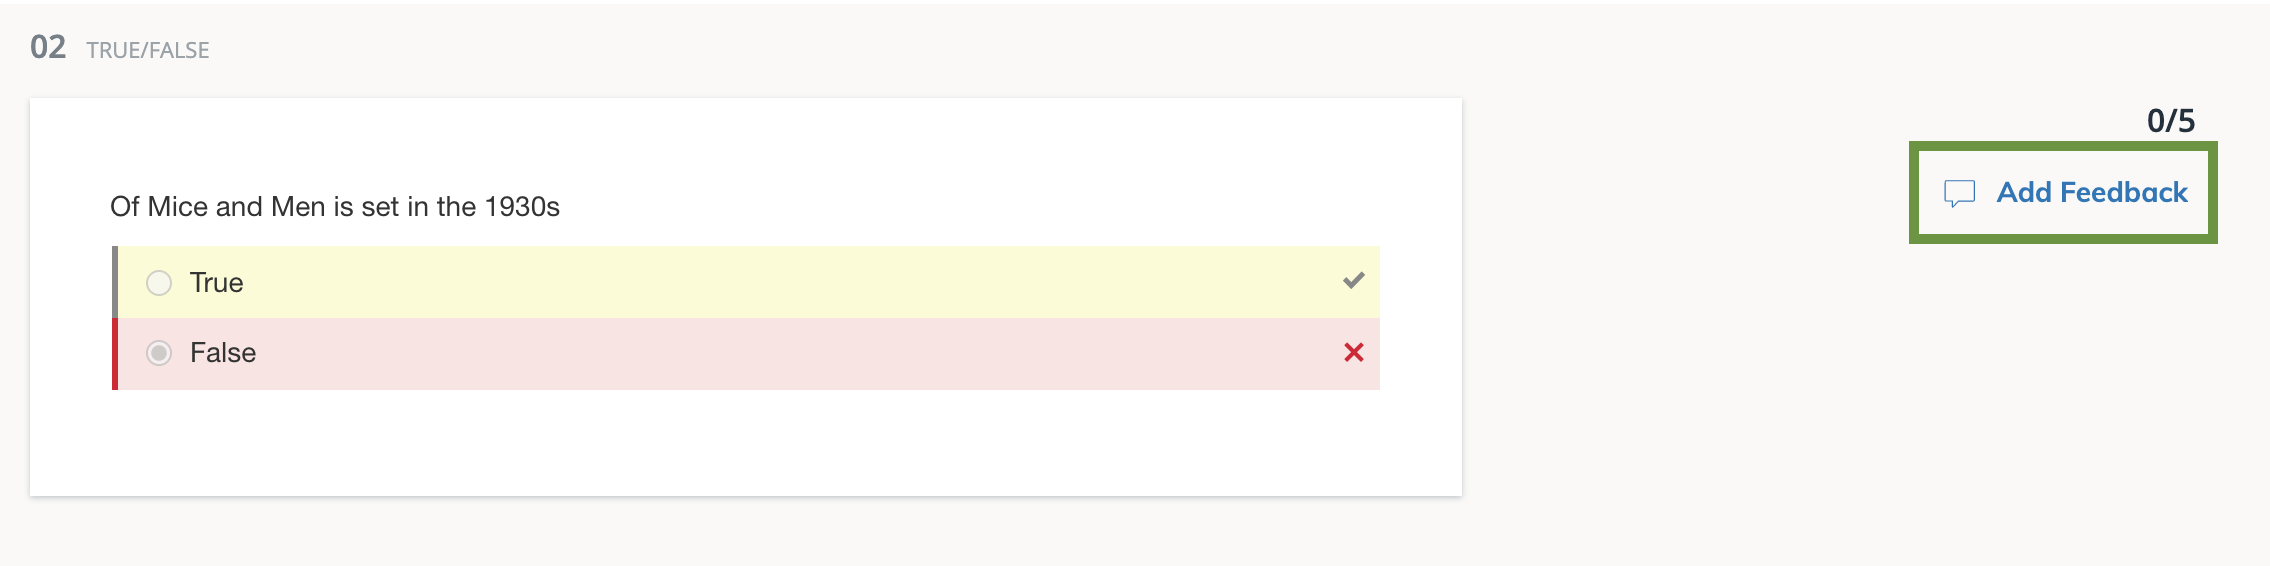
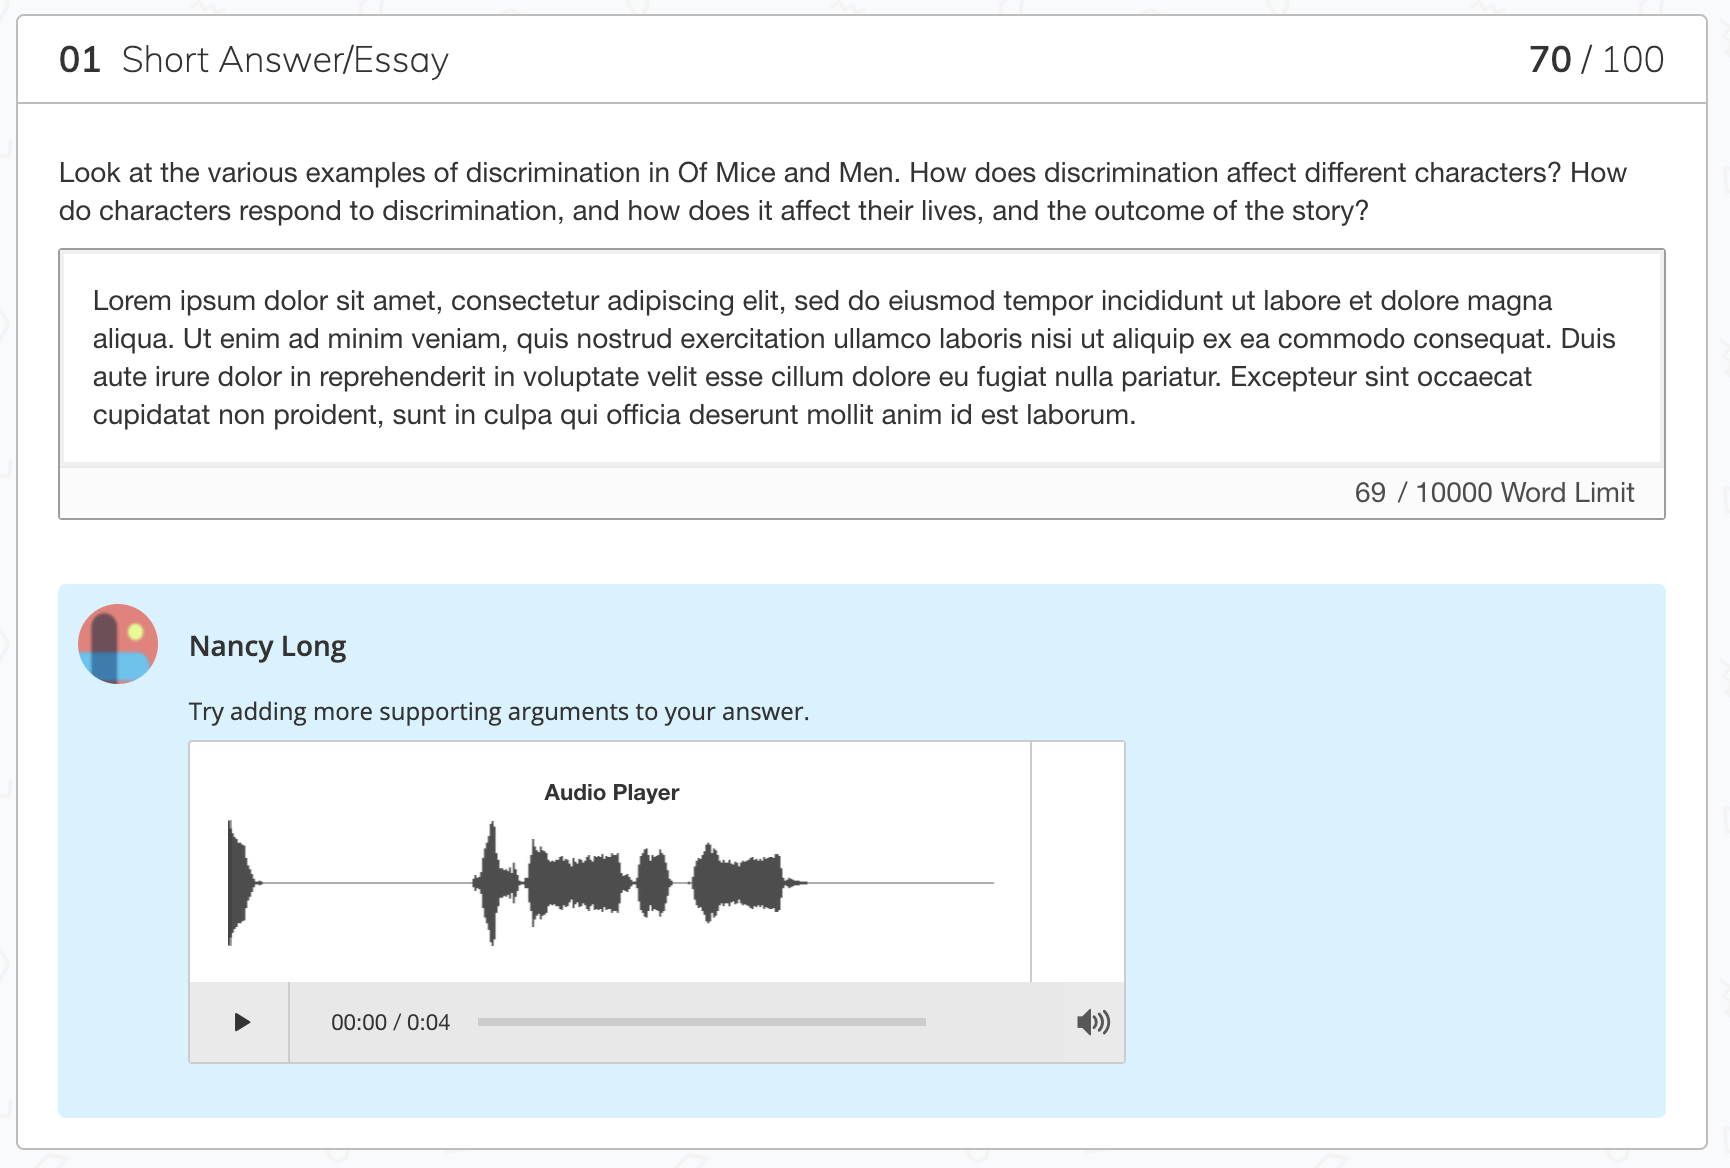
Add feedback
You can provide feedback on each student’s responses to help students improve their outcomes. Switch between tabs to include text, audio, and video feedback in the same response.
-
Click Add Feedback for an item to enter your comments.
-
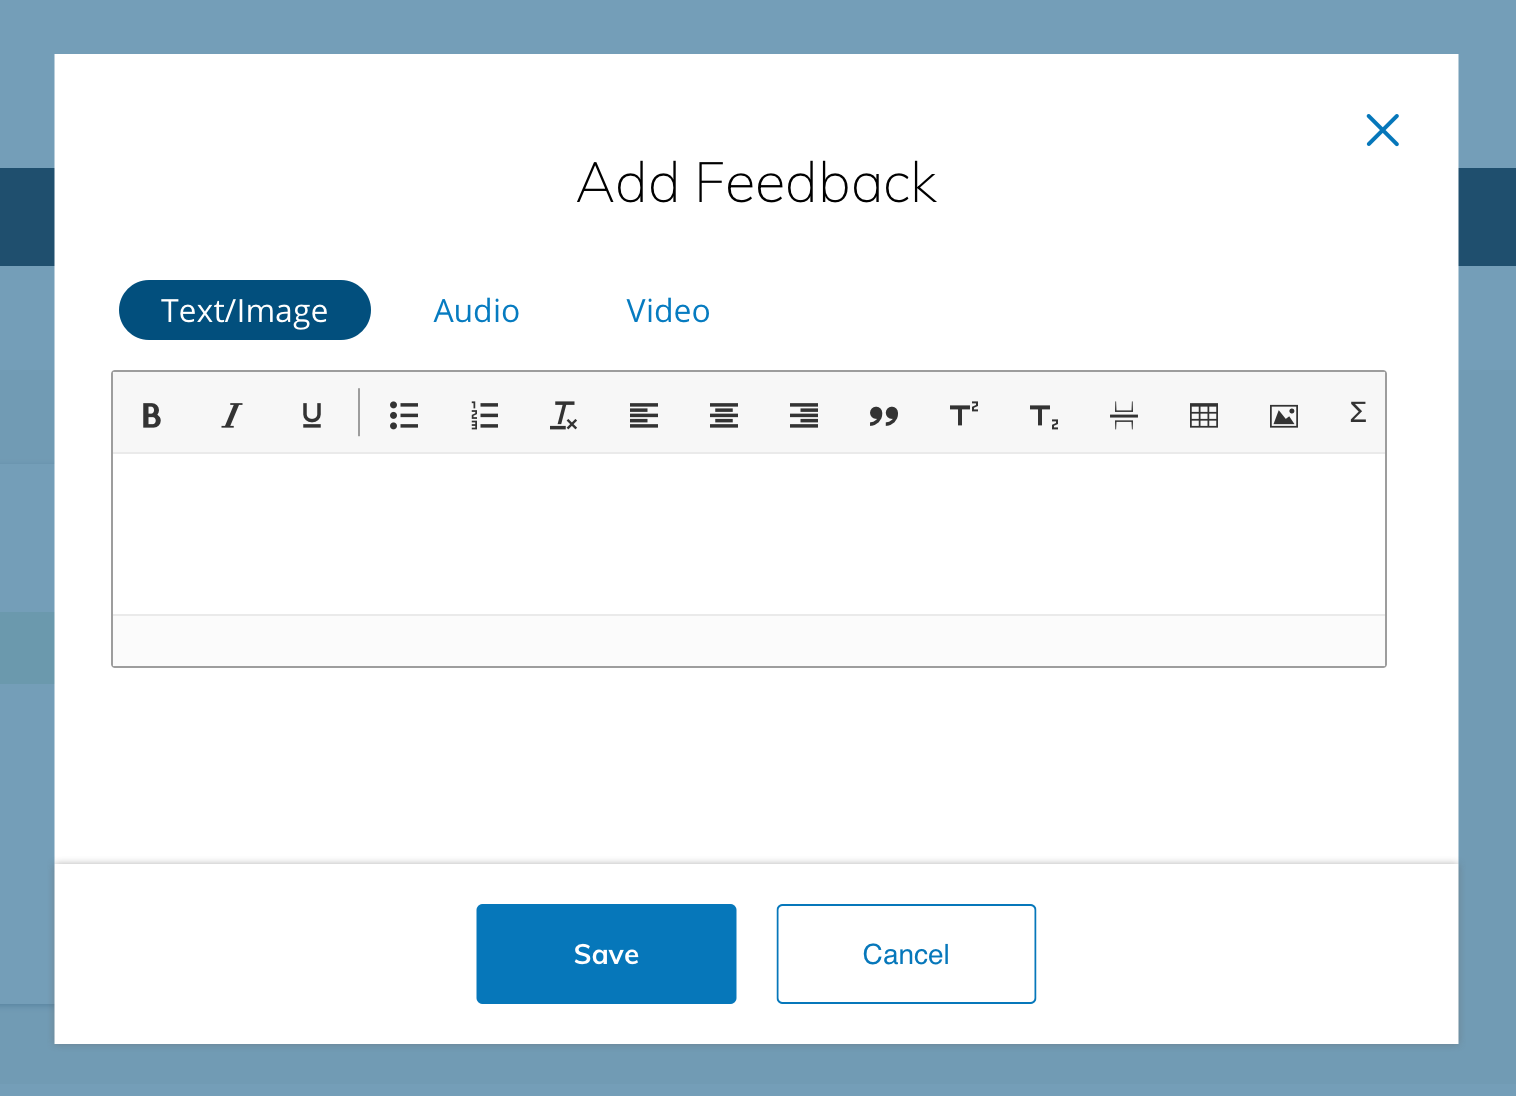
Choose how you’d like to leave feedback:
-
Text/Image – Use the rich text editor to add written comments and images.
-
Audio – Click Audio, and then select the Record to start recording.
-
Video – Click Video, and then select Record to capture video feedback.
-
-
After the feedback is saved, click the pencil or trash can icon to edit your comment or delete it.
Student view
Students can access the feedback directly from their submission when Allow students to view results after an attempt is submitted is enabled in Student Settings.
Grading a student attempt from the course gradebook
From the gradebook cell for the assessment attempt in the course gradebook, you can perform several grading functions:
-
Click the score and enter a new value to overwrite the overall grade for the attempt.
-
An orange pencil indicates the score has been overridden.
-
Click the pencil icon to clear the override and restore the original score.
-
-
Click the puzzle piece icon to review the student assessment submission.
-
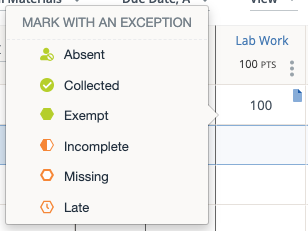
Click the flag icon to add an exception to the submission.
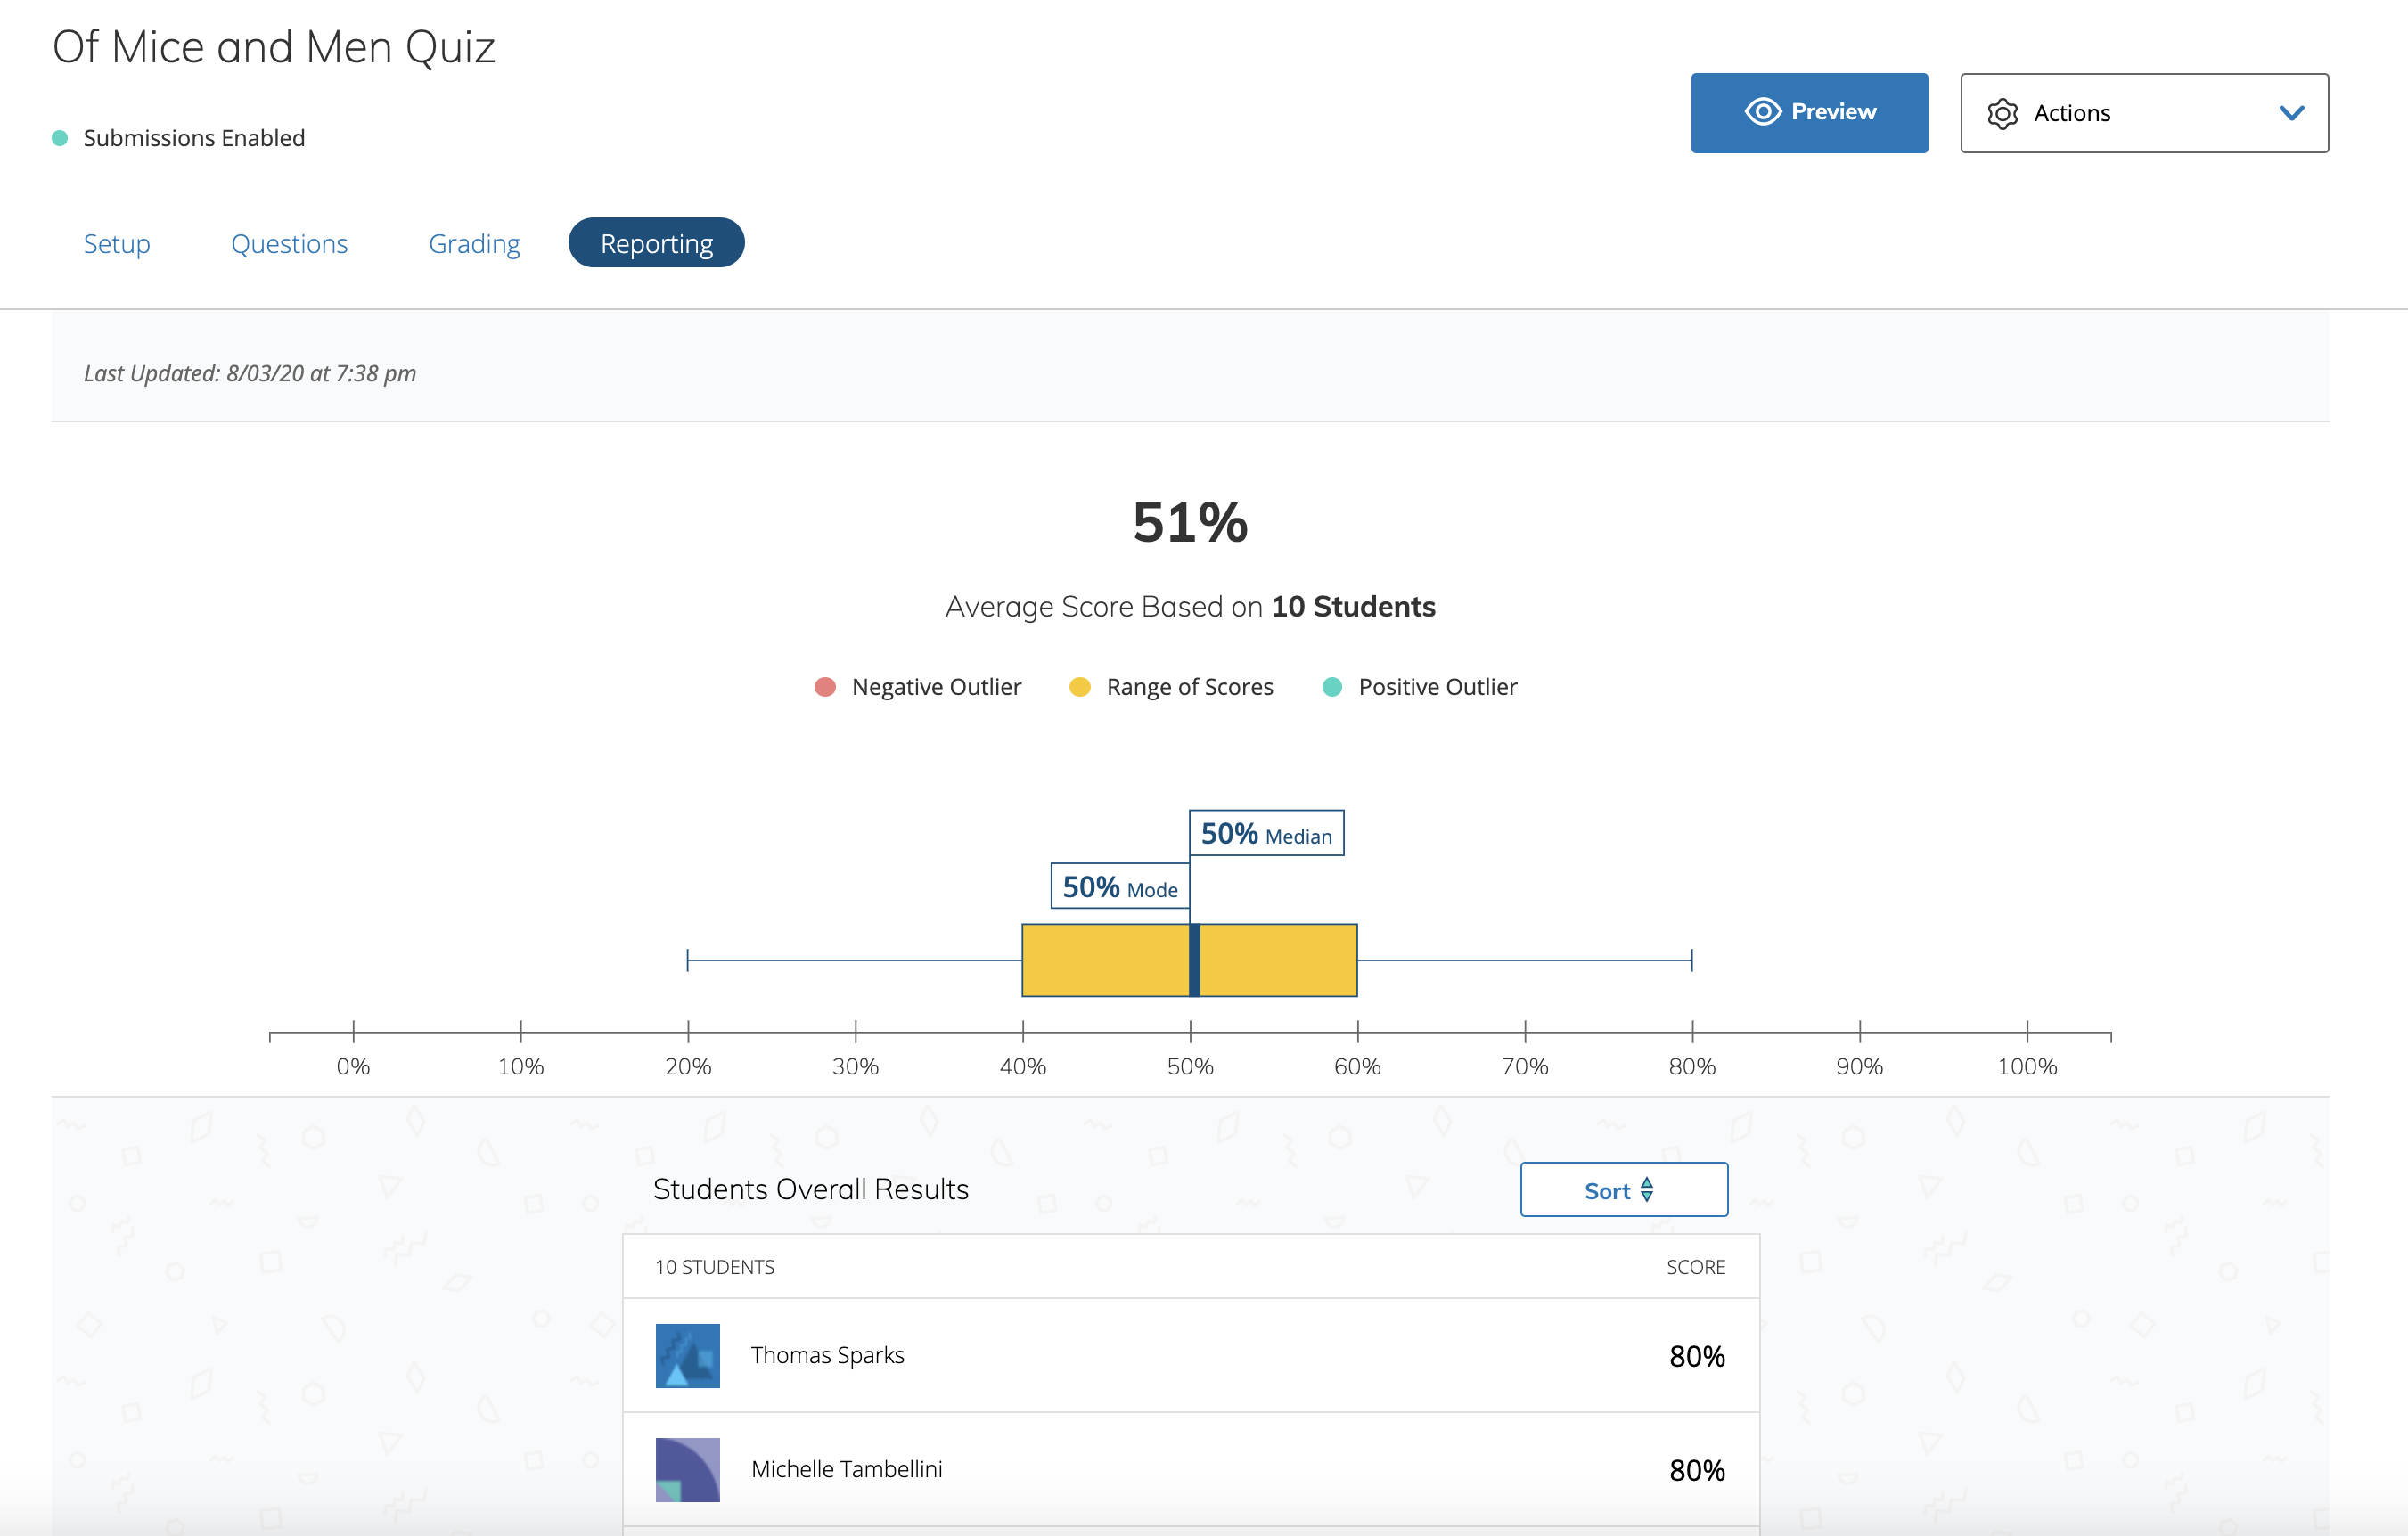
Assessment reporting
Assessment reporting provides immediate feedback based on student responses to assessment questions. The Reporting area provides insights into individual performance, class averages, and overall assessment results—helping you understand how students are progressing at a glance.