
Number Line: Enhanced Question Type (Enteprise Only)
Use the Number Line question type to allow students to drag points or other content on a number line. Use number lines for traditional math questions, or alternately for other types of question, such as science or history (placing a series of events in correct order, for example).
Question Setup
Enter your question into the Question Setup field.
Use the Rich Text Editor which appears when you click into the Question Setup field to apply formatting such as bold and italics, or to insert images or tables. Hover your mouse over the individual icons to view the tooltip explaining the function of each button.

Enter a Title, and add the number line's Minimum value and Maximum value. These will appear on the number line in Correct Answer Setup.
In the Possible Responses area, list options that students taking the test can drag on the number line.
Click +Add to add more options. Possible responses may include numbers and characters, and they may include fractions as well. Click X next to a possible response to delete it.
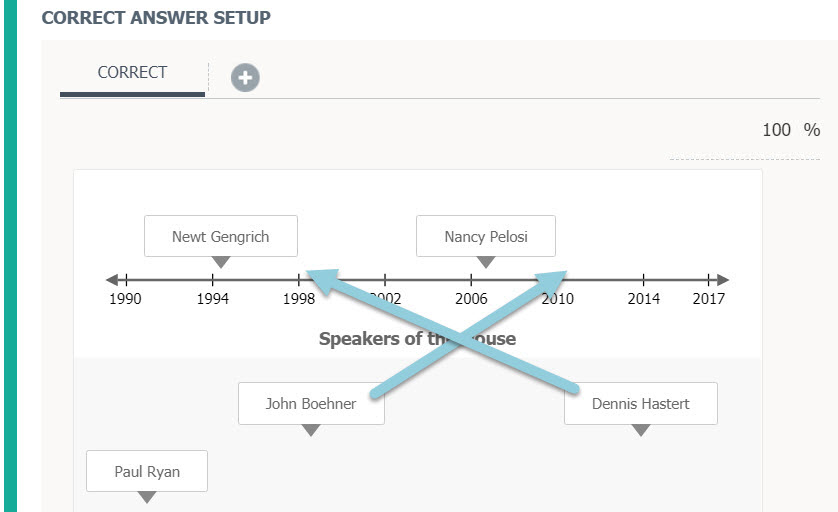
Correct Answer Setup
In the Correct Answer Setup field, drag the Possible Responses to their correct locations on the number line.
Click the + button at the top of the Correct Answer Setup area to enable an additional set of acceptable responses to the blanks in the question.
Click into the percentage field to the right of the additional answer to determine whether the alternate answer is worth partial credit and to set the percentage of possible points students can receive for this answer accordingly.
Set the Correct Answer Threshold to determine how close to the correct answer a student response must be in order to still be marked correct. For example, if the correct answer is 4 and you’ve set the threshold at 0, only a response of 4 is marked correct. However, if you set the Threshold at 1, responses of 3 or 5 are also acceptable correct answers.
Additional Setup Options
Ticks
Use the Ticks section to configure ticks – marks at regular intervals on the number line.
Enable Show Ticks to display marks on the number line.
Enable Snap to ticks to have responses snap to the nearest tick on the number line when a student drags the option. For example, if the number line has ticks at every whole number between 1-10, and a student drags a response to a spot next to the 6, it will automatically "snap" to the 6 on the line.
Insert a value in the Ticks Distance field - you can insert whole numbers, standard or decimal fractions, or mixed numbers.
If you use fractions as the distance, also specify Fractions format, which defines how fractions are rendered on the number line:
- Not normalized and mixed fractions - displays only not normalized and mixed fractions.
- Normalized and mixed fractions - displays only normalized and mixed fractions.
- Improper fractions - displays only improper fractions.
Define the Rendering base if the label frequency is greater than 1. This option sets if labels render from zero or Line minimum value.
Labels
In the Labels section, you can set number line labels options.
- Show specific labels: Add specific points that should be included in the line, including fractions, decimals, and mixed numbers. Separate multiple numbers with commas.
- Frequency: Set how often to show a label on the number line. For example, set the frequency to 1 to display labels at every tick, set to 2 to display labels every second tick, and so on.
- Show first: Display the first value in the number line.
- Show last value: Display the last value in the number line.
- Show left arrow: Add an arrow pointing left to the beginning of the number line.
- Show right arrow: Add an arrow pointing right to the end of the number line.
Author Notes
Enter Author Notes to explain why certain choices are incorrect, or why you chose to allocate a certain percentage of possible points to alternate answers. If you have edit access to a question, you will see this field. This information will not display to students.
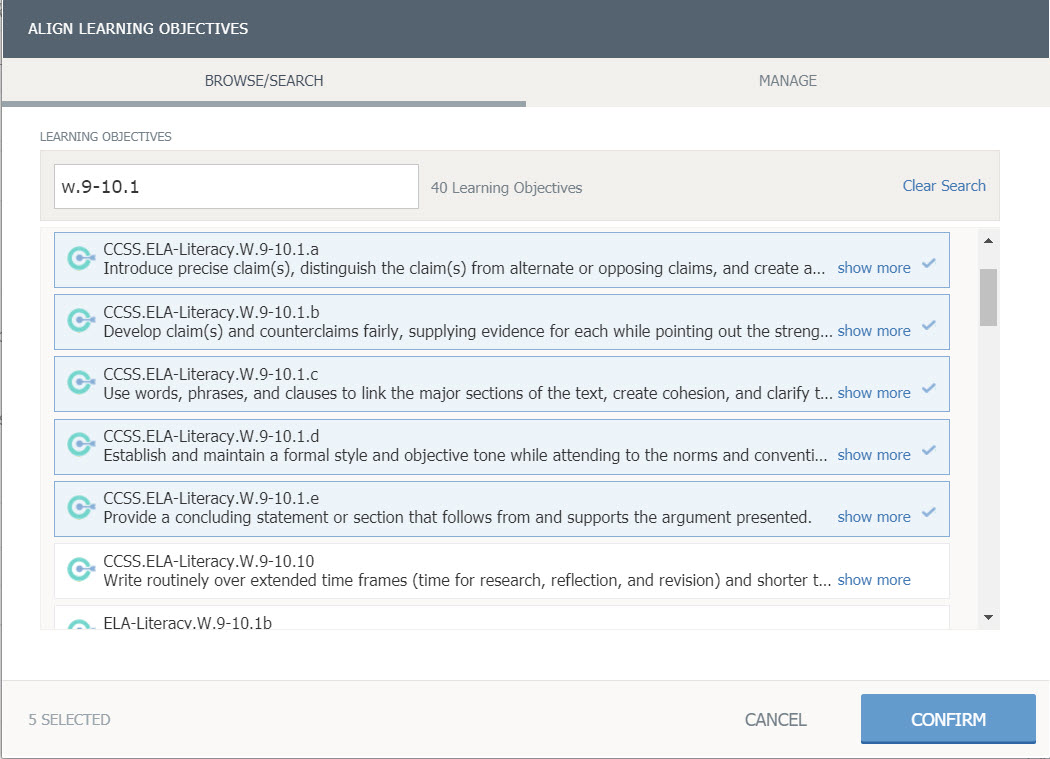
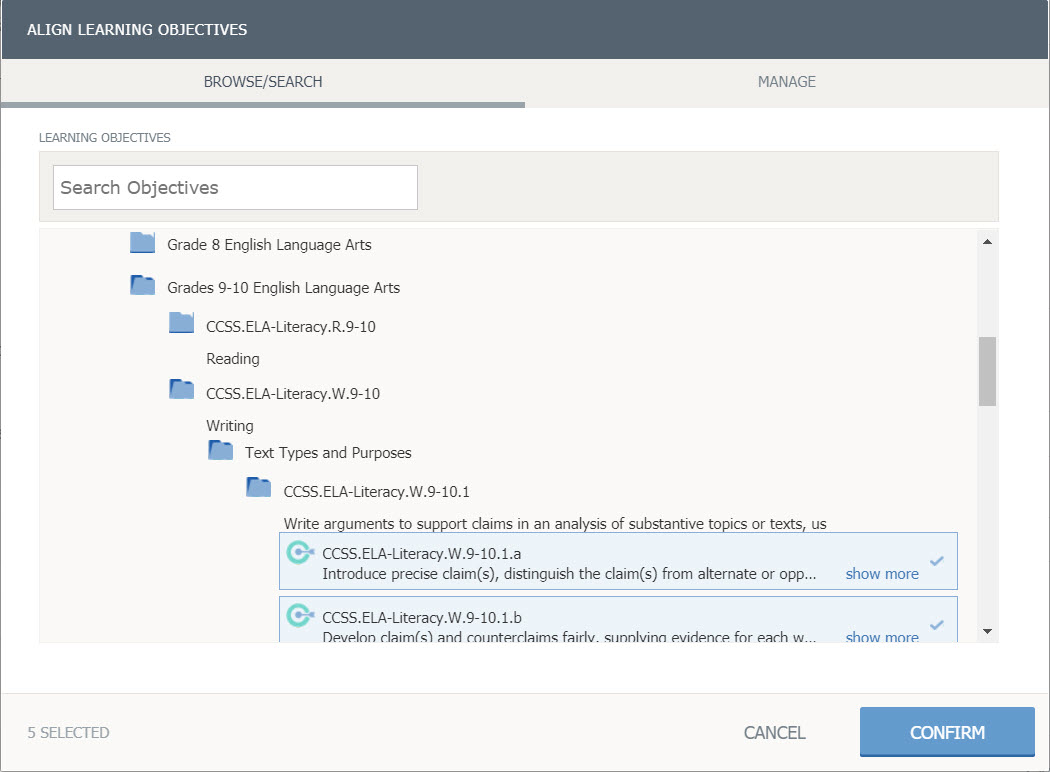
Align Learning Objectives
Click Learning Objectives to open the Learning Objectives browser window.
Click Browse/Search to find and add specific objectives.
Click Manage for objectives already aligned to the question.
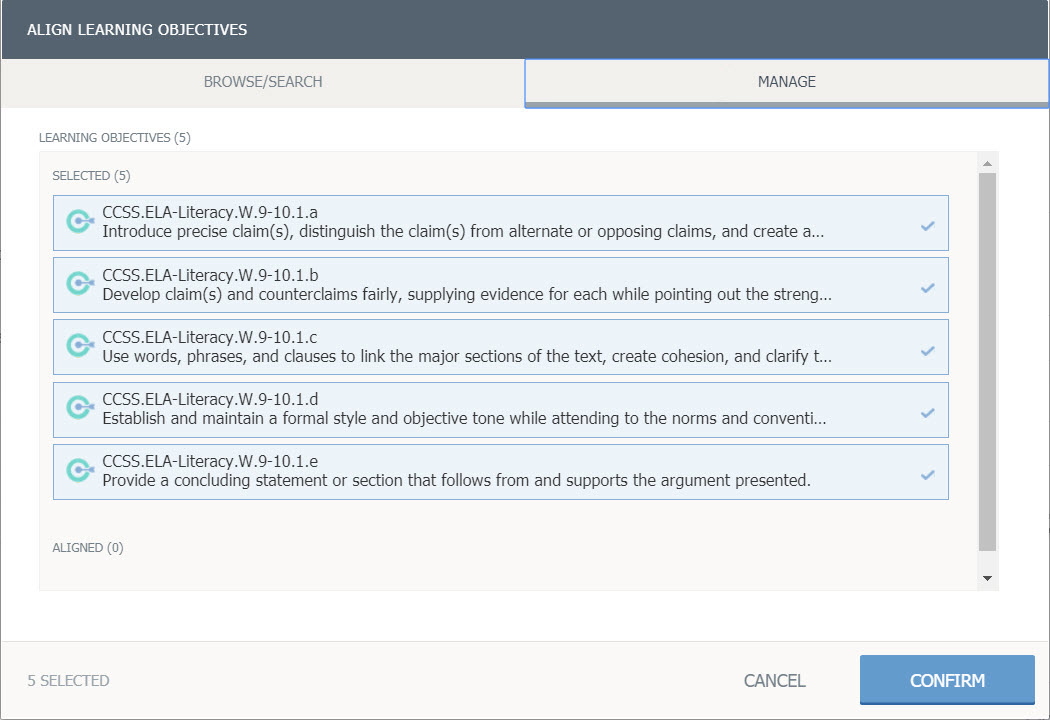
Click Confirm to save the learning objectives.
Preview and Edit Question
To see how the question will appear to a student taking it in an assessment, click Preview Question.
To exit the preview screen and return to the question editor, click Edit Question.
Once you are finished editing the question, click Save.