
Import student demographic data, such as ethnicity, economic status, or special education status, into Schoology to review assessment results by these attributes. Use these reports to identify needs, set goals, and track student proficiency.
Create demographic attributes
AMP Administrators with Manage Users permissions can create new attributes.
-
Navigate to Tools and select User Management.
-
Select Demographics.
-
Click +Attribute.
-
Enter an Attribute Name. Attribute Names can be up to 128 characters long.
-
Click Create.
Delete demographic attributes
Deleting an attribute is permanent. After being removed from Manage Users, all associated data is immediately deleted from Assessment Reports, and the attribute will no longer appear in reports or filters.
-
Navigate to Tools and select User Management.
-
Select Demographics.
-
Click Delete for the selected attribute.
-
Click Delete again to confirm.
Import demographic associations
After demographic attributes are created, students can have one associated value with each of the created demographics. To associate a student with demographic values, the user must upload a CSV file containing the associations.
Each student can have only one demographic value for each demographic attribute. For example, a student may not be associated with more than one Ethnicity. Instead, a student would need to be associated with an Ethnicity value of Two or More.
System Administrators can import demographics associations manually from the Demographics area of Import or by configuring the Demographics section of Auto-Import.
Manual demographic import
-
Prepare your import file.
-
The CSV for the import must have a header row. Each subsequent row will represent a student.
-
The following columns must be included:
-
User Unique ID
-
Attribute Names to match those in the Manage Users area
-
-
-
Navigate to Tools and select School Management.
-
Select Demographics.
-
Click Attach File, locate and select the file.
-
Click Continue.
-
From Map Columns, map the Demographics created in Schoology with the header row of the file. If there is no value in the student's row for an attribute column, the student will not have an associated value with that demographic.

-
Click Import.
You can monitor the progress of your import in the Status Log area. Process times are displayed in your organization's local time.
For optimal performance, Schoology processes imports and exports (manual or automatic) most efficiently between 7 PM and 6 AM Eastern Time (11 PM and 10 AM Greenwich Mean Time) Monday through Sunday. Imports or exports run outside this window may take longer to complete.
Schoology strongly recommends performing or scheduling all imports, exports, and bulk deletions during this time window.
Auto-import of demographics
-
Navigate to Tools and select School Management.
-
Select Auto-import.
-
Define the SFTP server and credentials. This can be the same as your other auto-import processes, or you can use a separate server specific to demographics.
-
Define the path to the file on the designated SFTP server.
-
Click Save.
-
Click Continue.
-
From Match Columns, enter the column headers from your CSV into the fields for each attribute to map the data in the file to existing attributes.
-
Click Save. The Demographics import will process with your scheduled auto-import, or you can click the gear icon and choose Run Now to initiate a demographic import. If your organization has enabled email notifications for Auto-Import, Schoology will send a confirmation email to the designated address once the import is complete.
-
If a configured demographic attribute is deleted, Schoology will still process the file but will log an error in the Status Log and skip importing the corresponding column.
-
To remove demographic values for students, follow the same process to import a CSV file with blank values in each student row for the desired attributes.
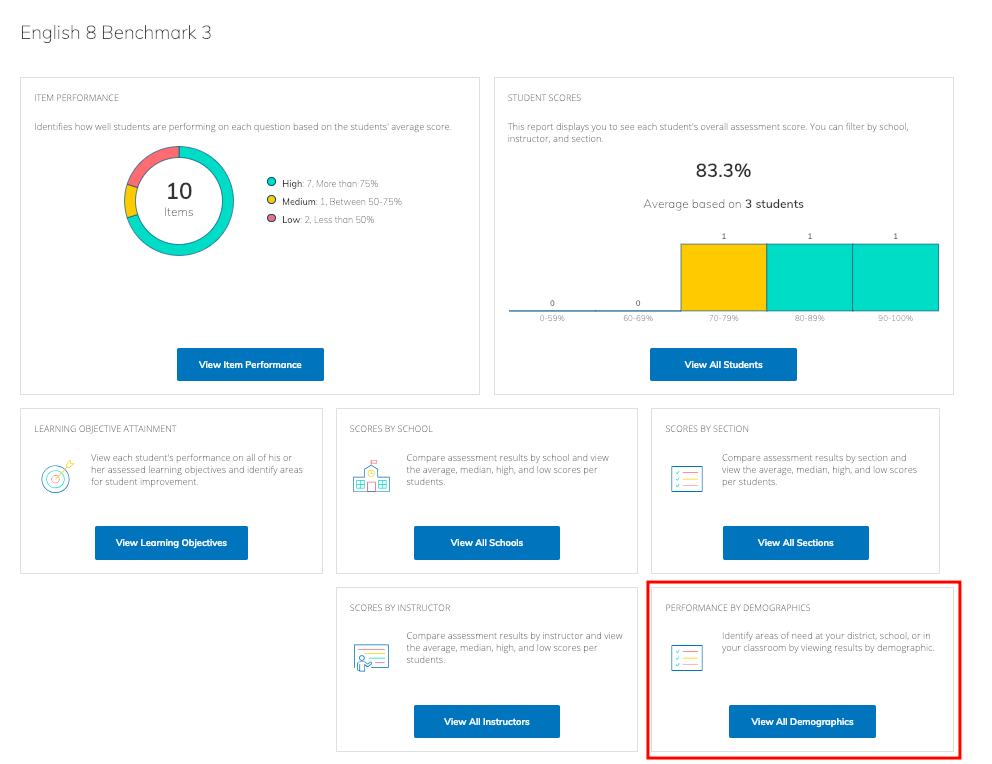
Review performance by demographics
All users with access to Assessment Results can review the Demographics report for managed assessment results. The students displayed in the report depend on the viewer’s AMP Administration permissions.
-
Navigate to AMP and select Assessment Reports.
-
Select a report.
-
Click View All Demographics.
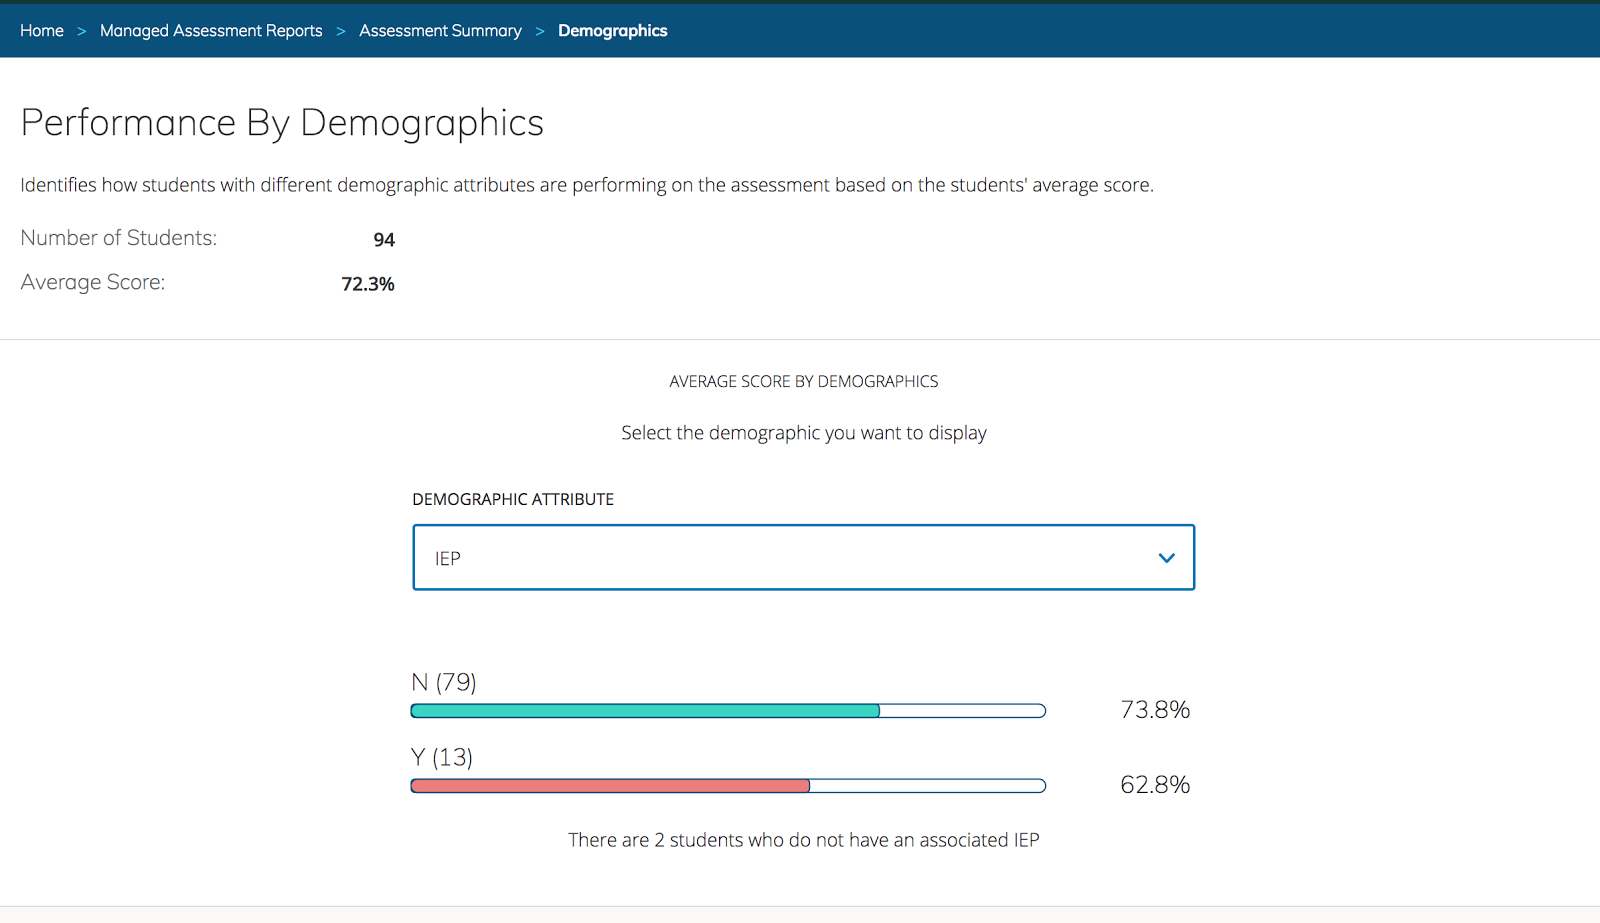
Select any demographic attribute from the Demographic Attribute list that was created in Manage Users and has associated students.
When a demographic attribute is selected, each demographic value displays in alphabetical order. The number of students appears in parentheses next to each value, along with the average assessment score for those students.
-
A red bar indicates that the average score for that demographic group is below the overall student average.
-
A green bar indicates that the average score for that demographic group is above the overall student average.
Filter overall and mastery results by demographics
You can filter Overall Results and Mastery Results by demographics for student, instructor, section, or school views.
Use the +More Filters option to filter by score range, demographic attribute, and demographic value.
-
Select multiple values for the same demographic attribute to include all matching students.
-
Filter by multiple values across different demographic attributes to display only students who match all selected criteria.
You can select up to 5 values per attribute for up to 5 attributes. When applied, the report will display only the students who meet the selected filters.