
Using the Google Drive App (Enterprise Only)
The Google Drive app is a new Resource App from Google, now available in Schoology from the App Center. Resource apps enable you to integrate third-party content directly into the Resource Center. This means that all of your personal, shared, public, and external instructional resources are consolidated in one place. With this integration you can:
- Access your Google Drive content from your Schoology Resources.
- Add Google Drive content directly within Schoology and sync to Google Drive.
- Add content from the Google Drive app to a course or resources.
- Import your Google Drive content from directly within courses and groups.
- Use as an alternative to the Google Drive Resource App from Schoology.
- Control how users in your organization share Google Drive files.
- Add your Google Drive content to updates, discussions, assignments, pages, and tests.
- Accept submissions from students who are connected to Google Drive.
- The Google Drive app by Google can be used as an alternative to the Google Drive Resource App by Schoology.
- The Google Drive app is a separate app from the Google Assignments App by Google.
To use the Google Drive app, a System Administrator must install the app from the Schoology App Center. Contact the Support Contact at your organization if you do not see the option to use this app in your Resources.
How to Access the Google Drive App in Resources
The Google Drive app is installed and configured at the district level by a System Administrator. Once the app is installed and configured, the app is available in the Resource Apps area in your account.
- Click Resources in the header.
- Click Apps on the left menu.
- Select Google Drive app from the apps list.

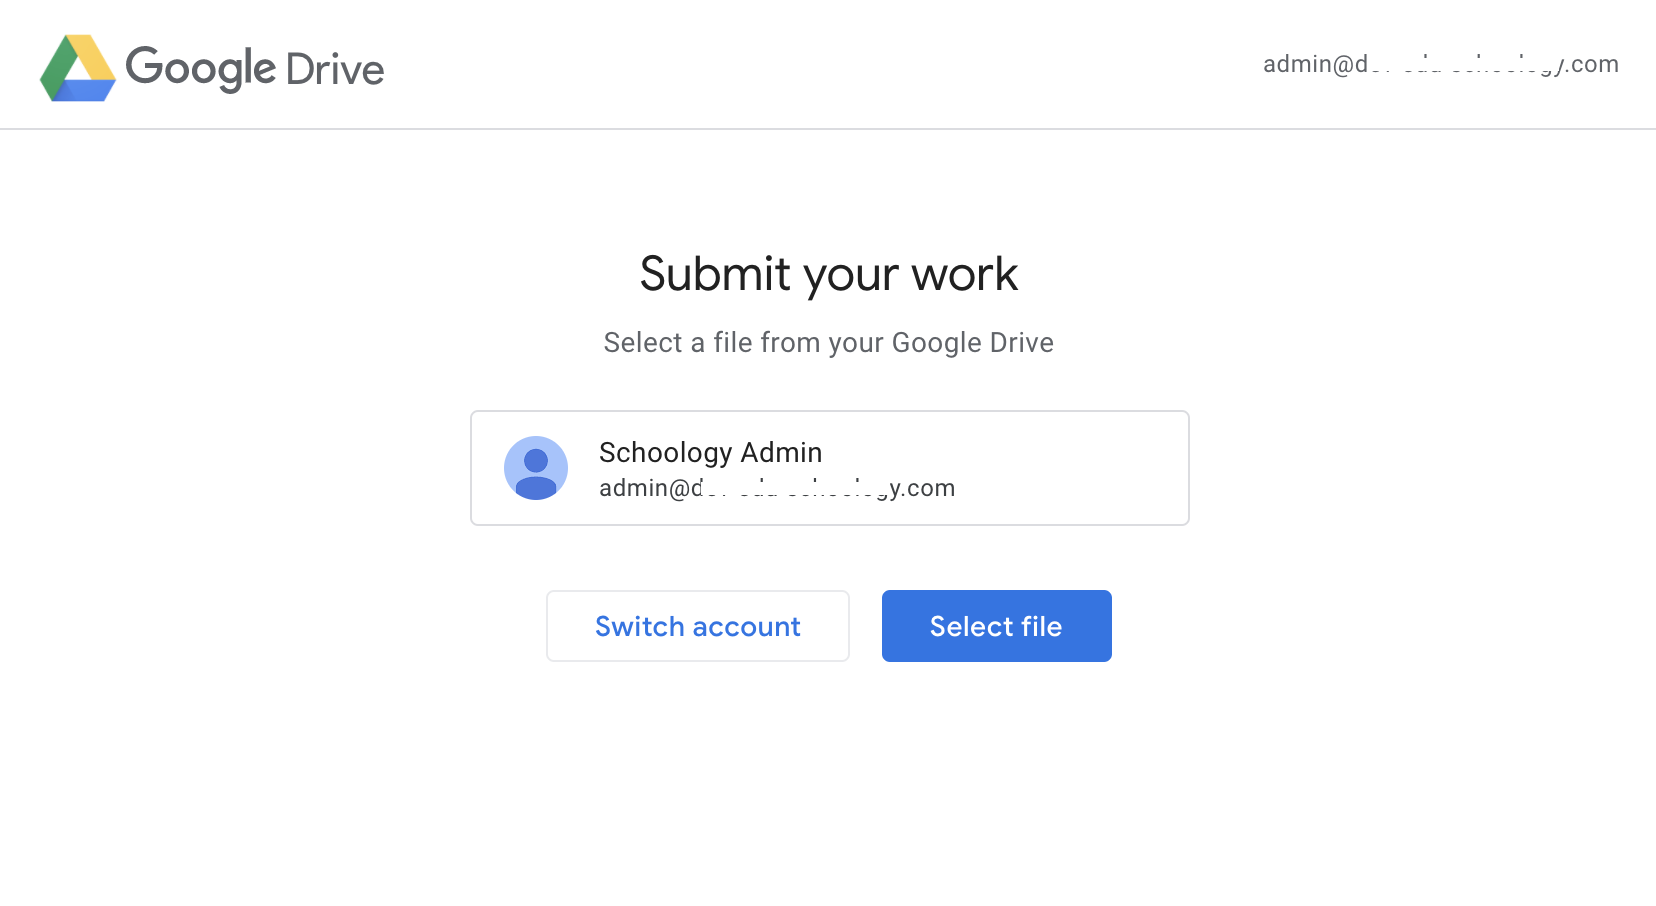
- Sign in to your Google account if this is your first time using the Google Drive app. Otherwise, check the correct Google account is displayed. You can choose Switch account if you need to sign into a different Google account. Ensure pop-ups are enabled on your browser.
Add Google Content to a Course or Resources
To add files from your Google Drive to Schoology:
- Open the Google Drive app by navigating to the Resources area of Schoology and select Apps from the left menu. Make sure you're logged into your Google account.
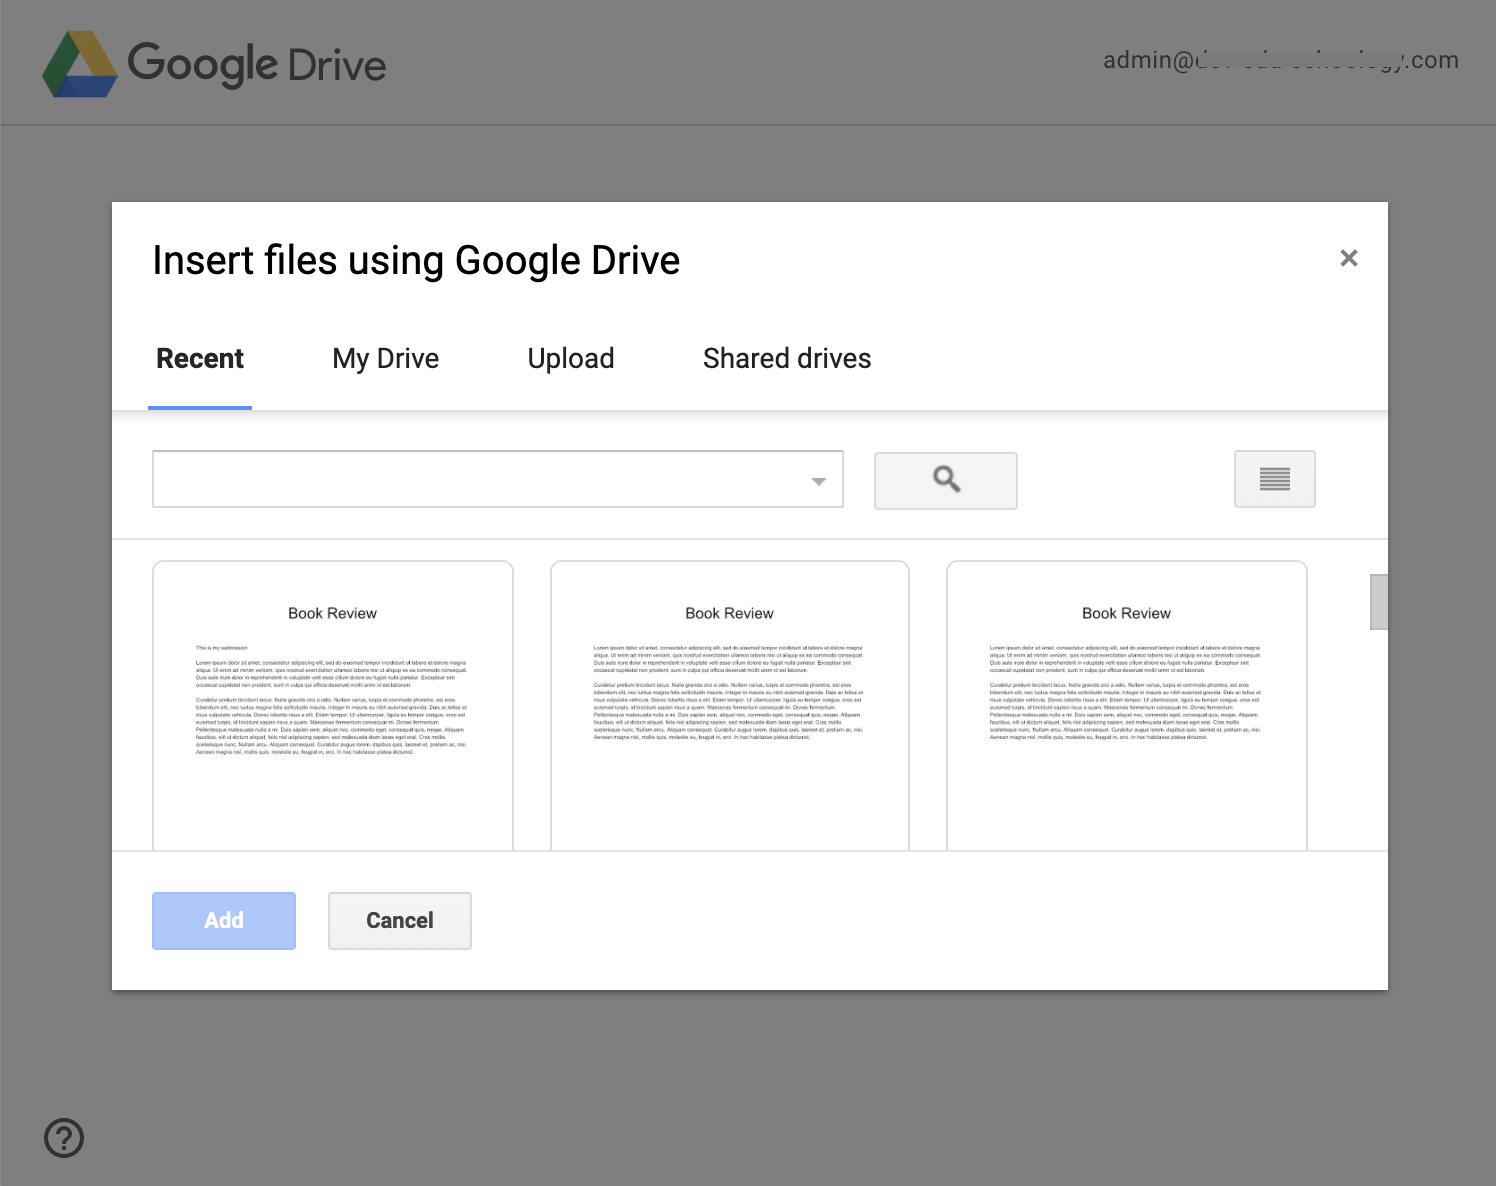
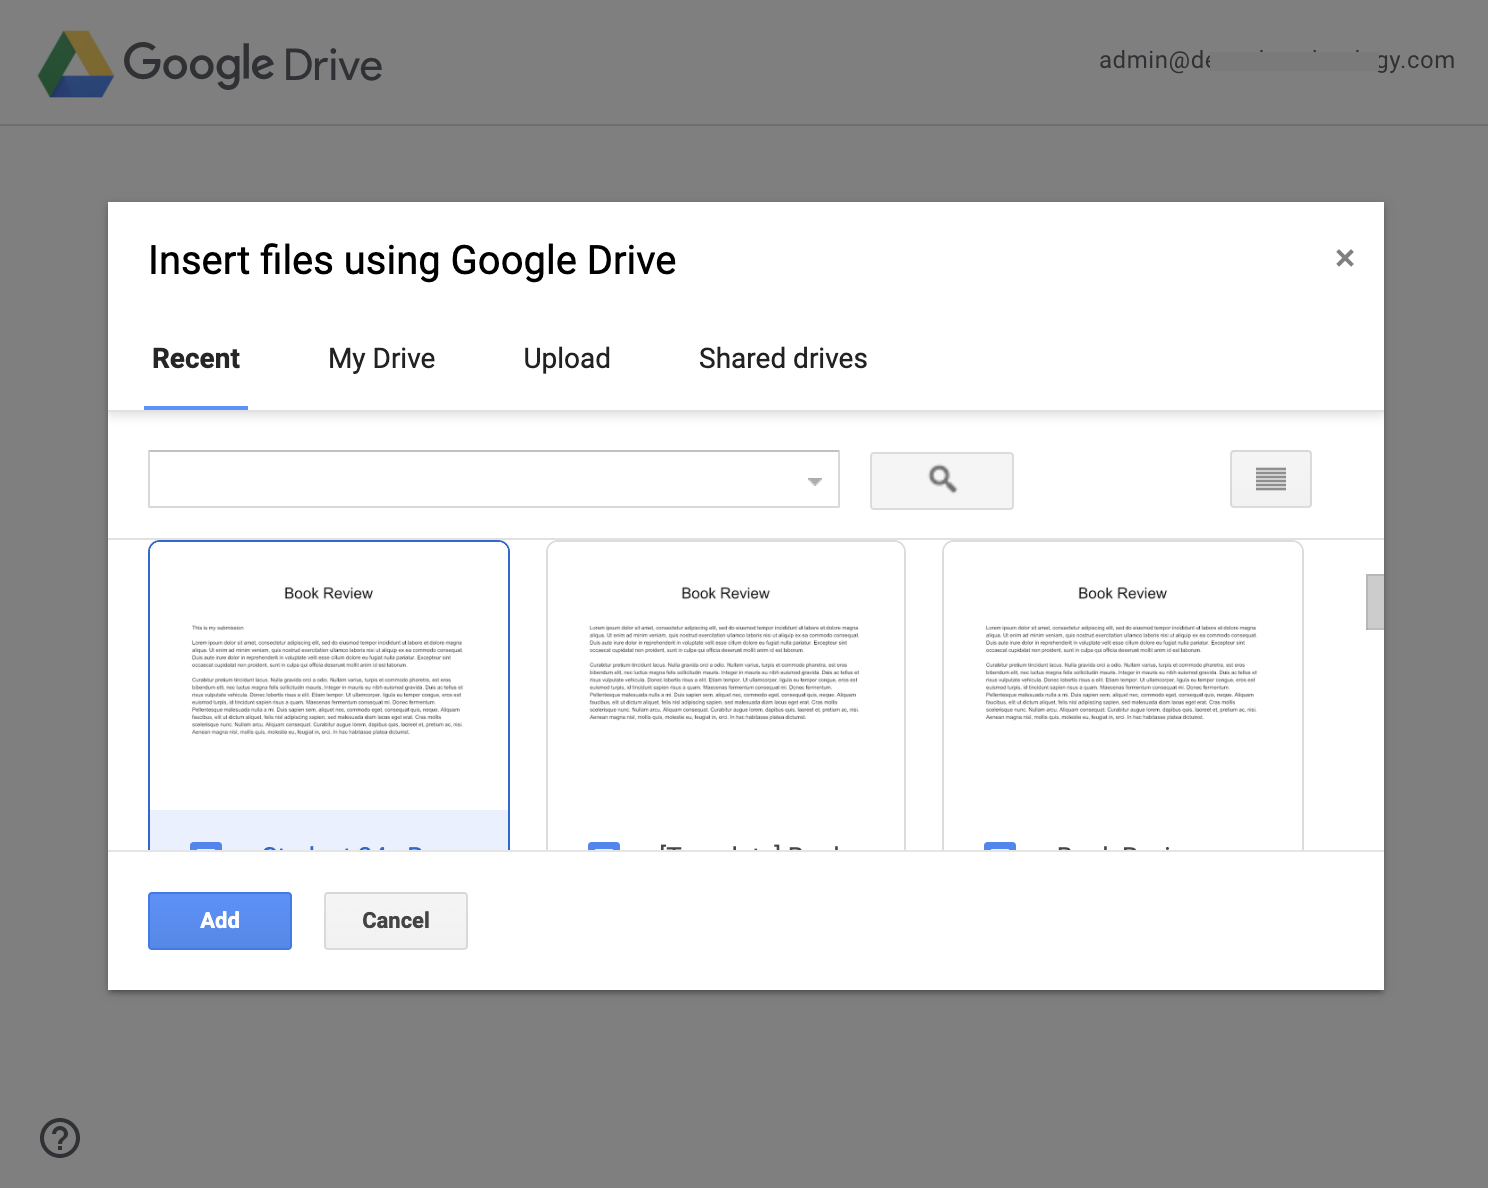
- Click Select file from the homepage.

Select from among the options to add a Google document, spreadsheet, presentation, or drawing. Enter words or phrases in the Search field to filter your results. Items matching your search terms populate automatically in the results list.
You may only select one file at a time.
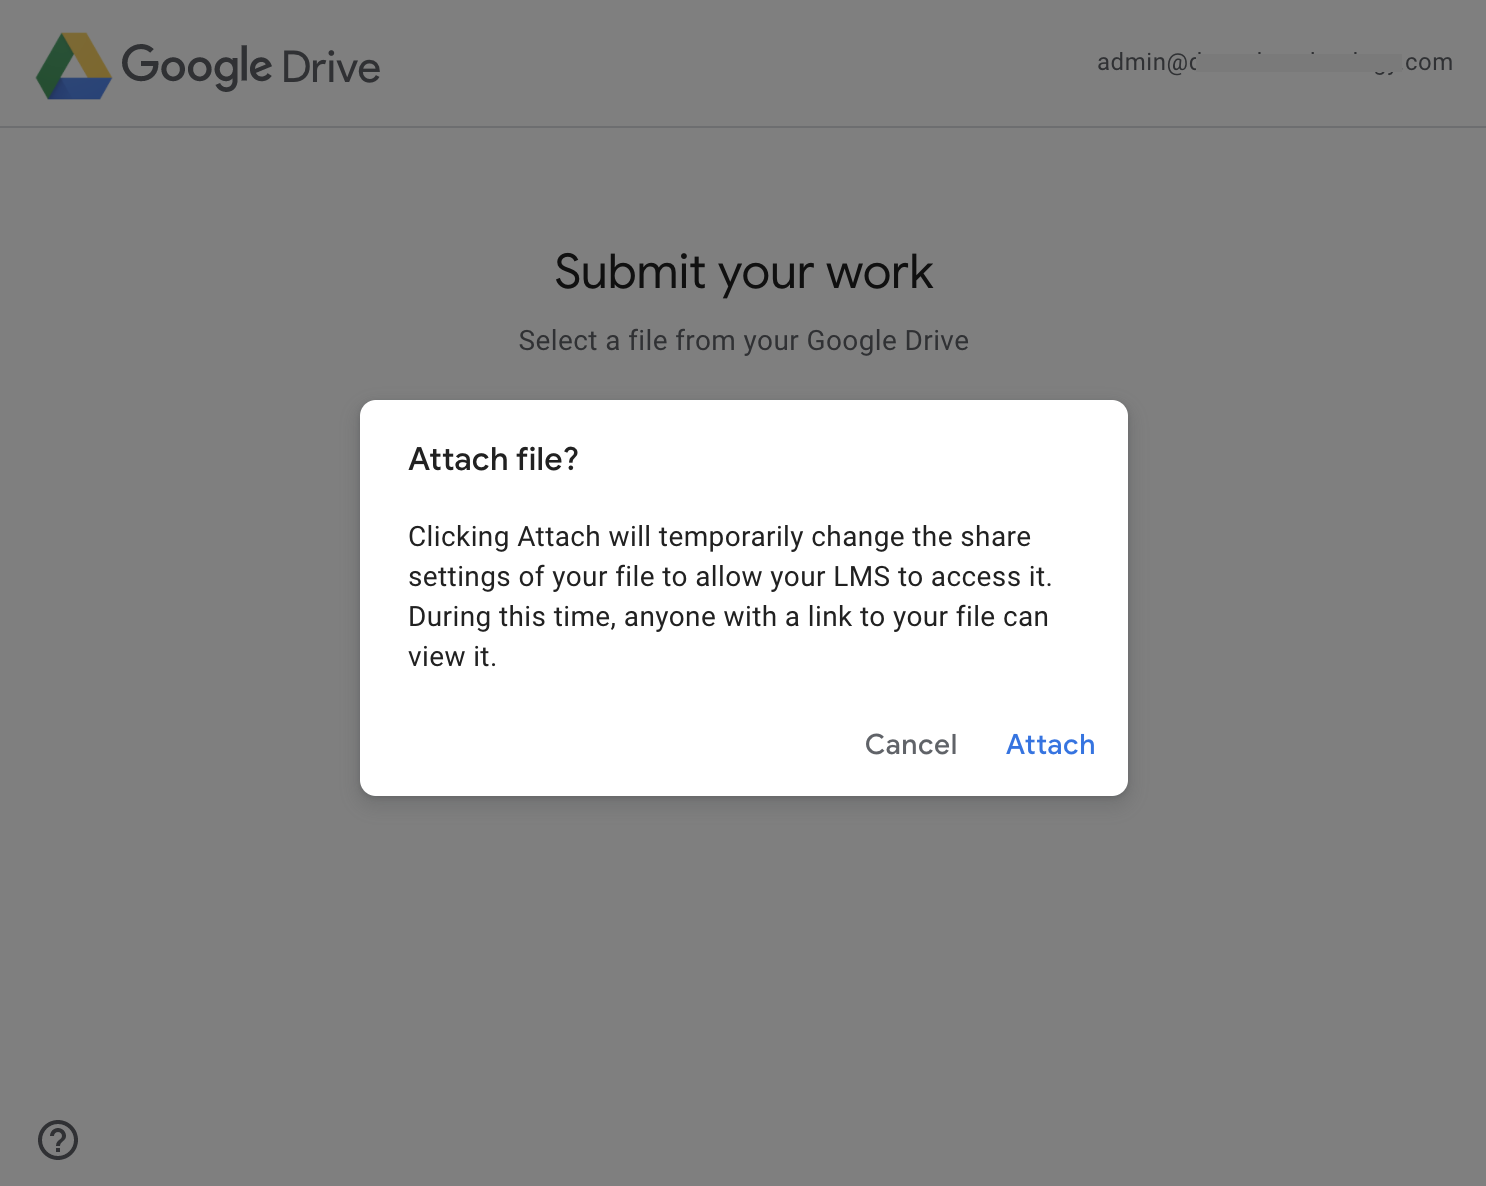
Click Add and then Attach.
This will temporarily change the share settings of your file to allow Schoology to access it. During this time, anyone with a link to your file can view it.
Once you’ve confirmed to add a file, you can choose to Add to Course or Copy to Resources and select the course or resource collection to add the file to.
Files may be added to collections in your Personal Resources or Group Resources.
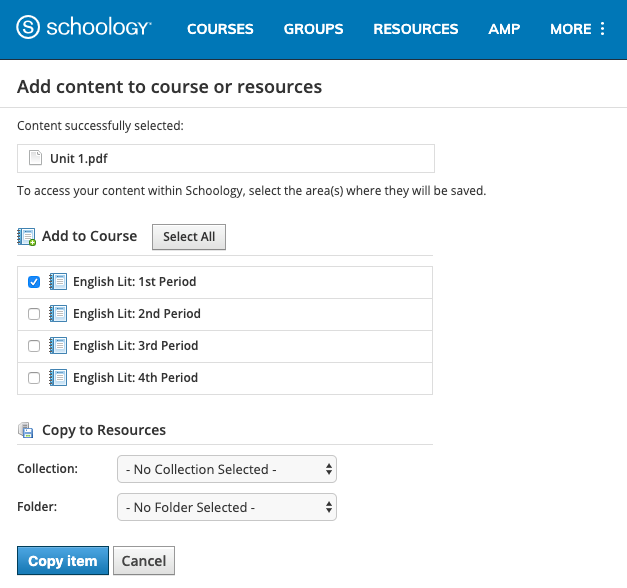
Click Copy item to confirm.
- Files may not be embedded or added as a link or private link, only a static file. You can view this copy of the resource directly in Schoology, but any changes made to the item in Google Drive are not reflected in the course.
- Files cannot be edited or deleted from within the app. They must be deleted or edited directly in Google Drive.
Add Google Content from Directly Within a Course
To add Google Drive files from within your course:
- Click Add Materials, or point your cursor in the location on the materials page where you want to add the resource and click the dotted green line that displays.
- Click Import from Resources to open your Resources collection.
- Click Apps and open the Google Drive app.
Click Select file and select a file from your Google Drive to add to the course. Enter words or phrases in the Search field to filter your results. Items matching your search terms populate automatically in the results list.

- You may only select one file at a time.
- Files may not be embedded or added as a link or private link, only a static file. You can view this copy of the resource directly in Schoology, but any changes made to the item in Google Drive are not reflected in the course.
- Files cannot be edited or deleted from within the app. They must be deleted or edited directly in Google Drive.
Click Add and then Attach.
This will temporarily change the share settings of your file to allow Schoology to access it. During this time, anyone with a link to your file can view it.
Attach Google Content to your Course Materials
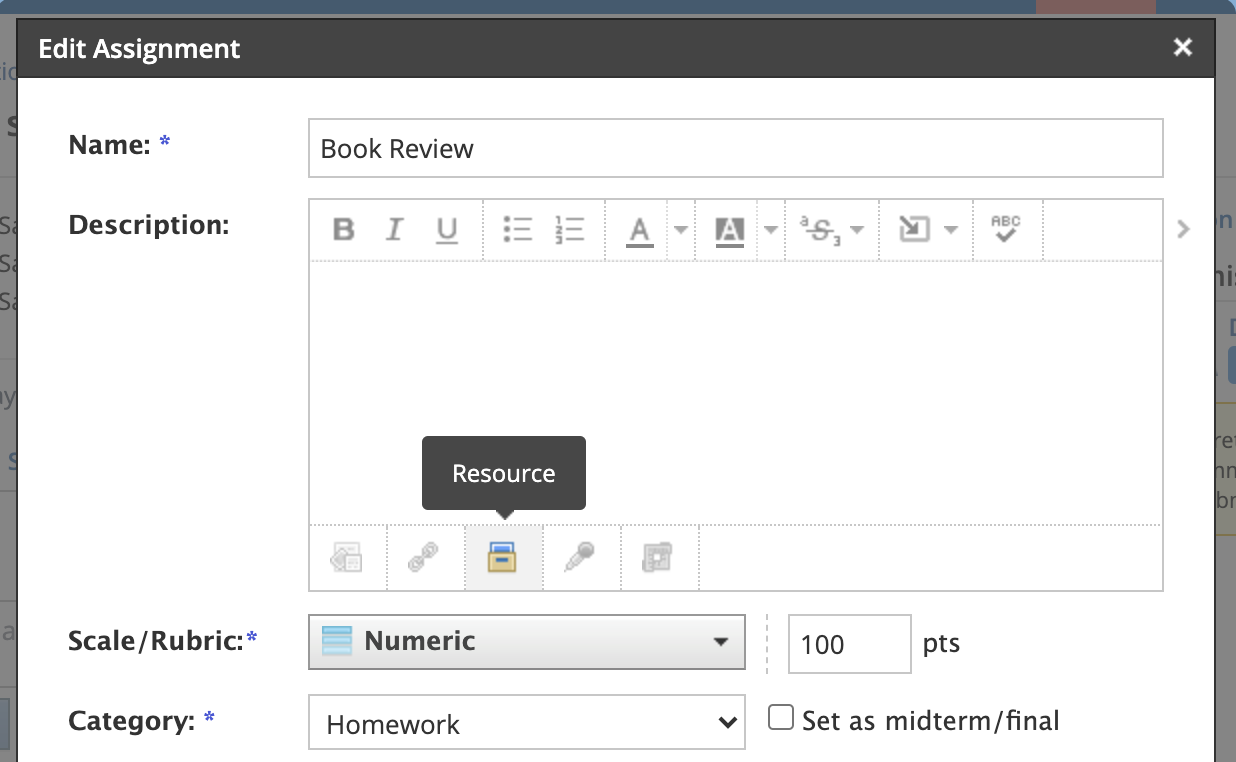
You can attach items from your Google Drive directly to your assignments, test/quiz questions, discussions, pages, and folders using the Resource tool in the Rich Text Editor.
To attach a Google Drive item to a course material:
- Click Add Materials and one of the material types mentioned above, or open an existing item in your course.
- Along the bottom panel of the Rich Text Editor, click the Resource option to access the Google Drive app. This provides the options to import a Google Drive resource as a file to the material:
- Click Apps from the left menu and open the Google Drive app.
Select the file from your Google Drive to add to the item. Enter words or phrases in the Search pane to filter your results. Items matching your search terms populate automatically in the results list.
- You may only select one file at a time.
- Files may not be embedded or added as a link or private link, only a static file. You can view this copy of the resource directly in Schoology, but any changes made to the item in Google Drive are not reflected in the course.
- Files cannot be edited or deleted from within the app. They must be deleted or edited directly in Google Drive.
Click Add and then Attach.
This will temporarily change the share settings of your file to allow Schoology to access it. During this time, anyone with a link to your file can view it.
Students Adding Google Content to a Submission
Students can attach a file from their Google Drive directly within an assignment.
- From the Submissions panel within the assignment, click Submit Assignment.
- Select Resources from the Upload dialog window.
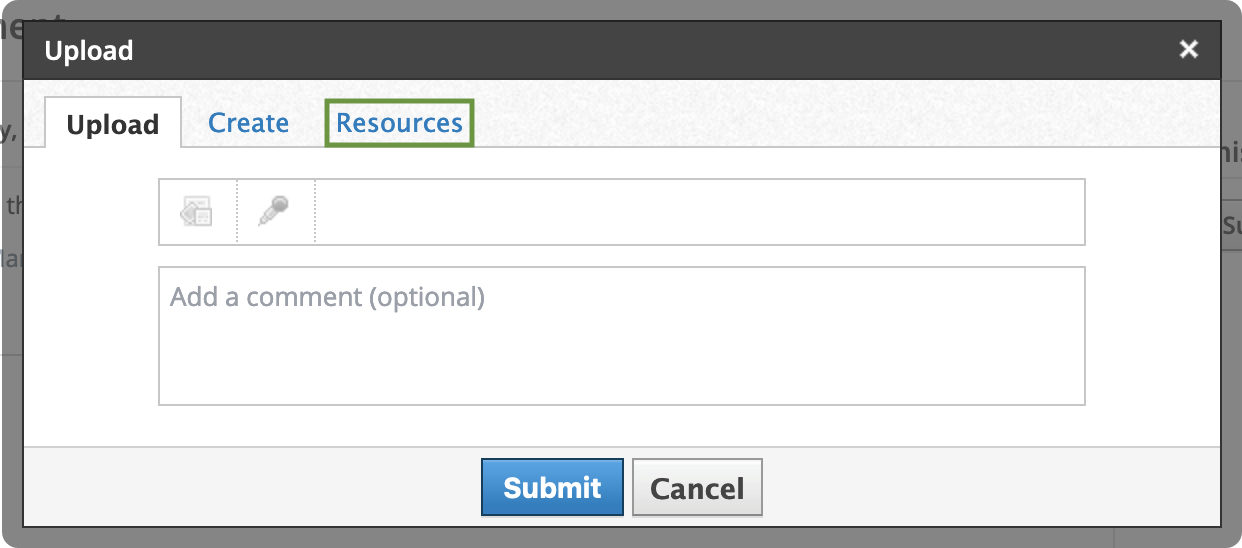
- Click Apps from the left menu and open the Google Drive app.
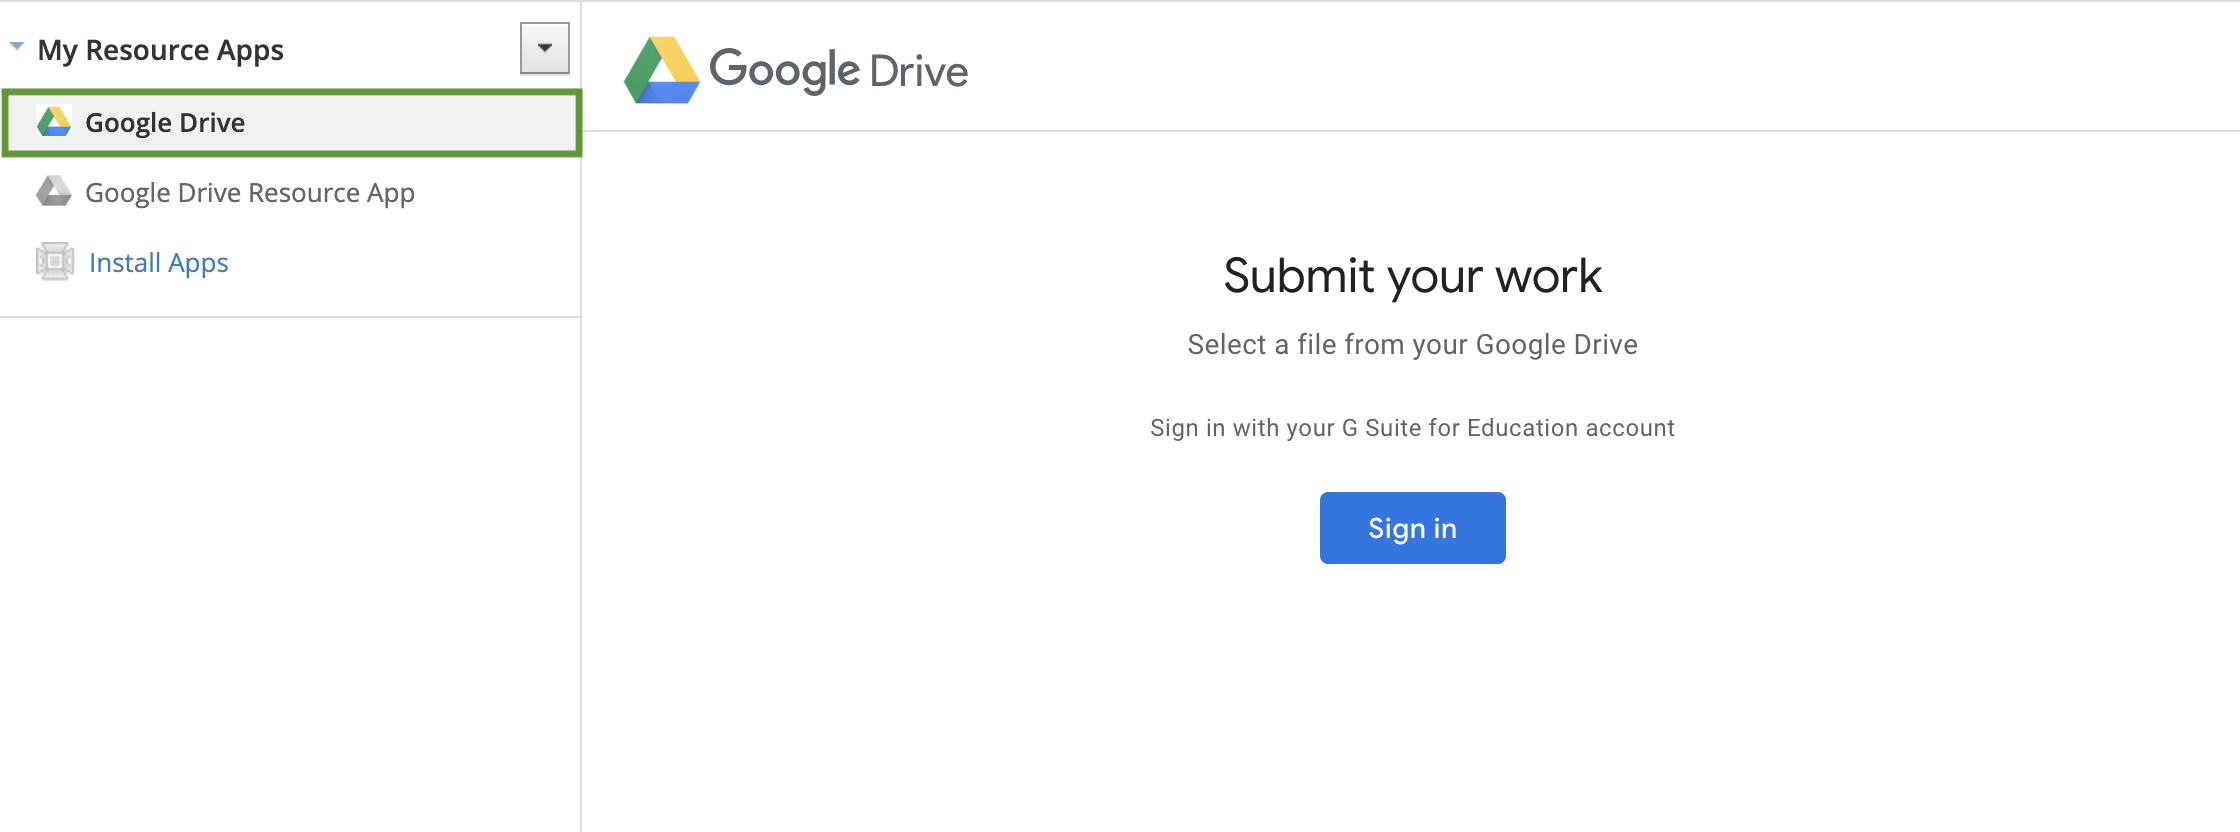
- Sign in to your Google account if this is your first time using the Google Drive app. Otherwise, check the correct Google account is displayed. You can choose Switch account if you need to sign into a different Google account. Ensure pop-ups are enabled on your browser.
- Click Select file and select a file from your Google Drive to add to your submission. Enter words or phrases in the Search field to filter your results. Items matching your search terms populate automatically in the results list.

- Click Add and then Attach to confirm and send your submission.
Frequently Asked Questions
Can I have more than one Google Drive account integrated with my Schoology account?
- No, you can only connect with one Google Drive account at a time in Schoology. Select the correct Google account when connecting to your Google Drive from the Google Drive app. You may switch to another Google account from the Google Resources apps but you can only be connected to one Google Drive at a time.
Can I edit or delete files in my Google Drive directly within Schoology?
- No. Files cannot be edited or deleted through the Google Drive app. You should make any edits directly in Google Drive. You may edit or delete Google resources using the Google Drive Resource app by Schoology instead.