
Overview
Course administrators and assessment authors can add images, audio, and video to assessments to support differentiated learning and students with accommodations.
-
Media can be uploaded or recorded directly in the assessment.
-
Media can be added to question stimuli or student responses.
-
Assessments must be created, edited, and graded from the web version of Schoology. Students can review and access assessments via the mobile app.
Network requirements for media
To display images and audio or video files uploaded to questions, you must add the following domains to your network's allowed list:
-
*.learnosity.com
-
s3.amazonaws.com/assets.learnosity.com
-
s3.amazonaws.com/learnositymediaprocessed
If your organization has a policy that prevents you from using a wildcard, review the full list of URLs that need to be added to the Allowed list. If you are unable to display media content, reach out to the support contact at your organization to confirm the above URLs have been added to the allowed list.
Add images
There is a file size limit of 512KB for uploaded image files.
Upload images to a question stimulus
-
Click the Image button on the rich text toolbar.

-
Drag and drop an image or click the + button to select an image on your device. Alternatively, enter a URL for the image in the Add URL for image from another website field.
-
If adding an image, you can choose to auto-populate images from your Downloads folder or click Show All Files... to add an image from your device.
-
-
When the image is selected, click Open to confirm.
-
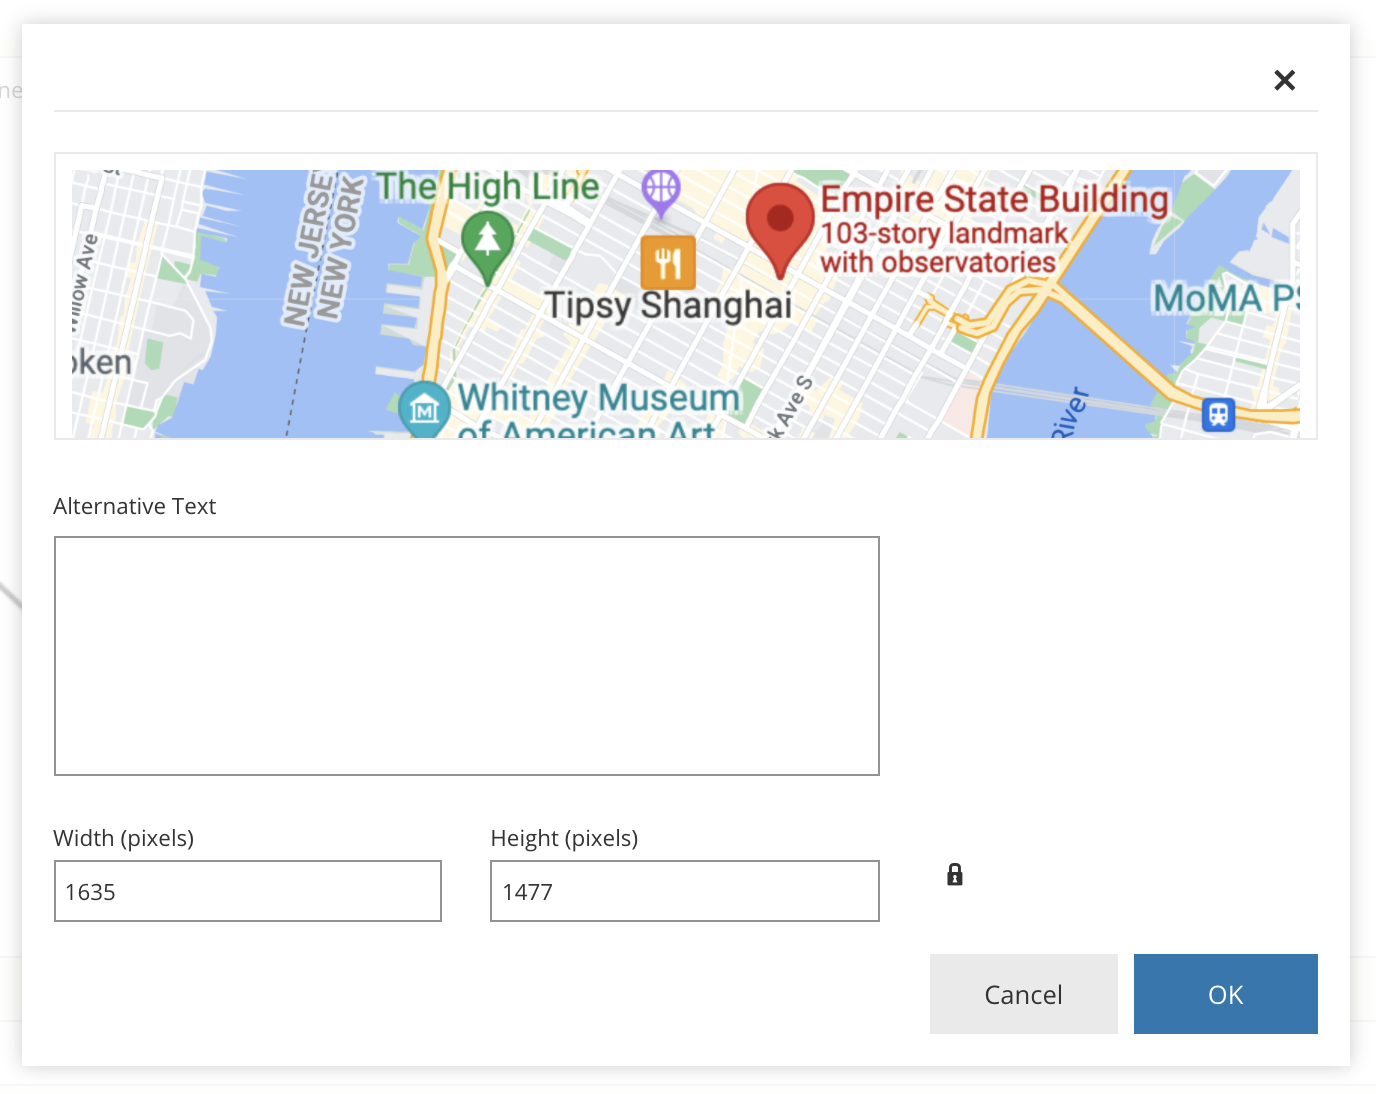
Optionally, after uploading the image, adjust the image dimensions or add alternative text to be read when a screen reader encounters the image.
-
Click OK to insert the image. You can also drag and resize the image after it has been inserted into the question stimulus.
Upload images to question responses
Follow the steps from Upload images to a question stimulus to add images to question response options for multiple choice, true or false, matching, ordering, fill in the blank drag and drop, and label image question types.
Add audio or video files
-
Only MP3 and MP4 file types are supported in this upload option.
-
There is a file size limit of 5MB for audio files and 100MB for video files.
Upload audio or video files to a question stimulus
-
Click the Tools button on the rich text toolbar.

-
From Tools, select Audio Player or Video Player and upload your file via the Upload option. Alternatively, enter a URL for the file in the Add URL for image from another website field.
-
You can select auto-populated files from your Downloads folder or click Show All Files... to add a file from your device.
-
-
After the file is uploaded, click OK.
-
Optionally, preview the file and adjust the various display options.
-
Click OK to insert the file.
-
Optionally, preview the question to see and hear it as students will.
Upload audio or video files to question responses
Follow the steps from Upload audio or video files to a question stimulus to add audio or video files to question response options for multiple choice, true or false, matching, ordering, fill in the blank drag and drop, and label image question types.
Add audio or video recordings
Audio and video can be recorded directly in assessment questions using the Tools button in the rich text editor.
-
There is a 10-minute recording limit for audio and video recordings.
-
Audio and video recordings are not supported on the Schoology mobile app. Students should access recordings via the mobile browser or desktop.
-
Instructors should direct students to submit their own audio and video recordings via the audio and video question types.
Record audio for a question stimulus
-
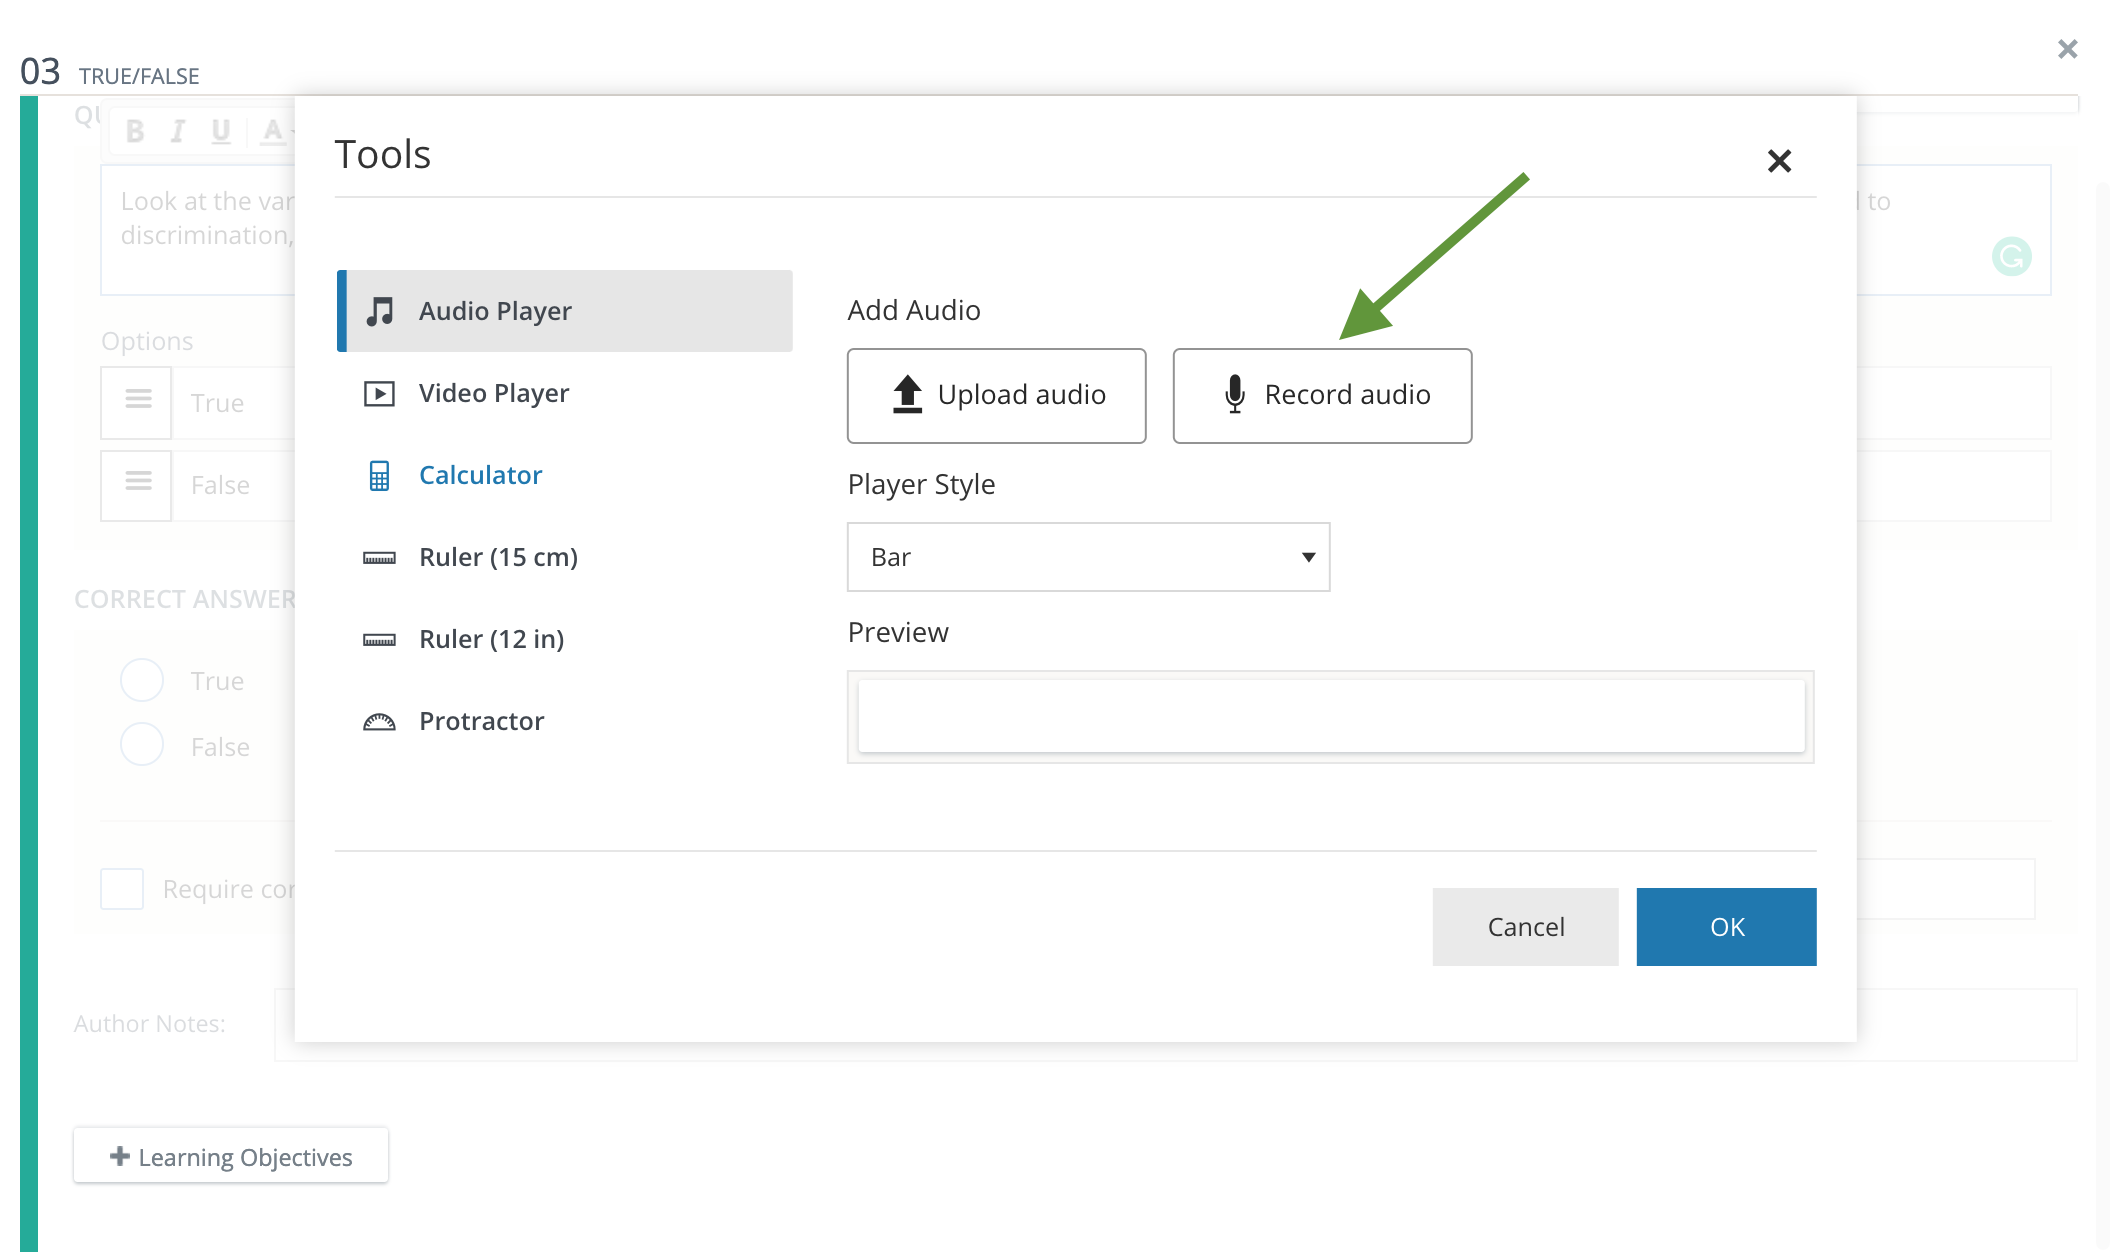
Click the Tools button on the rich text toolbar.

-
From Tools, select Audio Player and then click Record audio.
-
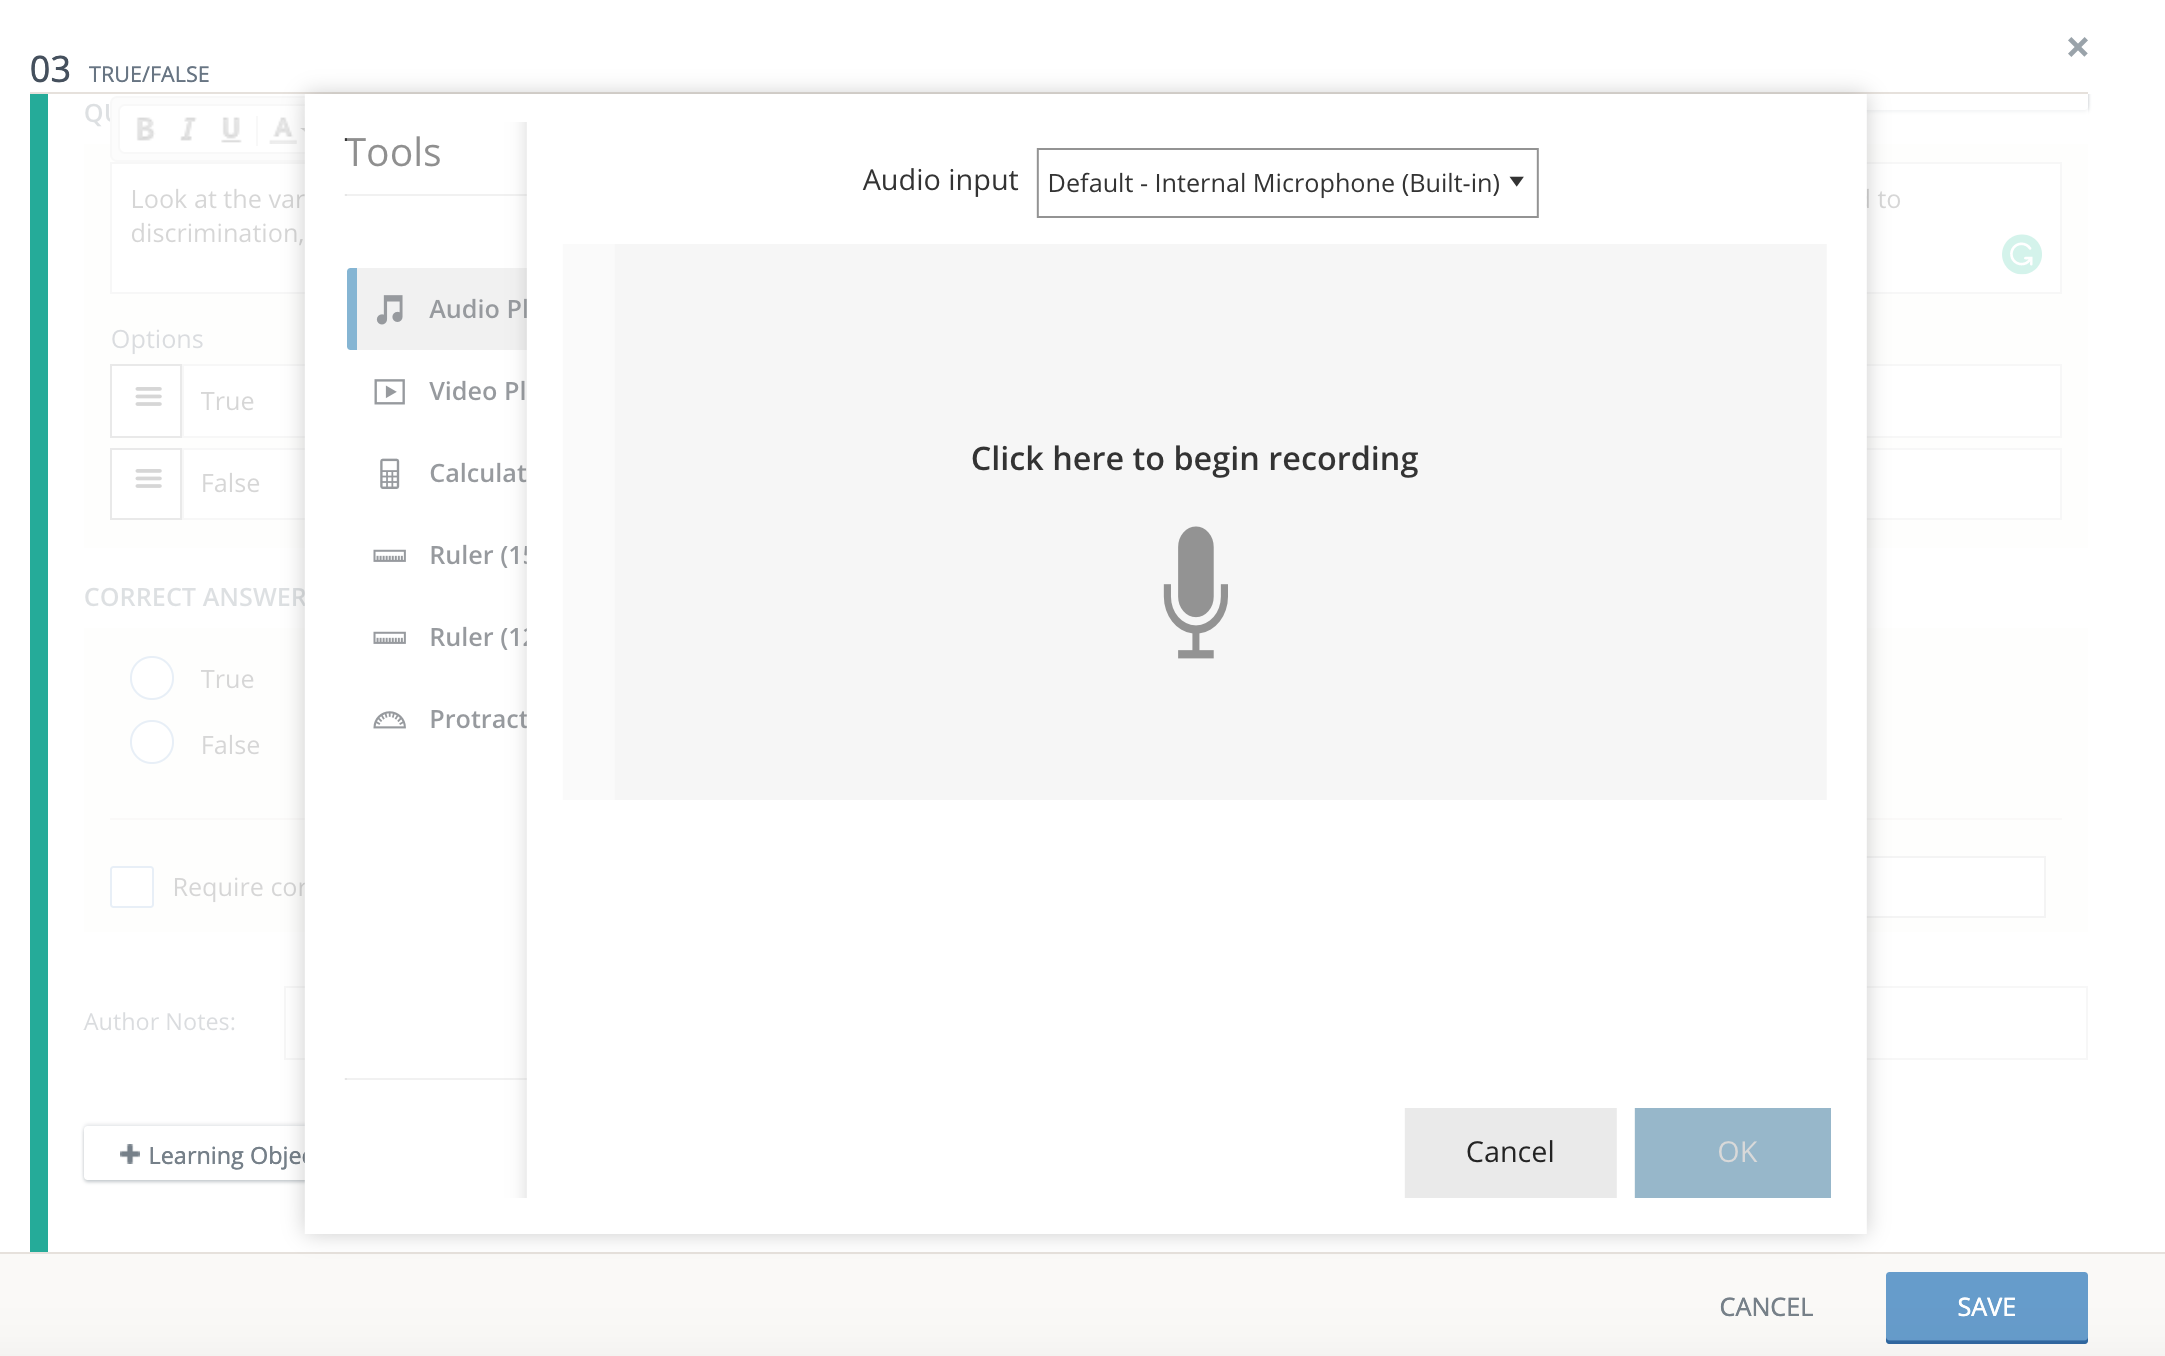
Click the recording modal to begin recording.
-
Depending on your browser settings, you may be prompted to enable the microphone. Click Allow to continue with the recording.
-
The recording will begin after the countdown.
-
Pause and resume the recording at any time.
-
Record up to a maximum of 10 minutes.
-
-
Click Finish when you have completed your recording.
-
Optionally:
-
Play back the recording.
-
Click OK to continue uploading the recording.
-
Preview the recording and adjust the various display options.
-
-
Click OK to insert the recording into your question.
-
Optionally, preview the question to see and hear it as students will.
-
To exit, click Cancel or X on the Tools modal or recording modal. Do not click Cancel on the question modal. If you cancel from the recording modal, changes will not be saved, and you can continue to edit the question. If you cancel from the question modal, the question will not be saved, and you will need to recreate the question.
-
To re-record and discard the previous recording, click Record audio on the Tools modal. You will be prompted to confirm to discard the existing recording.
Insert audio recordings to question responses
Follow the steps from Record audio for a question stimulus to add audio or video files to question response options for multiple choice, true or false, matching, ordering, fill in the blank drag and drop, and label image question types.
Record video for a question stimulus
-
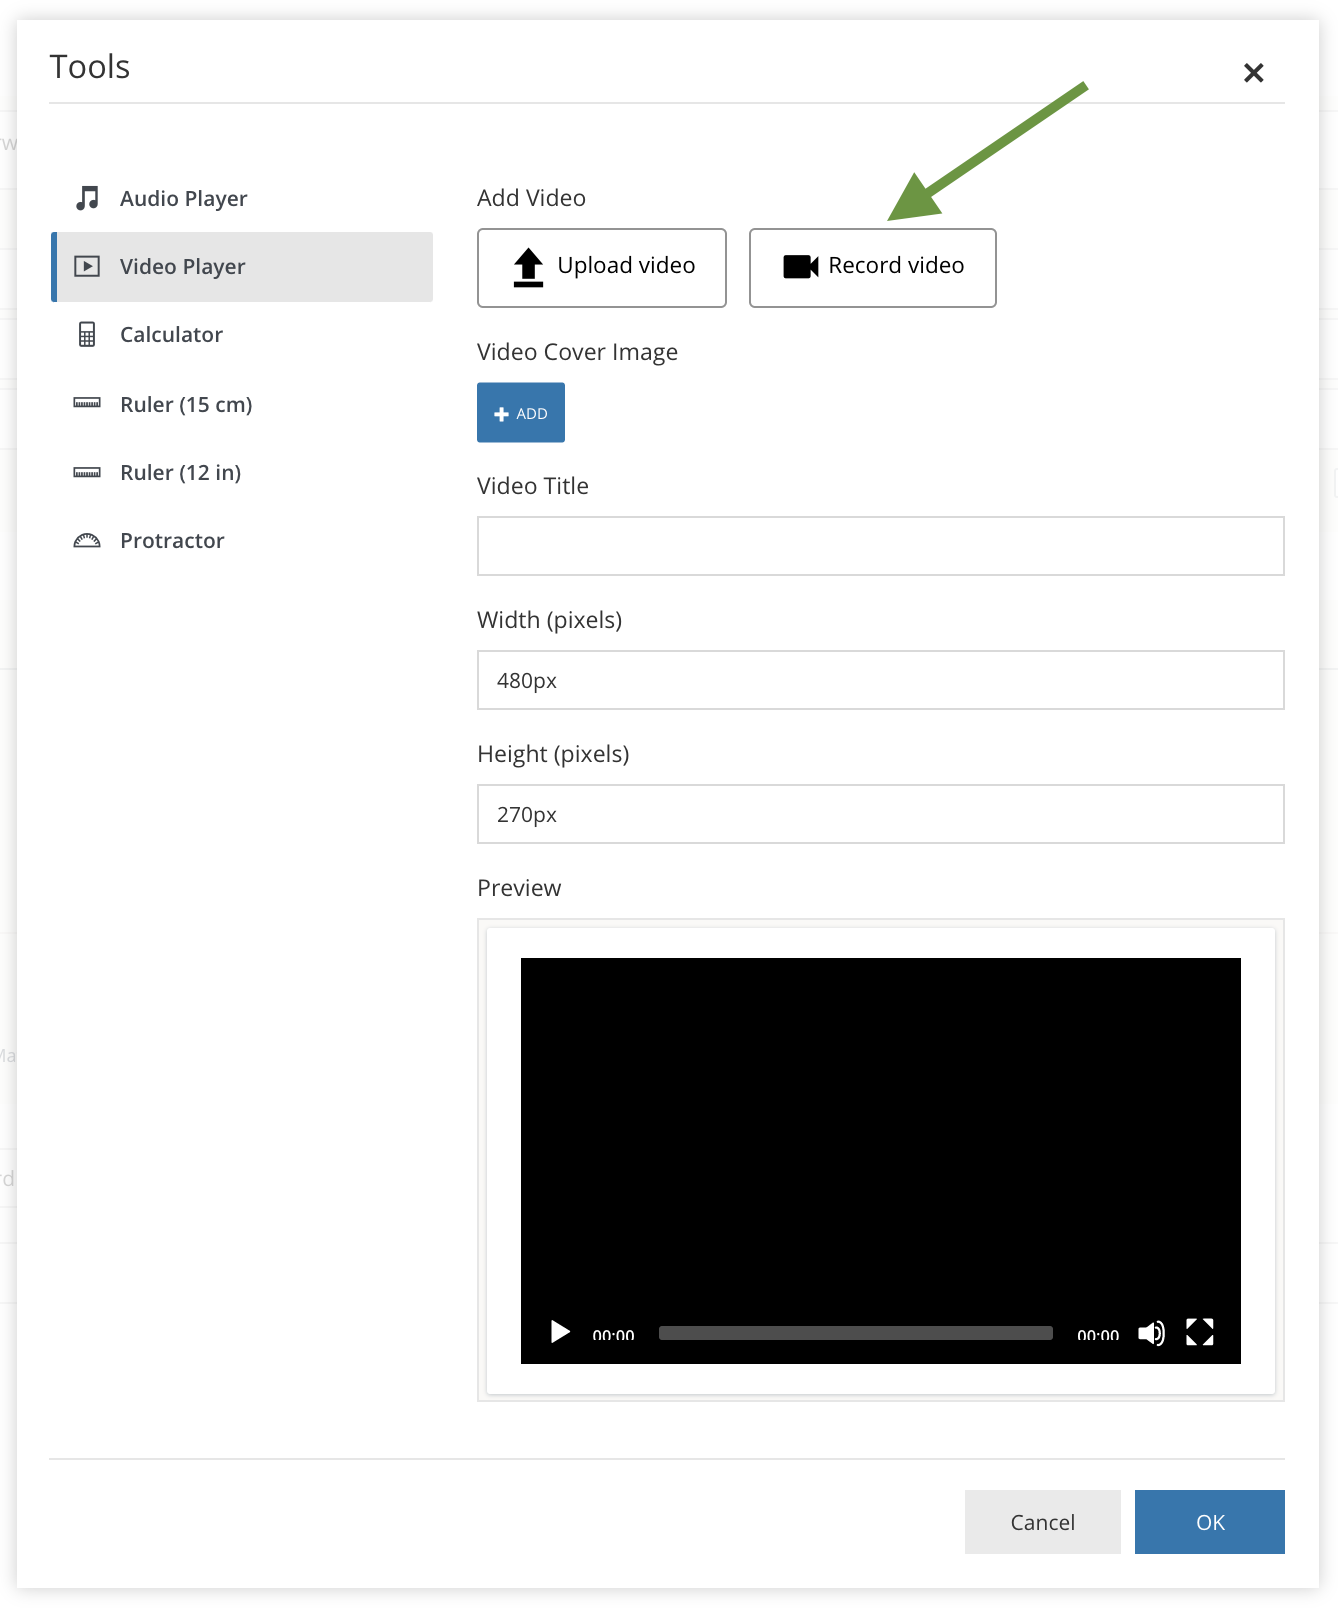
Click the Tools button on the rich text toolbar.

-
From Tools, select Video Player and then click Record video.
-
Click Record to begin your recording.
-
Depending on your browser settings, you may be prompted to enable the microphone and camera.
-
Click Allow to continue with the recording. The recording will begin after the countdown.
-
Pause and resume the recording at any time.
-
Record up to a maximum of 10 minutes.
-
-
Click Stop when you have completed your recording.
-
Optionally:
-
Play back the recording.
-
Click OK to continue uploading the recording.
-
Preview the recording and adjust the various display options.
-
-
Click OK to insert the recording into your question.
-
Optionally, preview the question to see and hear it as students will.
-
To exit, click Cancel or X on the Tools modal or recording modal. Do not click Cancel on the question modal. If you cancel from the recording modal, changes will not be saved, and you can continue to edit the question. If you cancel from the question modal, the question will not be saved, and you will need to recreate the question.
-
To re-record and discard the previous recording, click Record audio on the Tools modal. You will be prompted to confirm to discard the existing recording.
Insert video recordings to question responses
Follow the steps from Insert a video recording to a question stimulus to add audio or video files to question response options for multiple choice, true or false, matching, ordering, fill in the blank drag and drop, and label image question types.