
Interaction types
You can choose from several QTI-compatible interaction types to create items. An item can contain more than one interaction. When selecting interactions, consider:
-
Which attributes are defined for the item?
-
How will tests that include the item be administered (scan sheet, online assessment, or both)?
-
Do rubrics need to be included? For example, are there manually-scored interactions?
The following table provides an overview of the available interaction types.
|
Interaction Type |
Description |
Example |
Administration |
Scoring |
|---|---|---|---|---|
|
Record an audio or video response in the player, which is submitted to OLA. |
No example |
|
|
|
|
(Multiple Choice) (Multi-Select) |
Select responses from the presented choices. |
|
|
|
|
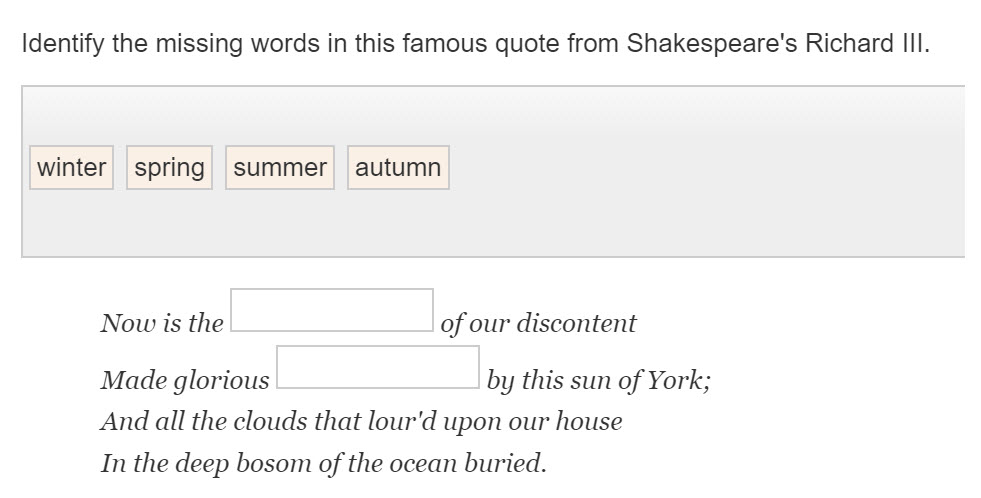
Drag and drop text objects to defined elements located within the context of the content area text. |
|
|
|
|
|
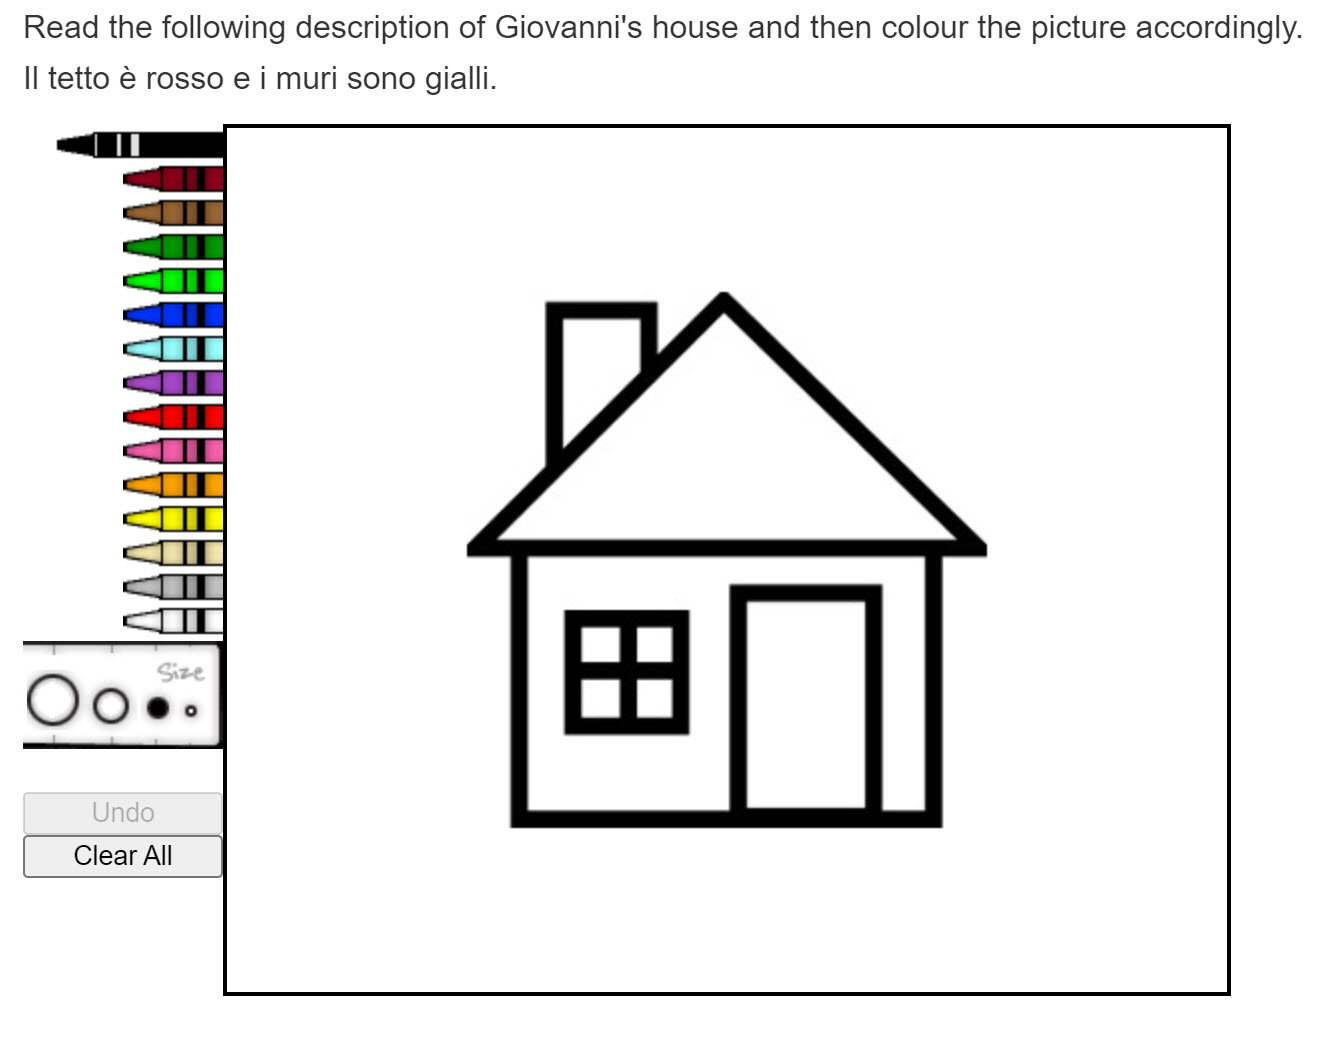
(Drawing) |
Draw the answer response on a canvas (blank or pre-selected image) with a set of drawing tools. |
|
|
|
|
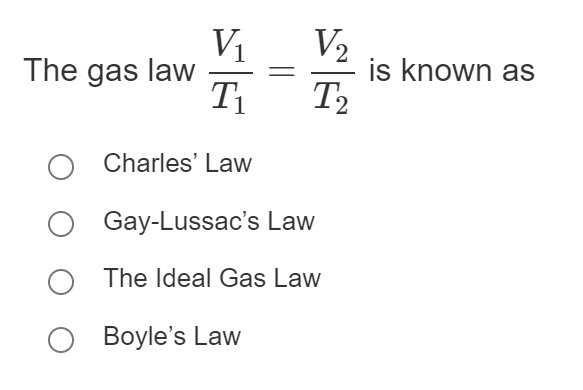
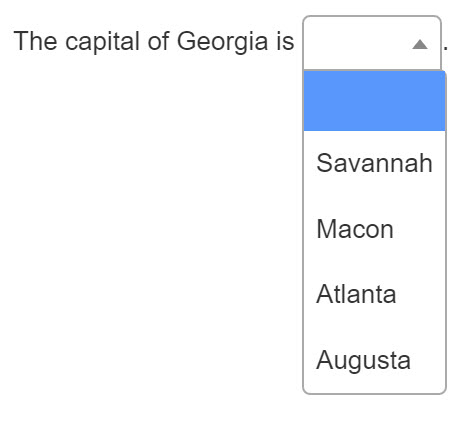
Select a choice from a drop-down list located within the context of the prompt text. |
|
|
|
|
|
Enter a response in a text box located within the context of the prompt text. |

|
|
|
|
|
Graph points, lines, line segments, vectors, circles, and polygons in a Cartesian coordinate system. |
|
|
|
|
|
Add rubrics and other information for test administrators, students, or scorers. |
|
|
Not applicable |
|
|
Drag and drop text objects to create matched associations between available answer choices. |
|
|
|
|
|
Enter a math response in a text box located within the context of the prompt text. |
|
|
|
|
|
Drag and drop points to plot on the number line. |
|
|
|
|
|
Drag and drop text objects in the correct order. |
|
|
|
|
|
Drag and drop image objects to defined elements located within the context of a larger image. |
|
|
|
|
|
Select regions of a static image as answer choices. |
|
|
|
|
|
Select responses from presented choices located within the context of the content text. |
|
|
|
|
|
|
Enter the response into a text field that has a word and equation editor toolbar. (Open Response) (Brief Constructed Response) (Equation Response) |
|
|
|
|
Select checkboxes at the intersections of columns and rows to display answer choices. |
|
|
|
|
|
Upload a file (for example, an image, audio, or video file) containing work to be scored. |
|
|
|
Audio/Video
This interaction requires students to record a multimedia response in audio or video format. Audio and video interactions can only be used with online assessments and are manually-scored. To support the scoring of answers, you must add an instructions block containing a rubric.
Use Online Scoring to score Audio/Video interactions.
-
On the New Item page, go to the Build tab.
-
Choose Audio/Video.
-
Enter the Question/Prompt.
-
Choose an Answer format of audio or video.
-
Enter the Maximum length of the recording.
Recording length can be between one second and ten minutes.
Choice/Multi Response
This interaction requires students to select responses from presented choices. You can administer multiple-choice interactions using either a scan sheet or online assessments.
-
On the New Item page, go to the Build tab.
-
Choose Choice/Multi Response.
-
Enter the Question/Prompt.
-
Choose whether to allow Partial Credit.
-
Enter the Answer Choices.
-
Select Add Choice if you want to add additional answer choices.
-
To reorder answer choices, hover over the drag icon until a four-way arrow displays, then move the choice to the desired position.
-
-
Choose whether to Shuffle unlocked choices to display answer choices in a different order each time the interaction is presented.
-
If the interaction has more than one correct answer, you can select Limit student selections, and then enter a value for the Number of selections. This prevents students from proceeding to the next question until they select the maximum number of answer choices.
-
If you selected Partial Credit, populate the Partial Credit Settings.
-
Enter a value in Default per choice to determine the points possible per answer choice.
-
Enter the Minimum and Maximum points possible.
-
Drag and Drop
This interaction requires students to drag and drop answer choices to fill gaps within a body of text. Drag and Drop interactions must be text-only and can only be used with online assessments.
Students can either click and drag an option into place, or simply select an option and click where they want it to go. On the assessment, draggable items appear highlighted in blue and the drop zones appear in green.
-
On the New Item page, go to the Build tab.
-
Choose Drag and Drop.
-
Enter the Question/Prompt.
-
Choose whether to allow Partial Credit.
-
Enter the Answer Choices.
-
Select Add Choice if you want to add additional answer choices.
-
To reorder answer choices, hover over the drag icon until a four-way arrow displays, then move the choice to the desired position.
-
-
Select Shuffle choices to display choices in a different order each time the interaction is presented.
-
Enter your text in the Content Area with Drag and Drop Placement field.
-
Position the cursor where you want to insert an answer choice, then click Insert Drag and Drop.
-
Select the correct answer or enter the points and click OK.
-
-
If you selected Partial Credit, populate the Partial Credit Settings.
-
Enter a value in Default per choice to determine the points possible per answer choice.
-
Enter the Minimum and Maximum points possible.
-
-
Continue entering content and answer choices until the interaction is complete.
-
Double-click a Drag and Drop Place element to make changes.
-
Draw
A Draw interaction requires students to draw the response on a canvas (blank or with an image) using a set of drawing tools. Draw interactions can be used with online assessments and scan sheets, except for blank scan sheets. This is a manually-scored interaction. To support answer scoring, you must add an instructions block containing a rubric.
-
On the New Item page, go to the Build tab.
-
Choose Draw.
-
Enter the Question/Prompt.
-
If needed, add an initial image using one of these methods:
-
Choose Upload Image to browse for and select a new image from your local drive.
-
Choose Insert Image to add an image resource from your resource library.
-
Enter a URL or File Path.
-
Drag and drop the image from your local drive to the image field.
-
-
Enter the image’s Alt Text. Screen readers use the alternative text to describe the image.
-
Adjust the Image Properties as needed.
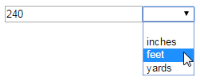
Drop Down
This interaction requires students to select an answer choice from a drop-down list within the prompt text. Drop Down interactions can only be used with online assessments.
-
On the New Item page, go to the Build tab.
-
Enter the question or prompt directly into the text editor.
-
Place the cursor where you want the drop-down field, then choose Drop Down.
-
Double-click Drop Down Interaction to enter the answer choices. You can use formatted text, special characters, and math formatting.
-
Select Add Choice if you want to add additional answer choices.
-
To reorder answer choices, hover over the drag icon until a four-way arrow displays, then move the choice to the desired position.
-
-
Select the Correct answer.
-
Choose Shuffle unlocked choices to display answer choices in a different order each time the interaction is presented.
-
Select OK or the collapse icon to save the changes.
-
Double-click the interaction to make changes, if necessary.
-
Fill-in-the-blank Text
The fill-in-the-blank text interaction requires the student to enter a response in an open text field. The student's response must match one of the defined correct answers exactly to receive credit. This can create a risk for incorrect test scores if all correct answer variations are not included.
-
On the New Item page, go to the Build tab.
-
Enter the interaction question or prompt into the text editor.
-
Place the cursor where you want the interaction and choose Fill-in-the-blank Text.
-
Choose whether to allow Partial Credit.
-
For each answer, enter Points, Answers, and choose if the answers are Case Sensitive.
-
-
If partial credit is not selected, enter the Correct Answer.
-
When there is only one correct answer, it is case sensitive by default.
-
-
Click OK.
-
Double-click the interaction to make changes, if necessary.
-
Suggested use
The following guidelines and tips can help ensure students receive proper credit for their responses:
-
Use the Math Entry interaction for math questions.
-
Include instructions with the items, as appropriate, to guide students when formatting their responses.
-
For questions where the correct answer can be written in various ways, use Partial Credit and add points accordingly. For example, a number that can be written with or without commas, either 1,407 or 1407 would be correct.
-
For questions requiring complex answers, consider using the Short Answer/Essay interaction with manual scoring.
-
Provide the units of measure and symbols outside the Fill-in-the-blank Text interaction. If units are critical, add the units as a separate drop-down interaction.
|
Units in text editor |
Units as Drop Down interaction |
|---|---|
|
|
|
-
For equation responses, provide “n” (or another suitable letter) outside the interaction.
-
As a rule, use ( ). Only use { } and [ ] when required.
-
Do not use spaces when entering an equation.
-
Do not use a comma when entering large numbers.
-
Use a decimal point only when required.
-
Use x as the multiplication symbol; do not use an asterisk (*).
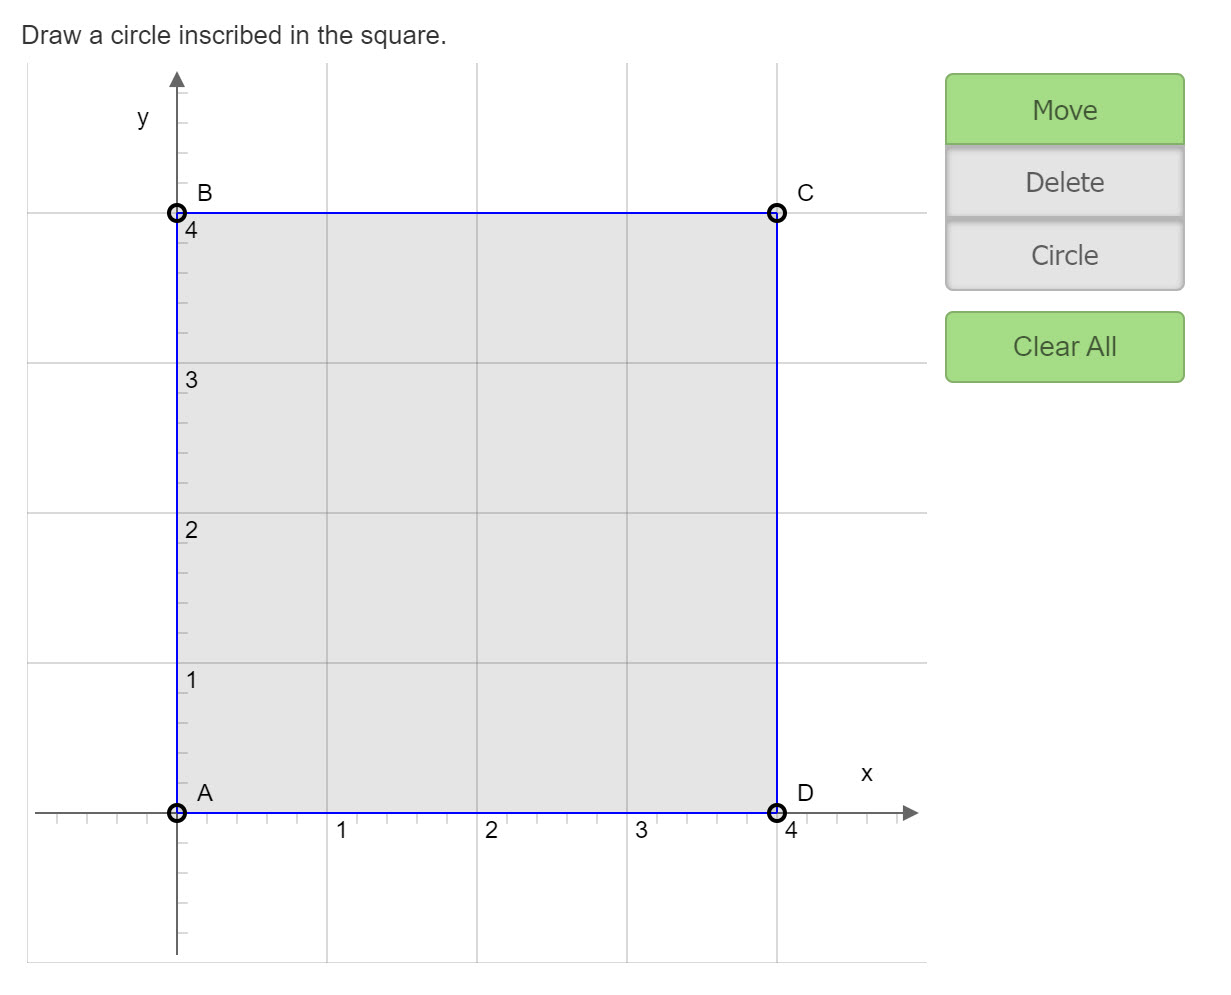
Graphing
This interaction requires students to enter a response by graphing points, lines, line segments, vectors, circles, and polygons in a Cartesian coordinate system. Graphing interactions are technology-enhanced items and can only be used with online assessments.
-
On the New Item page, go to the Build tab.
-
Choose Graphing.
-
Enter the Question/Prompt.
-
Create the graph structure:
-
Enable - Set by default to include both axes. You can clear one axis to create a question with a single axis.
-
Label - Enter text to label the axes. Defaults to lowercase x and y.
-
Minimum - Enter the minimum range for the axes. Defaults to a range of -5 to 5. Use integer values.
-
Maximum - Enter the maximum range for the axes. Defaults to a range of -5 to 5. Use integer values.
-
Scale - Enter to change the value between each displayed point. Defaults to 1. Use integer values.
-
Ticks per Step- Enter a value to display divisions between grid lines. Defaults to 0, so no divisions will display. For example, the choice of 1 tick per step adds one division point between each labeled value, 2 ticks per step adds two division points, and 3 ticks per step adds three division points.
The default of 0 Ticks per Step supports snap to grid. If you add more divisions, it becomes more likely that a student's response will snap to a different grid point than the student intended.
-
-
You can add background elements to the graph. These elements are visible to the student when they display the graph while taking a test.
-
Select which elements to add. A shaded version of the element will be displayed on the Correct Answer graph.
-
Click on the background image to create the element.
-
Select whether to Show Grid.
-
You can Move or Delete an element.
-
Select Clear All to remove all background elements.
-
Background elements options
|
Option |
Description |
|---|---|
|
Move (arrows icon) |
Select to move shapes or individual points. |
|
Delete (x icon) |
Select to delete existing elements. |
|
Clear All (trash can icon) |
Click to clear all elements. |
|
Circle |
Select to draw a circle. |
|
Line |
Select to draw a line. |
|
Line Segment |
Select to draw a line segment. |
|
Point |
Select to add a point. Labels for points are statically generated in the order of creation, such as A, B, C, and so forth. If previous points are deleted, the labels do not automatically change for the remaining points. |
|
Polygon |
Select to draw a polygon. Polygons can be drawn using any number of coordinates as vertices to form an enclosed area. The Polygon element is not supported when using Safari or Chrome browsers on an iOS device. The last point cannot be connected to the first point. |
|
Vector |
Select to draw a vector. |
Create correct student answer
Follow the steps to create background elements, but place the correct answer on the Correct Answer graph.
Set the student response options
For students to enter their response, select the necessary Response Options. By default, all response options are enabled, but you may want to disable some options to simplify the item display for the student.
-
Select the Response Options for the graphing tools presented with this interaction in Online Assessment. The options allow students to draw the respective element when answering the question.
-
Click Preview to preview how your item will display during testing.
Scoring
Graphing interactions are machine-scored. The student response is compared to the Correct Answer graph created by the item author. The following criteria determine the score for each interaction.
|
Interaction |
Description |
|---|---|
|
Circle |
The student's response must correctly plot the center point of the circle as indicated on the Correct Answer graph. The second point can be plotted anywhere on the circle, matching the correct radius displayed on the Correct Answer graph. |
|
Line |
The student's answer must plot any two points on the given line indicated on the Correct Answer graph. The two points are not required to match either point displayed on the Correct Answer graph. They can be plotted in either order. |
|
Line Segment |
The student's answer must correctly plot both endpoints as indicated on the Correct Answer graph. The two points can be plotted in either order. |
|
Polygon |
The student's response must correctly plot all vertices as shown on the Correct Answer graph. The points can be plotted in any order. |
|
Vector |
The student's answer must plot the exact initial point as indicated on the Correct Answer graph. The second point can be plotted anywhere on the directed line segment. They can be plotted in either order. |
Instructions
The instructions block is not an interaction type and cannot stand alone in an item. Use the instruction block when adding information such as rubrics. You must add instructions and one of the appropriate item interactions before adding a rubric.
-
On the New Item page, go to the Build tab.
-
Choose Instructions.
-
If needed, enter Author Notes.
-
Enter instructions in the Contents.
-
Choose Add Rubric to add a rubric for Draw, Extended Text, or Upload interactions.
-
Use the Permissions to choose who can display the instructions.
-
Scorer makes the rubric available when scoring items with manually scoreable interaction types.
-
Student makes the contents of the instruction block available to students when taking tests online.
-
The Text-to-Speech pause, ignore, substitution, and multiple language support plugins are not supported for instruction blocks.
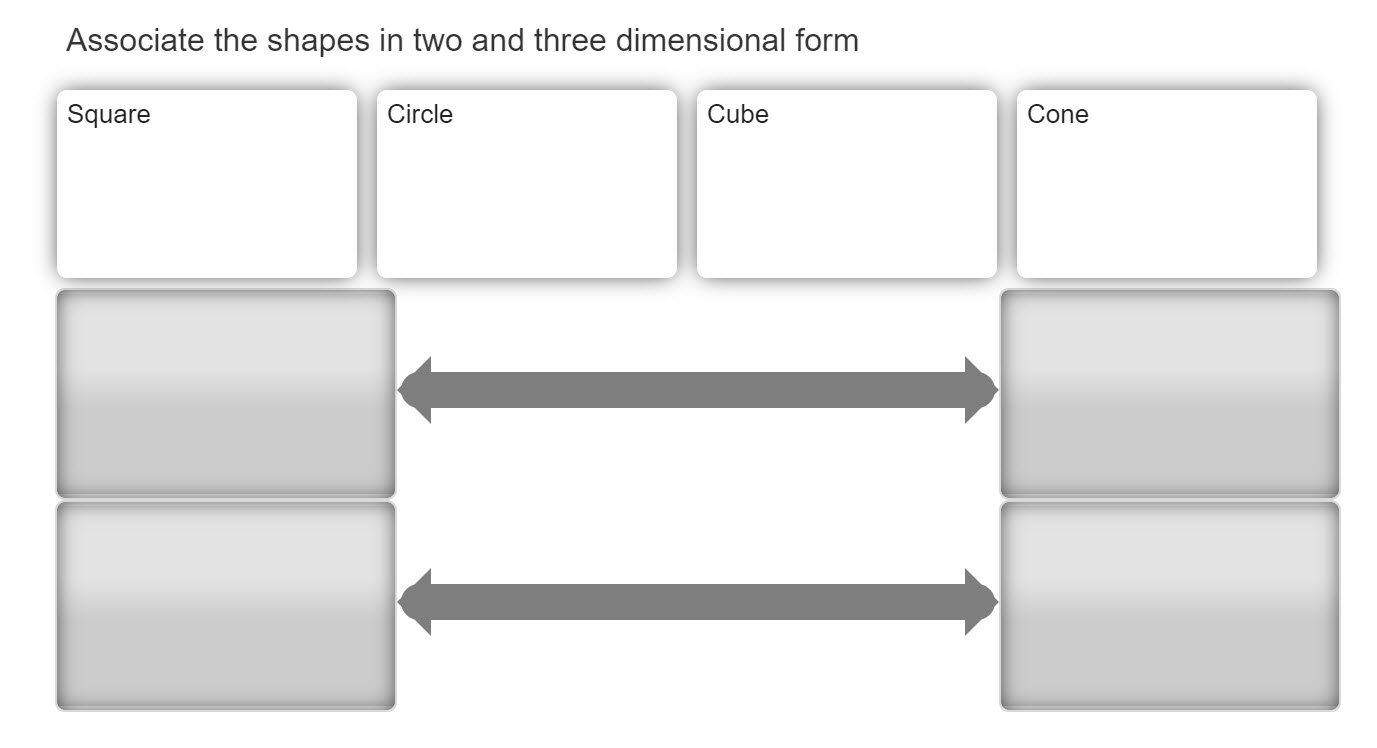
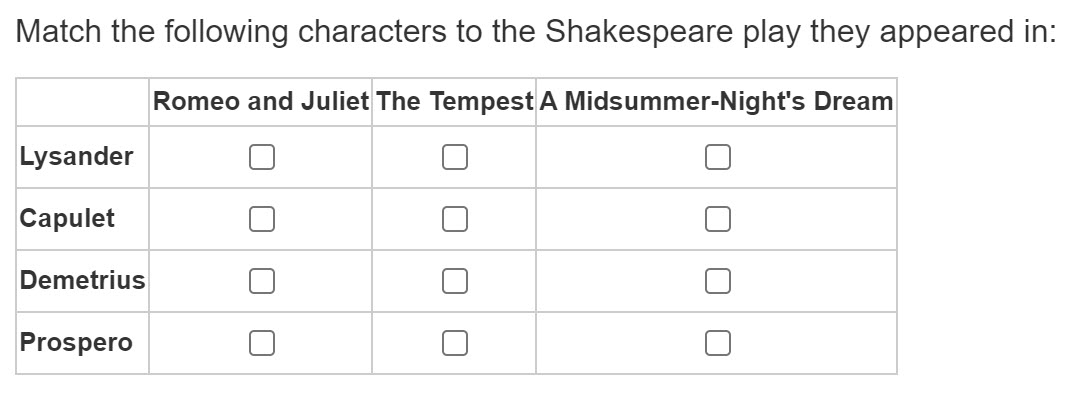
Matching
A Matching interaction requires students to drag and drop text objects to create matched associations between available answer choices. These interactions can be used only with online assessments.
-
On the New Item page, go to the Build tab.
-
Choose Matching.
-
Enter the Question/Prompt.
-
Choose whether to allow Partial Credit.
-
Enter the Answer Choices.
-
Select Add Choice if you want to add additional answer choices.
-
To reorder answer choices, hover over the drag icon until a four-way arrow displays, then move the choice to the desired position.
-
-
Choose Shuffle unlocked choices to display answer choices in a different order each time the interaction is presented. You must shuffle the choices to prevent the correct answer choices from being paired first in the student's interaction.
-
If you selected Partial Credit, populate the Partial Credit Settings.
-
Enter a value in Default per choice to determine the points possible per answer choice.
-
Enter the Minimum and Maximum points possible.
-
You can enter point values for each pair of answer choices.
-
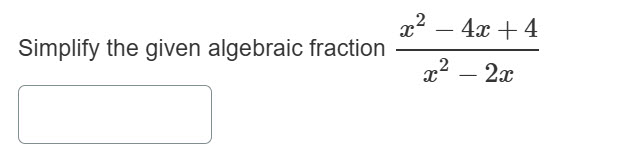
Math Entry
Use the Math Entry interaction to create questions with complex math expressions. Students can input their responses using a built-in MathML editor.
-
On the New Item page, go to the Build tab.
-
Enter the interaction question or prompt into the text editor.
-
Place the cursor where you want the interaction and choose Math Entry.
-
Choose whether to allow Partial Credit.
-
For each answer, enter Points, Answers, and choose if the answers are Case Sensitive.
-
-
If partial credit is not selected, enter the Correct Answer.
-
When there is only one correct answer, it is case sensitive by default.
-
-
Click OK.
-
Double-click the interaction to make changes, if necessary.
-
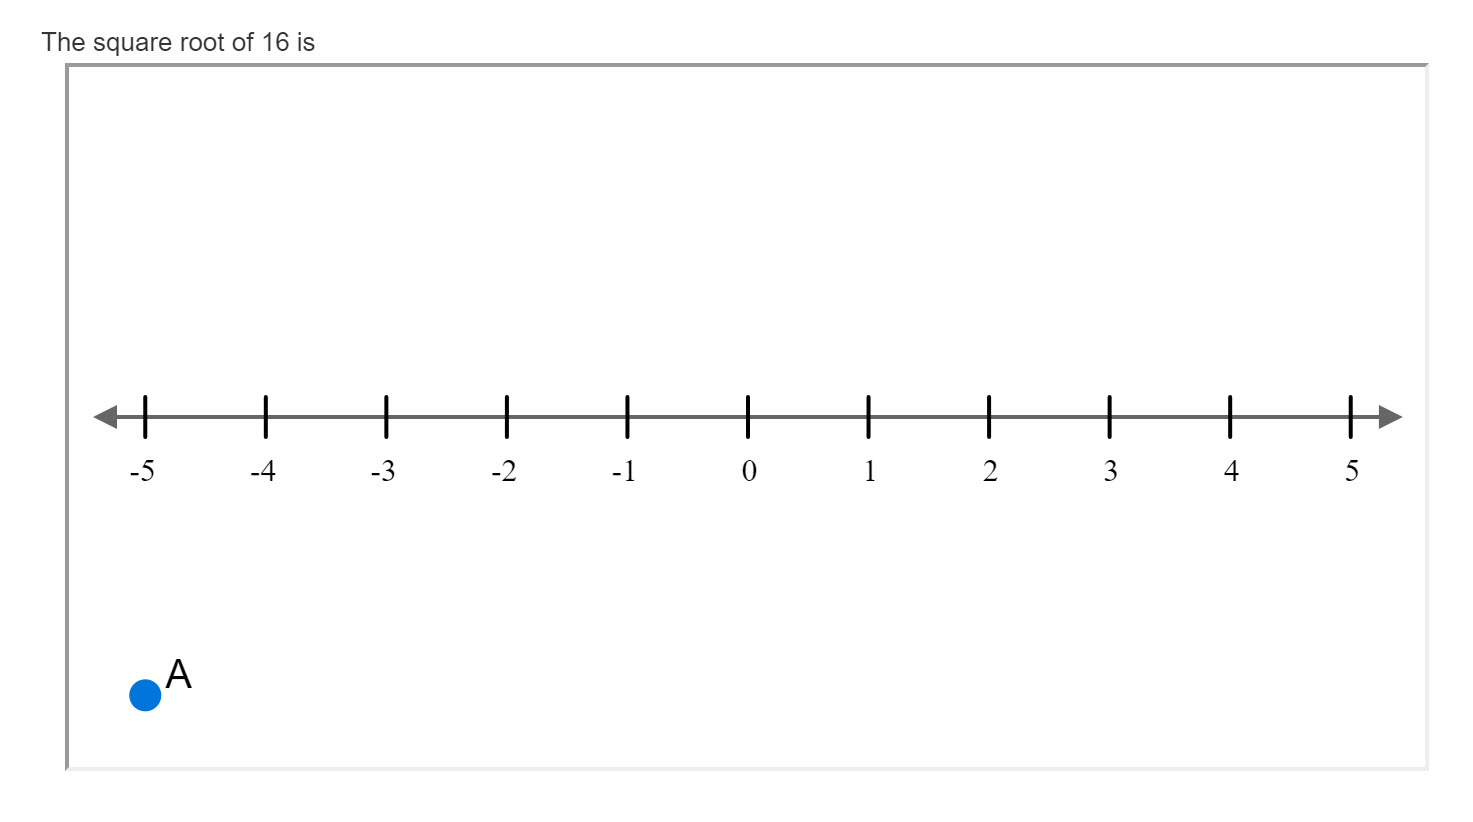
Number Line
A Number Line interaction requires students to drag and drop the answer choices on the number line. Number Line interactions are technology-enhanced items and can only be used with online assessments.
-
On the New Item page, go to the Build tab.
-
Choose Number Line
-
Select the Response Type.
-
Identify Labels on Number Line: add one or more points as answer choices. Use to plot number line points.
-
Number Line Plot: add multiple graphical representations with one correct answer. Use to plot number line inequalities.
-
-
Enter the Question/Prompt.
-
Configure the number line settings:
-
Minimum value: Enter the minimum range for the number line on the x-axis. Defaults to -5. Use integers, fractions, or decimals.
-
Maximum value: Enter the maximum range for the number line on the x-axis. Defaults to a range of 5. Use integers, fractions, or decimals.
-
Tick Distance: Enter a value to display divisions between grid lines. Use integers, fractions, or decimals.
Changing the tick distance may hide your set minimum and maximum values on the number line. If needed, adjust the values or the tick distance to ensure the values are visible. -
Label Frequency: Enter a positive integer value to set the frequency of labels on the number line.
-
Show Left Arrow and Show Right Arrow: Configure the number line to display or hide arrows.
-
Fraction Type: Select the type of fraction you want to use if you entered a fraction for the minimum, maximum, or tick distance values.
-
-
Enter the response options.
-
For Identify Labels on Number Line:
-
Click within the text boxes in each row to enter the Possible Response label. MathML expressions can be used for responses.
-
Optionally, select Add Choice to add additional response options. Each response option must be unique.
-
To create the correct student answer, place the correct answer on the Correct Answers graph.
-
-
For Number Line Plot:
-
Select the graphical representations to include as choices and select one as the correct answer.
-
-
Scoring
Number Line interactions are machine-scored. The student response is compared to the Correct Answers graph created by the item author. The student’s answer must correctly plot the point, points, or line as indicated on the Correct Answers graph. More than one point can be plotted in any order. For number line plots, only one line can be plotted as the correct answer.
Notes:
-
Number lines are currently not rendered in print student responses or SIA report downloads.
-
Text-to-speech will not read the answer choices on the number line.
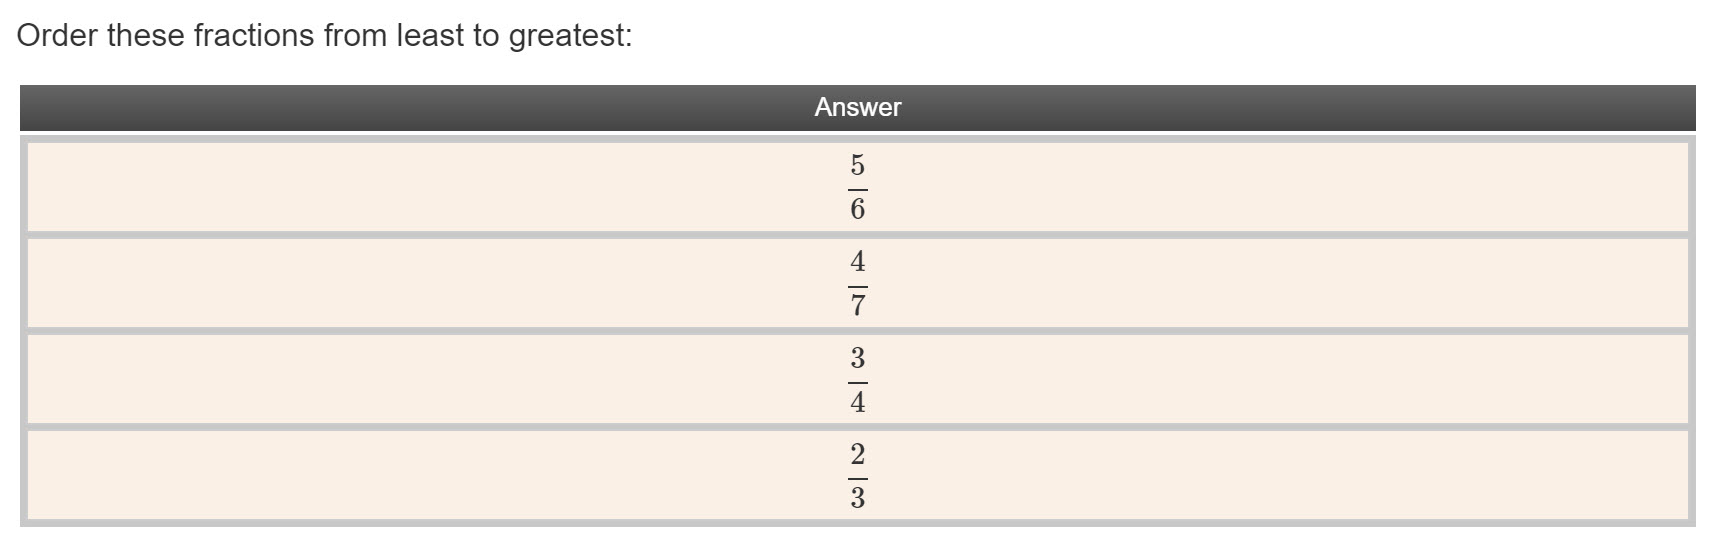
Ordering
The Ordering interaction requires students to drag and drop text objects in the correct order. Ordering interactions can only be used with online assessments.
-
On the New Item page, go to the Build tab.
-
Choose Ordering.
-
Enter the Question/Prompt.
-
Enter the answer in Displayed Choices.
-
Select Add Choice if you want to add additional answer choices.
-
To reorder answer choices, hover over the drag icon until a four-way arrow displays, then move the choice to the desired position.
-
-
Drag the Displayed Choices column to the Correct Order column. To move a choice, hover over the drag icon until a four-way arrow displays, then move the choice to the desired position in the Correct Order column.
-
Select Shuffle unlocked choices to display answer choices in a different order each time the interaction is presented. If you select this option, use the lock icon to lock specific answer choices in place.
-
Select the Display orientation.
When all of the answer choices are used in the correct answer in the Correct Order column, only one column of answers will display for the student to reorder. When only some of the answer choices are used in the correct answer in the Correct Order column, a second column displays for the student to drag choices to build the answer.
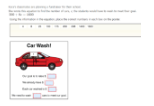
Picture Drag and Drop
This interaction requires students to drag and drop image answer choices within a larger image. Picture Drag and Drop interactions can only be used with online assessments.
Students can either click and drag an option into place, or simply select an option and click where they want it to go. On the assessment, draggable items appear highlighted in blue and the drop zones appear in green.
-
On the New Item page, go to the Build tab.
-
Choose Picture Drag and Drop.
-
Enter the Question/Prompt.
-
Choose whether to allow Partial Credit.
-
Use one of the following methods to add the answer Background Image:
-
Choose Upload Image to browse for and select a new image from your local drive.
-
Choose Insert Image to add an image resource from your resource library.
-
Enter a URL or File Path.
-
Drag and drop the image from your local drive to the image field.
-
Use images in PNG format for optimum results. PNG images have a .png suffix and their type is image/ png.
-
Use lowercase in image filenames for the best results.
-
-
-
On the Insert Image dialog:
-
Enter the image’s Alternative Text. Screen readers use the alternative text to describe the image.
-
Update Image Properties as needed and choose OK.
-
-
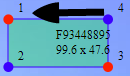
Click Add Choice to add answer choices. A corresponding answer placement will display in the background image. The ID code pairs the placement in the background image to the answer choice.
-
Move and size the answer placement.
-
To move a rectangle, click in its center and drag it to the desired location.
-
If the shape you are placing on the background image does not move, minimize your screen by ten percent. Then click a corner point of the shape to move.
-
To resize a rectangle, click on a corner point and drag the rectangle to the desired size. Dimensions are indicated below the code.
-
When you move and resize the answer images, verify that the shape orientation is not affected. The answer image should be numbered 1, 2, 3, 4, going counter-clockwise, starting at the top left corner.
-
-
Add correct Answer Choices and Additional Image Choices for incorrect answers one at a time, in the order you want them to be presented to the student.
-
If you selected Partial Credit, assign Points for each correct answer choice and populate the Partial Credit Settings.
-
Enter a value in Default per choice to determine the points possible per answer choice.
-
Enter the Minimum and Maximum points possible.
-
Notes:
-
The background image is not resizable. Size the image correctly before adding it to the interaction.
-
An image can be assigned no correct answer choice. This can be used to include distractors.
-
The answer choices are presented to the student in the exact order that they are added to the interaction. For example, if you want the answer choices to display in alphabetical order for the interaction in these instructions:
-
First, add the AL image to Additional Image Choices as an incorrect choice.
-
Then, assign the AZ image to Answer Choices as the correct answer choice.
-
Next, add the GA image to Additional Image Choices as an incorrect choice.
-
Continue until all images have been added.
-
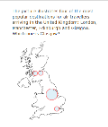
Select Image
The Select Image interaction requires students to select the regions of a static image as the answer choices. These interactions can only be used with online assessments. Allowed image formats are .jpg, .jpeg, and .png.
-
On the New Item page, go to the Build tab.
-
Choose Select Image.
-
Enter the Question/Prompt.
-
Use one of the following methods to add the answer Background Image:
-
Choose Upload Image to browse for and select a new image from your local drive.
-
Choose Insert Image to add an image resource from your resource library.
-
Enter a URL or File Path.
-
-
On the Insert Image dialog:
-
Enter the image’s Alternative Text. Screen readers use the alternative text to describe the image.
-
Update Image Properties as needed and choose OK.
-
-
Under Answer Choices, choose a shape for each answer choice hotspot you want to present.
-
If you choose Polygon, select the number of sides. Polygons can have up to eight sides.
-
-
Choose whether to allow Partial Credit.
-
Select which hotspots are the Correct answers or enter Points for each answer.
-
Select a Color for each hotspot.
-
For each answer choice, size and move the hotspot to its desired location on the image.
-
Hover over a shape until coordinates display, then click and drag to resize.
-
-
Choose whether to Limit the number of hotspots a student can choose.
-
Enter the Number of hotspots a student can choose.
-
-
If you selected Partial Credit, populate the Partial Credit Settings.
-
Enter a value in Default per choice to determine the points possible per answer choice.
-
Enter the Minimum and Maximum points possible.
-
TTS is not supported for text in hotspot interactions.
Select Text
This interaction requires the student to select responses from presented choices located within the content text. Select Text interactions can only be used with online assessments.
-
On the New Item page, go to the Build tab.
-
Choose Select Text.
-
Enter the Question/Prompt.
-
Choose whether to allow Partial Credit.
-
Enter the interaction Content Area with Select Text Placement.
-
Position the pointer where you want to insert the interaction, then select Insert Select Text.
-
Enter the answer choice. Select if the answer is correct or not
-
Select the Correct checkbox to indicate the correct answer or enter Points.
-
Click OK.
-
Double-click the interaction to make changes, if necessary.
-
-
Continue entering content and inserting Select Text as needed.
-
If you selected Partial Credit, populate the Partial Credit Settings.
-
Enter a value in Default per choice to determine the points possible per answer choice.
-
Enter the Minimum and Maximum points possible.
-
Short Answer/Essay
This interaction requires students to provide a textual response to a prompt. Short Answer/Essay interactions can be used with online assessments and scan sheets, but blank scan sheets are not recommended. This is a manually-scored interaction. To support scoring answers, you must add an instructions block containing a rubric.
-
On the New Item page, go to the Build tab.
-
Choose Short Answer/Essay.
-
Enter the Question/Prompt.
-
Choose the Answer Format to determine whether the student will use plain text or the text editor.
-
Enter a value for Initial Height of Answer Area to determine the number of lines to display in the student response area.
-
If students need access to the math editor, use the text editor for the Answer Format.
-
The number of lines specified for the response area determines the size of the response box on a scan sheet. For online assessments, a scroll bar will display for longer student responses.
Table Selection
This interaction requires students to select checkboxes at the intersections of columns and rows as answer choices. Table Selection interactions can only be used in online assessments.
-
On the New Item page, go to the Build tab.
-
Choose Table Selection.
-
Enter the Question/Prompt.
-
Choose whether to allow Partial Credit.
-
Enter the Answer Choices column and row labels.
-
To reorder columns or rows, hover over the drag icon until a four-way arrow displays, then move the choice to the desired position.
-
-
Select the correct answers or enter the number of Points each correct answer has.
For example, you have a table with columns for warm-blooded, features, and scales, and rows for bird, mammal, and fish. You will select the following answer choices: bird and warm-blooded, bird and feathers, mammal and warm-blooded, and fish and scales.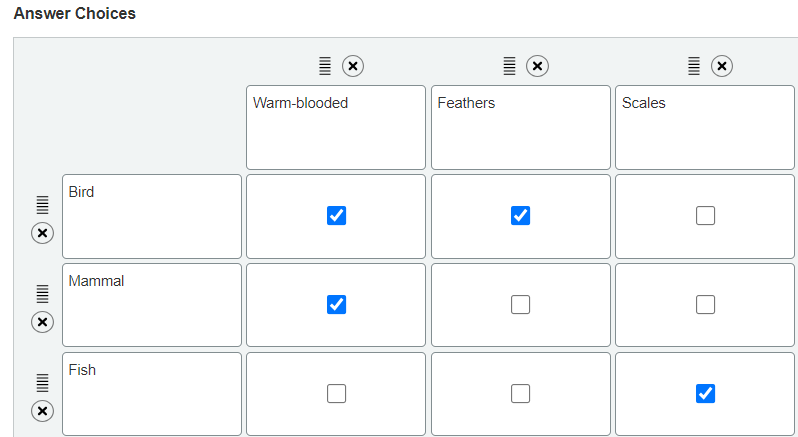
-
Choose Shuffle columns and rows to display answer choices in a different order each time the interaction is presented.
-
Choose whether to Limit student selections per row and column.
-
Enter a value for Limit total number of student selections. The value supersedes the total number of selections allowed via the row and column settings.
-
-
If you selected Partial Credit, populate the Partial Credit Settings.
-
Enter a value in Default per choice to determine the points possible per answer choice.
-
Enter the Minimum and Maximum points possible.
-
By default, all rows and columns are set to 0, which means there are no restrictions on the number of answer selections a student can choose for that row or column. If you set limits for rows or columns and then choose to remove the limits, you must reset the count to 0 for each row and column before clearing the option. Otherwise, the number of selections will continue to be restricted.
Upload
This interaction requires students to upload a file, such as an image, audio, or video file, containing a piece of work to be scored. Upload interactions can only be used with online assessments. This is a manually-scored interaction. To support the scoring of answers, you must add an instructions block containing a rubric.
Answers uploaded by students are limited to a maximum file size of 1GB using one of these file types: bmp, doc, docx, gif, htm, html, pdf, jpeg, jpg, mov, mp3, mp4, png, pdf, ppt, pptx, svg, txt, uri, xls, zip.
-
On the New Item page, go to the Build tab.
-
Choose the Upload interaction.
-
Enter the Question/Prompt.