
This guide provides you with the best practices to follow when setting up and using your SchoolMessenger CustomApp. It will discuss options to consider when implementing your application and make recommendations that will help you get the most out of your application.
Who Should Use this Guide
The contents of this guide are written to be readable by users of all technical backgrounds. This guide is intended for users who are working with SchoolMessenger to implement their CustomApp.
Landing Screen Design
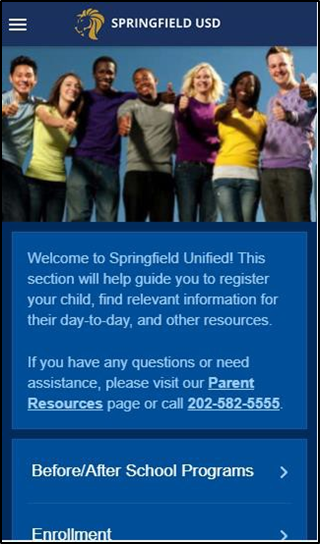
One of the first things to decide when setting up your application is to determine how your landing screen should appear. The landing screen is the page that users first see when they open your application, so it is important to optimize the design for your users.
Choosing a Layout
The layout you choose will also determine how many buttons appear when the user open the application. If there are more buttons than can fit on one screen with the given layout, users will be able to scroll over to see additional buttons.
|
2x2 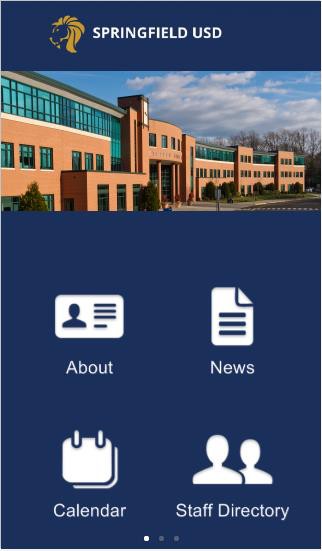
|
3x1 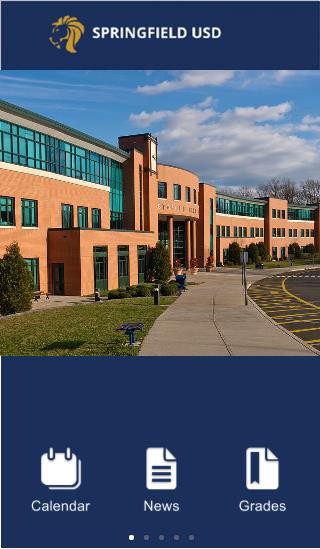
|
|
3x2 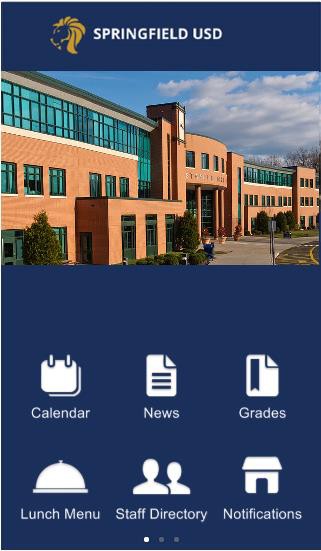
|
3x3 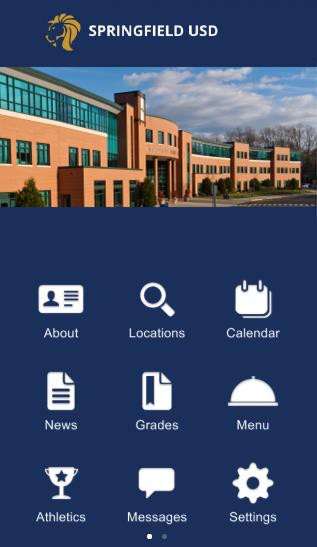
|
|
4x1 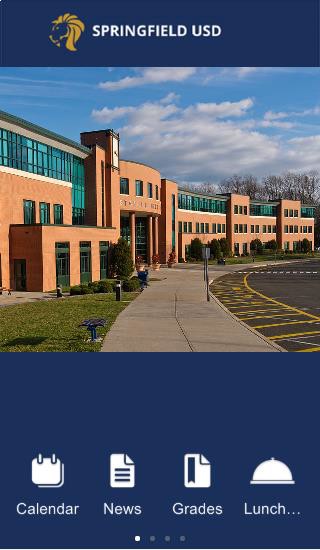
|
4x2 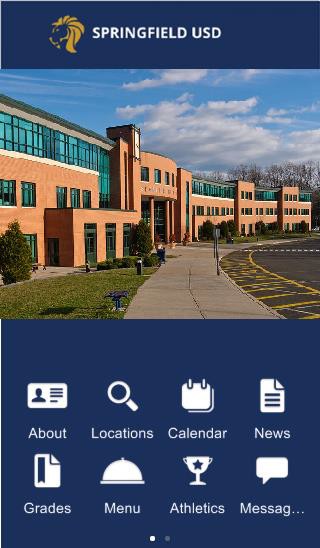
|
|
5x1 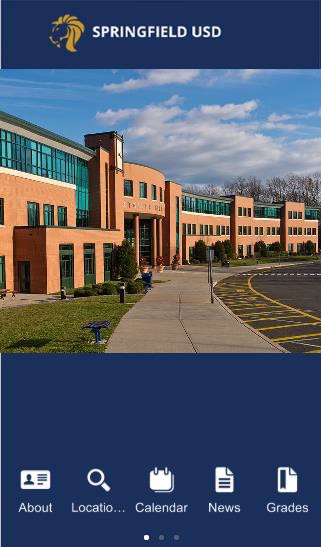
|
List Bottom 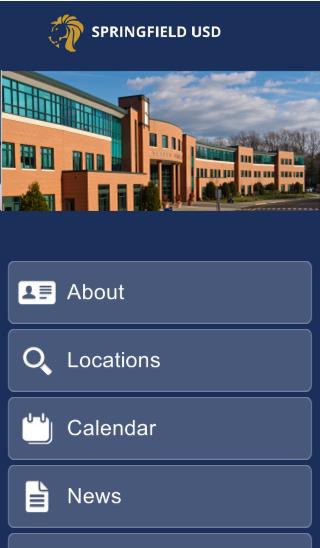
|
|
List Left 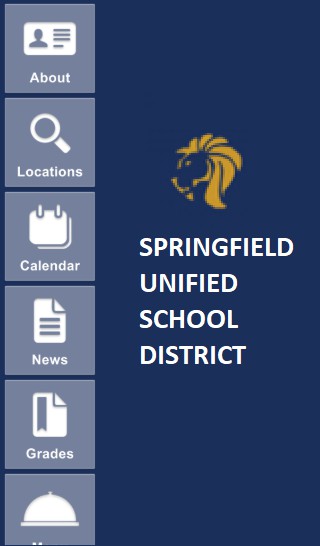
|
List Right 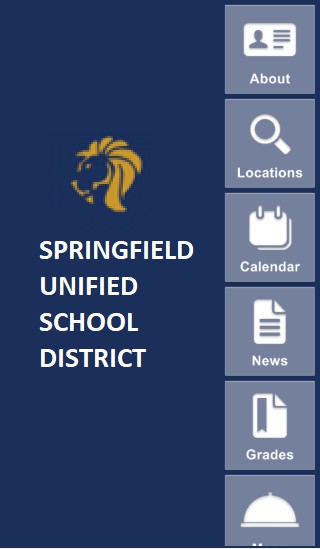
|
|
Side Menu with Image 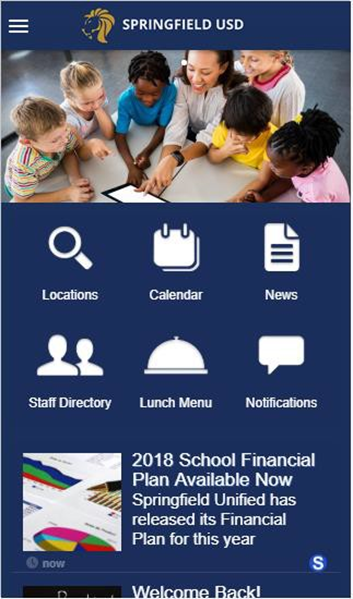
|
Side Menu without Image 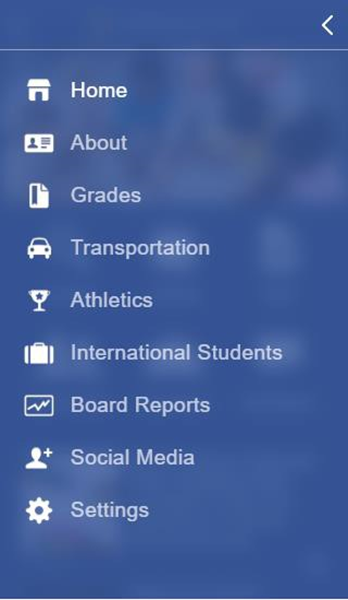
|
Note: The second screenshot of the Side Menu layout shows the side menu appearing after the user clicks the Menu (Hamburger) icon on the page.
When deciding which layout to select, think about why users are opening the application. What features are users most likely going to be opening when they view the application?
Choosing a layout with a small number of icons, allows you to have larger icons, making it easier for uses to find frequently used components within your application. However if you expect users will need quick access to a large number of icons, you may want to consider one of the options that supports a larger number of icons, such as the 3x3 layout, one of the list options or the Side Menu layout.
Slider Images
If you are using the 2x2, 3x3 or List Bottom layouts you have multiple images appear on the top portion of the page. These images will rotate automatically; users can also swipe left or right to scroll through the slider images you have set.
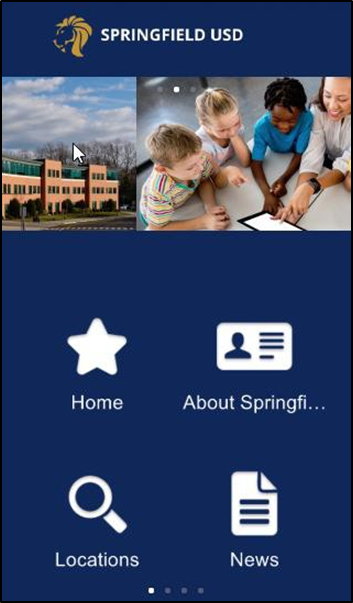
You can use these slider images to share your most important updates here or to highlight the core values and strategic vision of the district.
The sliding image banner can be used to promote:
-
Special events and news
-
District initiatives (partnerships, Edtech, special programs, etc.)
-
Board announcements (bonds, taxes, etc.)
-
Notable achievements (graduation rates, notable alumni news)
-
Seasonal greetings
-
Partners
You can include a hyperlink with some or all of the slider images when appropriate. You can link to the appropriate press release, website or other resource.
Note: All images used as slider images should be 1280 pixels wide and 560 pixels high.
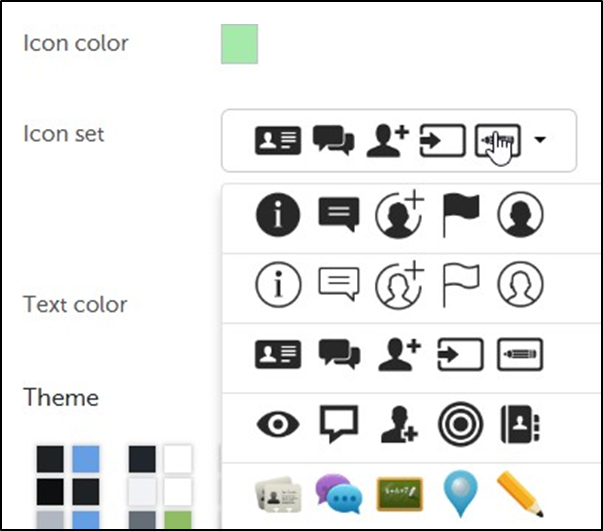
Icons and Colors
With the Icons & Colors section, you are able to change the look and feel of your application. You can specify the type of icons you want to use, the color of the icons, the color of the text used as well as other elements of the application. For the colors, you can even create a number of pre-set themes you can easily switch between at any time.
Icons
With the Icons section, there are a large number of icons available that can be used immediately. While you have the option, there is generally no need to manually upload icons; when you add content CustomApp will automatically assign the icon that mostly closely matches your content.
Channel Icons
While you can choose an icon set and upload icons from the Icons & Colors page, the icons for specific channels are not set here. Setting those icons will be discussed within the Content section of this guide.
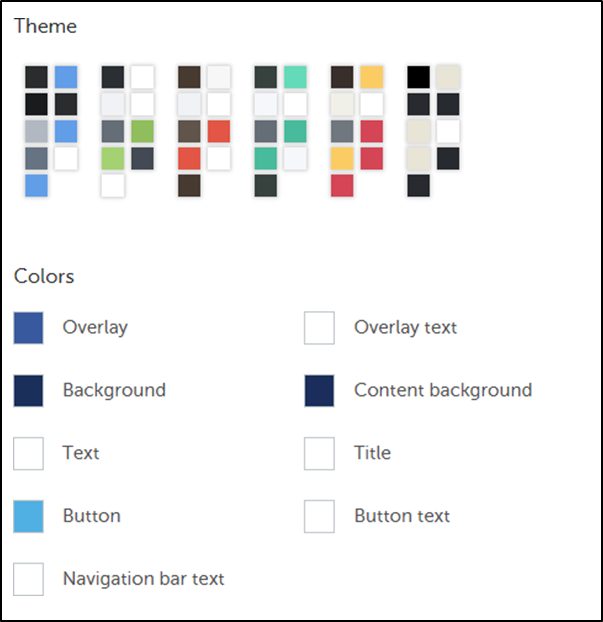
Theme and Colors
You are able to set colors used for the Overlay, Background, Text, and so on. These color choices can be saved to one of the six theme options which you can then switch between at will. This can allow you to easily compare and contrast different color schemes to decide which will work best for your application.
Graphics
With the Graphics section, you are able to update your logo, set gallery images for the home screen and set images for your application, the navigation bar, the launch screen and the home screen.
Home Screen Header Image
This is the image that appears along the top of the home screen.
The image should be 1536x336px in size.
Note: The Home Screen Header Image section is only used with the 2x2, 3x3, and List Bottom layouts.
Home Screen Gallery Images
The Home Screen Gallery Images are slider images that appear on the home screen of your app, below the Home Screen Header Image. The images you add will rotate automatically when users view the home screen. Users can also slide left or right to cycle through the images.
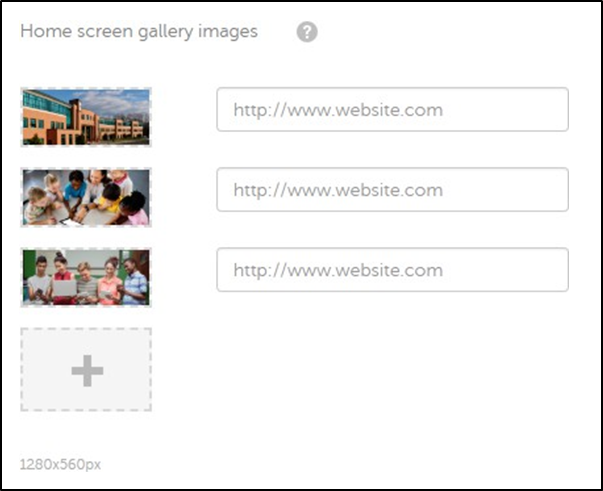
Each slider image you add should be 1280x560px in size.
In addition to showcasing images from your district, you can use these header images to promote upcoming events, important news and other relevant information.
You can also add a URL for a slider image. When a user taps on a slider image, it will open the URL.
Note: The Home Screen Gallery Images section is only used with the 2x2, 3x3, and List Bottom layouts.
Application Icon
The Application Icon section is used to specify the icon that users tap to open your application. You can specify the icon to use for iPhone and Android.
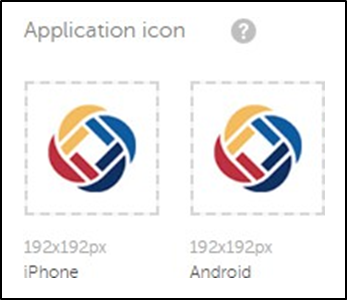
The icon images should be 192x192px.
Navigation Bar Background
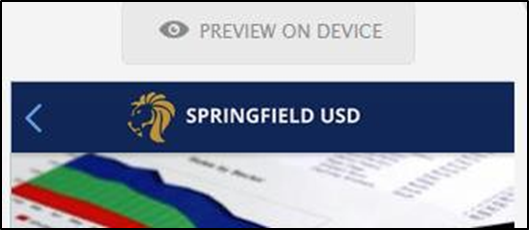
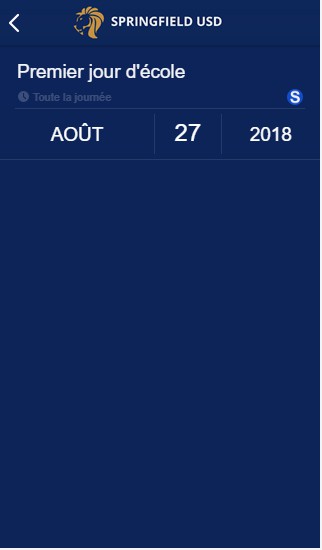
The Navigation Bar Background is the bar that appears at the top of the page when viewing content within the app/content past the home screen. This image is often similar to the Home Screen Header Image (though not exactly the same as it has smaller dimensions).
Note: If you change your application’s theme, you may wish to update your navigation bar to match the new theme.
The navigation bar background image should be 1440x135px. When creating the background image, keep in mind that the back arrow and date selector will appear on the left and right sides of the bar at times. As such, make sure there aren’t any text or logos too close to either edge of the image.
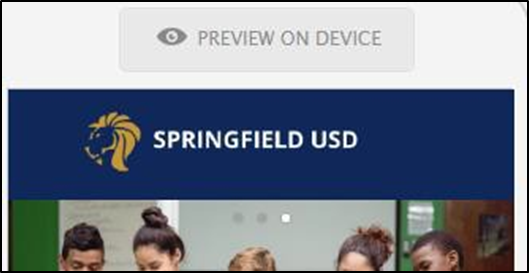
Launch Screen
The Launch Screen is the image that appears when users first open their application. It is essentially the loading screen that will display while the Home Screen data is loaded.
You will need to specify launch screens for multiple formats.
|
Model |
Image Size |
Image Ratio |
|
iPhone X |
1125x2436px or larger |
If larger, it will need to retain a 19.5:9 image ratio. So, for example, if the image is 4000 pixels high, it will need to be 1846 pixels wide. |
|
Android Devices |
1242x2208px or larger |
If larger, it will need to retain a 16:9 image ratio. |
|
Most Apple Phones |
1242x2208px or larger |
If larger, it will need to retain a 16:9 image ratio. |
|
iPhone 4 |
640x960px or larger |
If larger, it will need to retain a 3:2 image ratio. |
|
iPad |
1536x2048px or larger |
If larger, it will need to retain a 4:3 image ratio. |
If updating an existing site, be aware that the iPhone X image format has only been added with the addition of iPhone X so you may not already have an image set for those dimensions. You will want to make sure you set one.
Home Screen
The Home Screen is the background image that will be used on your Home Screen. Depending on the layout being used, this is often a solid color or a faded image so as to not steal attention from the home screen icons that appear on top of the background.
You will need to specify home screens for multiple formats.
|
Model |
Image Size |
Image Ratio |
|
iPhone X |
1125x2436px or larger |
If larger, it will need to retain a 19.5:9 image ratio. So, for example, if the image is 4000 pixels high, it will need to be 1846 pixels wide. |
|
Android Devices |
1242x2208px or larger |
If larger, it will need to retain a 16:9 image ratio. |
|
Most Apple Phones |
1242x2208px or larger |
If larger, it will need to retain a 16:9 image ratio. |
|
iPhone 4 |
640x960px or larger |
If larger, it will need to retain a 3:2 image ratio. |
|
iPad |
1536x2048px or larger |
If larger, it will need to retain a 4:3 image ratio. |
If updating an existing site, be aware that the iPhone X image format has only been added with the addition of iPhone X so you may not already have an image set for those dimensions. You will want to make sure you set one.
Content
The most important thing with any application is making sure that you populate it with useful and attractive content.
Channels
With channels you can allow users to choose the content that is relevant to them. Channels can be organized by school, but they can also be organized by interest (such as having a channel for Athletics, Drama, Fundraising, and so on).
Grouping Channels
When you create channels, for schools or interests, you can group the channels. For example, if you have a lot of schools, you may wish to group them by Elementary, Middle and High School.
Channel Icons
When a channel is created, you have the ability to upload a specific icon for the channel. Alternatively, you can choose to use a letter (usually the first letter of the name of the channel) or you can opt not to have an icon to go with the channel.
If you want to make changes to your channel icons, please contact your project manager or our support team.
Schools
School List
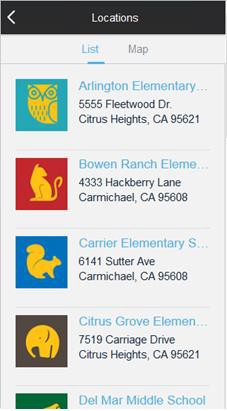
When users click on the Schools button (or whatever name you give it) within your application, they will be presented with a list of schools. There are a number of choices you can make to determine how this list will appear.
Suggested School List Layouts
When users click on the Schools button (or whatever name you give it) within your application, they will be presented with a list of schools. There are a number of choices you can make to determine how this list will appear.
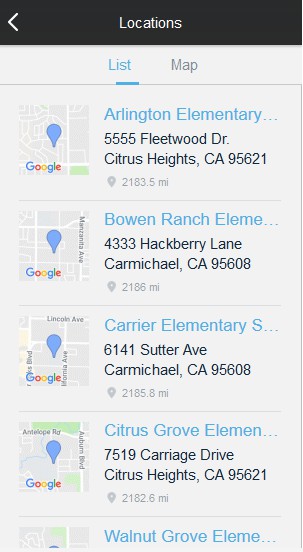
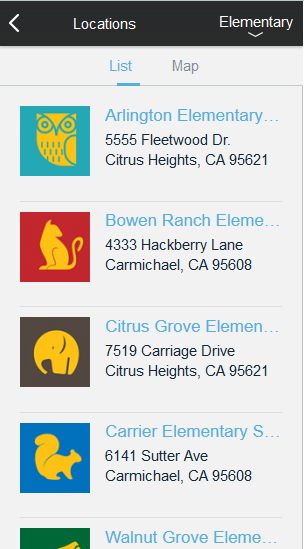
With Featured Images
-
You can use a map thumbnail or school logo for your image.
-
If you are using the map thumbnail, the list item will also display how far away the user’s device is from the school’s location.
|
Map Thumbnails |
School Logos |
|
|
Without featured images
-
Displays a simple list of school locations.
-
You can choose whether or not to include the school address in the list.
-
If your schools don’t all have individual logos and you don’t want to use map thumbnails, we recommend using this option.
-
This option may also be the best one if you have a lots of schools as it allows you to display many schools in a smaller amount of space.
|
Address Included |
Address Not Included |

|

|
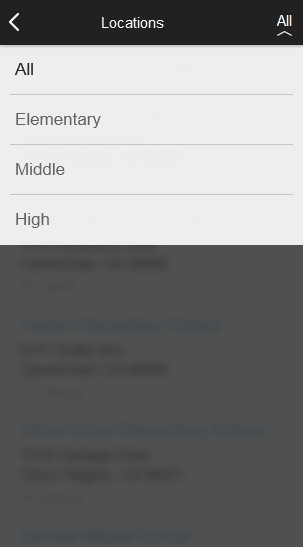
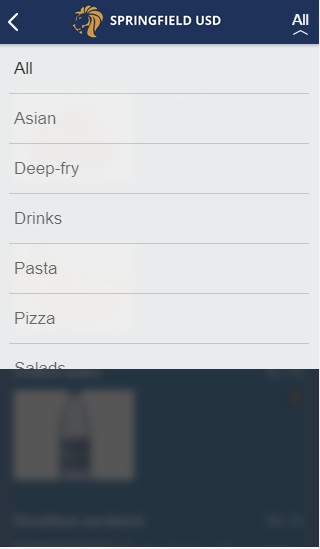
Group Schools by Section
-
You can also choose to order your list by grouping schools into sections separate school lists by sections.
-
Sections can split up one large list of schools into smaller lists. You may want to group by:
-
Type of School (Elementary, Middle, and so on)
-
Areas within school boundary (great for larger districts)
-
Specialized programs
-
Others
-
-
If you choose to split the schools into sections, there will be drop-down menu on top right that will allow users to choose the section they wish to view.
-
If you use sections, your preferred list format will be used within each section.
|
Sections |
Inside a Section |
|
|
Adding Schools
There are multiple ways to add schools to your application.
-
Manually add each school through the builder.
-
Create a CSV file that you upload to the application. If you have more than two or three schools in your district, it is easier to create a spreadsheet of your schools with all the relevant information for each school.
-
Create a CSV file and place file on an external server. To make it easy to maintain your list of schools and capture any changes (schools added or removed, contact information changing, etc), it is a good idea to create a CSV file and host it on the internet. You can link to the file and have CustomApp periodically check the file to capture any changes.
-
Use CMS Integration. If you are also using our Presence CMS, the CMS Integration can be used to automatically add and maintain your list of schools. This is the easiest way to populate the list of schools as information is pulled directly from your Presence site.
Recommendations
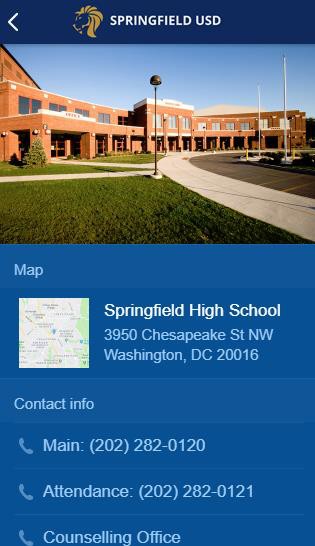
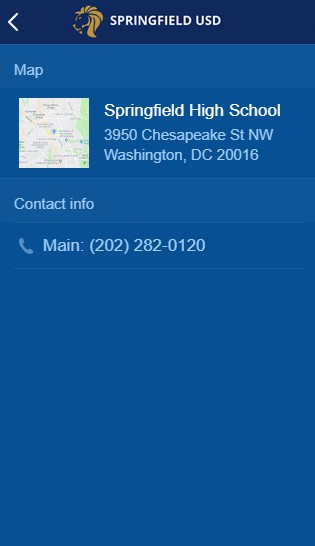
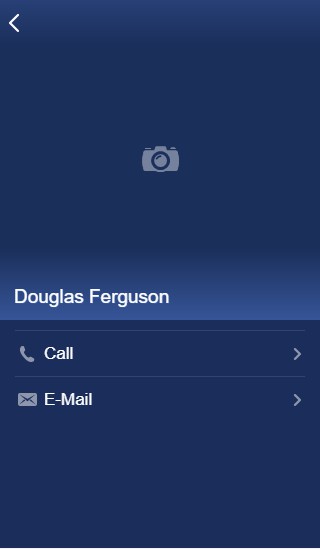
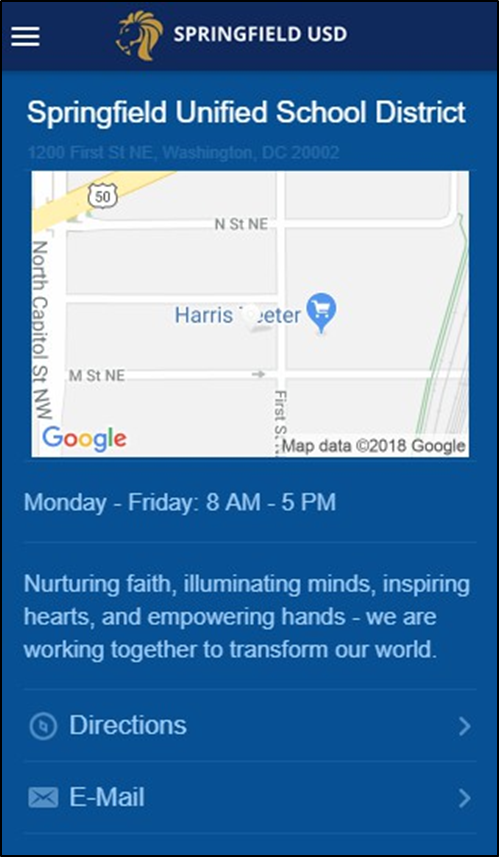
When you add a school, we recommend providing as much information as possible. Additional information makes your school page more visually attractive and gives users easy access to important information about the school.
Be sure to brand your school pages by adding a logo image or a photo of the school.
If you contact our support team or your project manager, events and news can be set up so that news and event feeds are linked to their appropriate school channel.
You can use the Directory content to create a linkable staff directory to the school.
It is also a good idea to add links that are useful for the school. For example, you may want to add links to the bell schedule or and an About Principal page.
Be sure to include important contact information such as phone numbers and email addresses. When users click on these, the default application on their phone for handling a phone number or an email will be automatically launched making it very easy for the user to contact the school.
By following these recommendations, you can ensure that your school pages are useful pages that users will return to when they need to interact with your school.
|
Attractive Content |
Minimal Content |
|
|
In the screenshot above you can see the benefits of adding content to a school page. The screen on the left actually contains a good deal more content, that the user can scroll to access.
Note: In addition to having pages for schools, you can also create pages for other places at the district such as the Transportation or Administrative Centers.
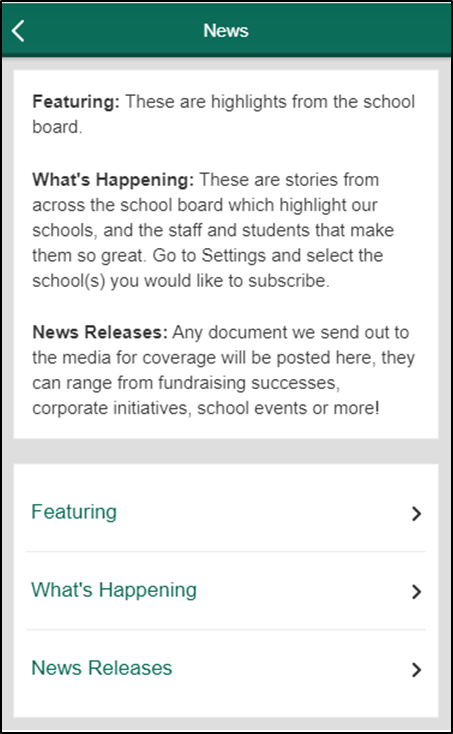
News
You can have multiple News modules for different purposes. Some examples include having a Superintendent’s blog, a Principal’s blog, a School News section, an Athletics News section, a Counsellor’s Corner, Nurse’s Corner, etc. Each news section can be linked to the district or a specific school channel.
News Sources
If you have are using our Presence CMS, then the news from your district and school sites can be automatically fed into the application from Presence.

When setting up your news feeds, be sure to take advantage of the option to sync the news feeds periodically. If the news is being pulled from Presence, this happens automatically, but you can choose it with other news sources as well.
Preparing News Content
When linking to a news source, you will want to make sure that the news is in a format that will be mobile-friendly.
If your news story includes any images or videos, you will want to make sure that they are not using a fixed size. For example, if your images have a fixed width set to 800px, they will not display properly on most mobile devices. The better option would be to set a percentage width (for example, having a 100% width). With a percentage width instead of a fixed width, the image size will be automatically adjusted to fit the screen size.
You should also avoid having tables in your news stories as these tend to have fixed sizes and are generally not mobile-friendly.
External vs Internal News Links
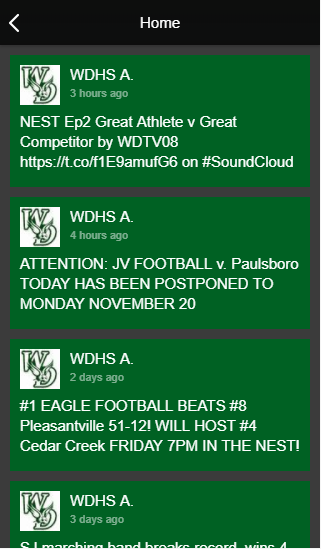
If you are linking to news from your Presence site via CMS integration, the summary news page will show the title of the story, the featured image for the story (if one was set and you have chosen to display them in the layout) and the summary of the story. If you are using an internal link for your news, clicking the story will then take you to a page in the app that will show the title and featured image again along with the content of the news story.
If you are linking to an RSS feed then the content will vary depending on how the feed is set up, but generally users will not be able to access the full story if you choose to make the link internal to the application. When viewing the feed, the summary news page will show the title of the story, the featured image for the story (if one was set and you have chosen to display them in the layout) and the summary of the story. If you are using an internal link for your news, clicking the story will then take you to a page in the app that will show the title and featured image again along with a summary of the news story (this may be longer than the summary that showed on the news source page but will usually not be the full story). If you for users to be able to view the full story, then choose the external link option.
Note: If you are linking to a Presence RSS feed, the feed can be configured to show either the body or summary of the news story. Please contact our support team for assistance in implementing this.
To recap, if you are using CMS integration, you should choose the Internal Link option and the user will be able to view the full story in the app. If you are using an RSS feed for news, then which option you choose will depend on how the RSS feed has been configured and if you want the users to be able to view the full text of the news story.
News Channels
When importing news, you are able to choose the channel or channels the news source is applicable to. If you are using CMS Integration, this will be done on the Presence side (making sure that news stories appear in news sections for the corresponding channels). If you are using other RSS feeds to populate your news, you are able to choose which channel or channels each news feed will be applicable for. This provides users with the ability to see school (or interest) specific news feeds within the application.
You can also have news sources that apply just to the district channel or to all channels, depending on how you want to feature your news.
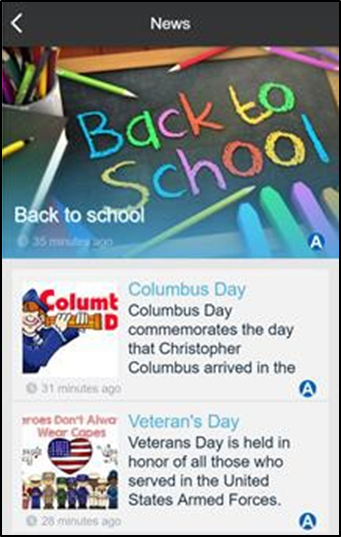
Suggested News List Formats
You can mix and match which items to show and hide in the news. Here are some examples of various options.
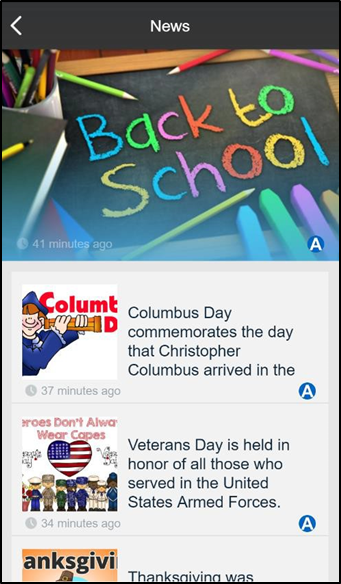
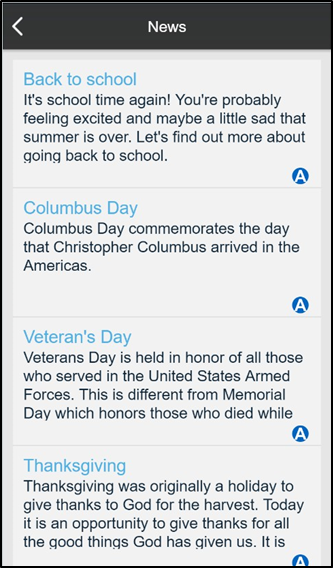
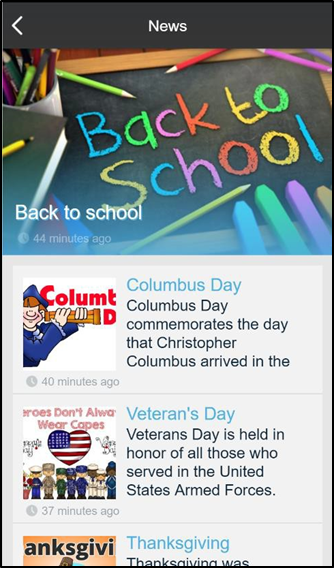
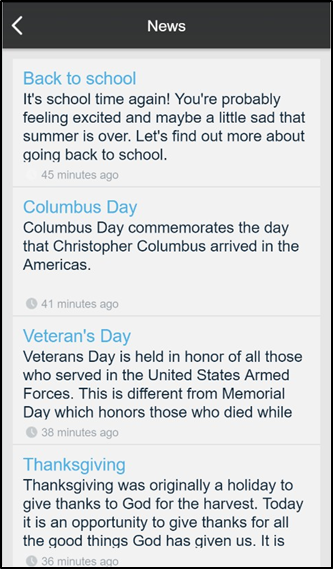
Showing Title, Summary, Published Date and Channel Icon
|
With Featured Image |
Without Featured Image |
|
|
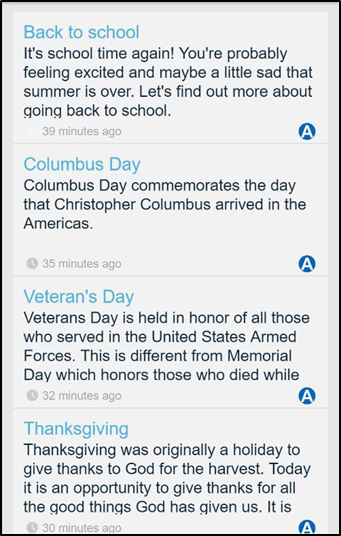
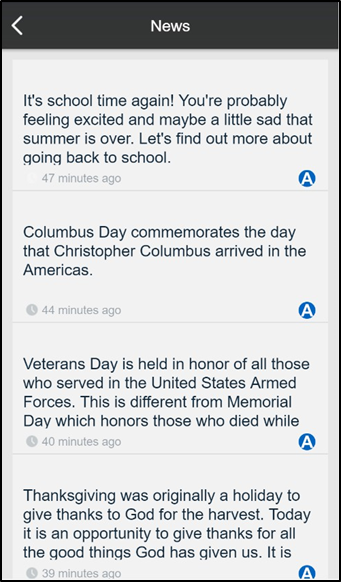
Hiding Title Field
|
With Featured Image |
Without Featured Image |
|
|
Hiding Published Date
|
With Featured Image |
Without Featured Image |

|
|
Hiding Channel Icon
|
With Featured Image |
Without Featured Image |
|
|
Events
With event content, you are able to share upcoming events from around your district. These events can be linked to channels for specific schools or interests (like Athletics).
Users are also able to choose to add events to their calendar. Clicking the Add to calendar option will allow them to add the event to their calendar on their mobile device.
Event Sources
There are three different sources you can use for creating calendar events. iCal, CSV or CMS Integration.
If you are using Presence, then CMS integration allows you to automatically bring in events from calendars on the district and school sites. When changes are made to the Presence calendar, the changes will be automatically propagated to your application.
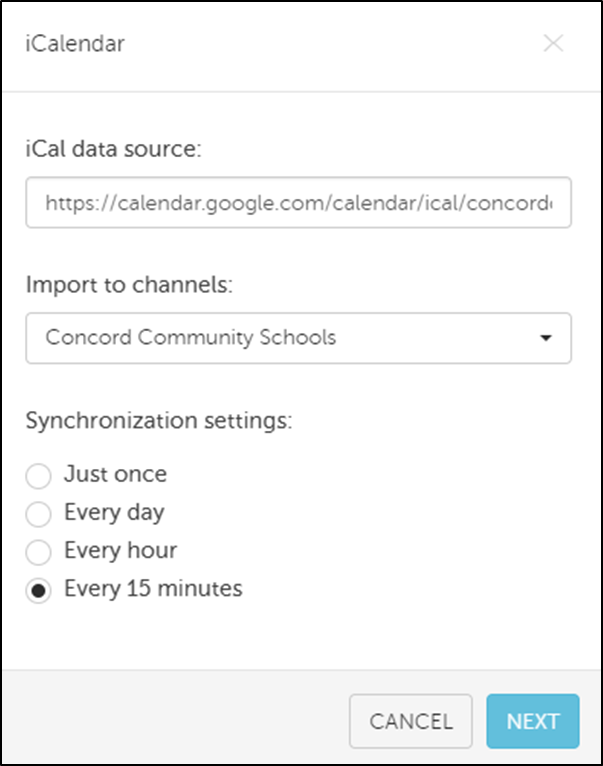
With iCal and CSV, you are able to do a one-time import of a file with events or you can include a link to an external URL with the iCal or CSV file. This file can then be automatically synced on a periodic basis to capture any added, deleted or updated events. Many calendars (such as Outlook Calendar or Google Calendar) will provide you with a public-facing URL you can use to access that calendar’s iCal or CSV feed.
When possible, we recommend using either CMS integration or an iCal feed through an external URL so that your calendar can be easily maintained and updates can be easily captured.
Event Channels
Like with news, event sources can be linked to specific channels. This allows you to control events so that they only show up for the appropriate school or interest channel(s). You can also choose to have a calendar source that propagates to all channels for events that are applicable to all users.
We recommend having unique and easily identifiable icons for each school channel. This way users will be able to tell which channel an event is from when viewing the events from multiple channels at once.
If you are using an iCal feed to populate your events, you can map events to multiple channels. If you are using CMS integration to populate your events, the event will only show as part of its original channel (even if the event has been pushed to other schools within the CMS).
Event Content
Generally, the more detail you can add to your calendar events, the better. Having more content will give the user more information about the event while also being more visually appealing.
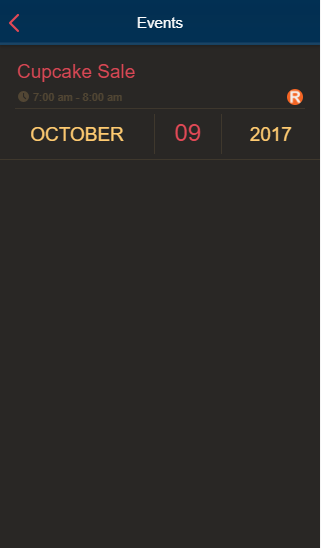
Ideally in addition to the event name, date and time, you should include a location for the event as well as a short description including any relevant links (to flyers, RSVP forms, etc). If appropriate you may also wish to include an image to go with the event.
|
Details Populated |
Minimal Details |

|
|
Directory vs People
There are two different ways you can include a staff directory for a school. You can use either the People or the Directory options. In either case users will be able to view a list of staff members and click on them to see more information.
People
With People, you can create a generic contact directory. This allows for a simple list of users that can be viewed and contacted.
The available fields are:
-
First name
-
Last name
-
Title
-
Biography
-
Image
-
Phone
-
Email
-
LinkedIn Profile
-
Twitter
-
Website
If you have a lot of users, you may wish to set up sections so that users can be grouped into appropriate sections within People.
It is recommended to use the People option when you are wanting to display a School Org Chart or a list of third-party contacts.
CMS Integration of People
If you have Presence sites, you can also use the People option with CMS integration. This allows you to link to each site’s Staff Directory page to bring in your users. You will see a list of the first 100 users in the directory, but you can use the search bar to search for any user from the Staff Directory page.
Directory
The Directory module is quite similar to the People module however it has fields that are more specific to school contacts.
The available fields are.
-
First Name
-
Last Name
-
Job Title
-
Organization
-
Phone
-
Extension
-
Email
-
Website
-
Twitter
-
Image
-
About
-
District
-
Term
If you have a lot of users, you may wish to set up sections so that users can be grouped into appropriate sections within Directory.
It is recommended to use the Directory module for district staff or departments.
Populating Directory or People Modules
In addition to being able to use CMS Integration to populate the People module (if you have Presence), you are able to use CSV imports to populate both the People and Directory modules.
You can place the CSV file on an external URL if you wish to be able to automatically sync any changes to your staff.
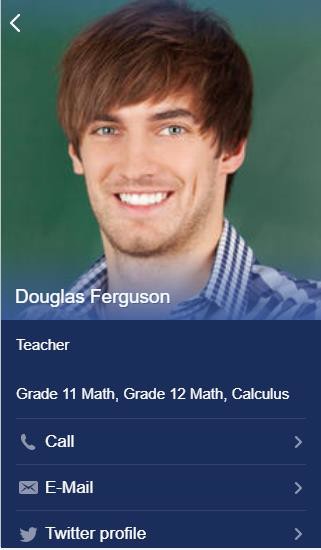
When you populate your list of users, you should include as much information as possible to make the contacts more useful and more attractive.
|
Contact Populated |
Minimal Details |
|
|
While it is important to add as much information for your contacts as possible, it is also important to keep the fields consistent from one contact to the next. So, for example, if some users have details for their About section while others do not, you should leave the About section blank for all users.
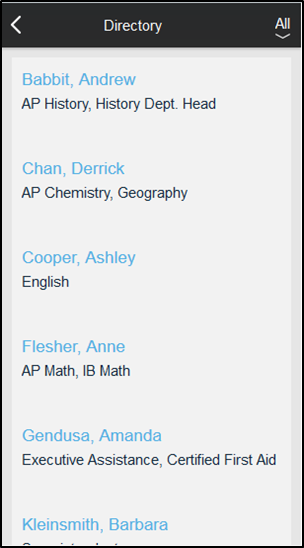
Staff Directory and People Example List Layouts
Last Name, First Name
|
With Photo and Title |
Without Photo and Title |
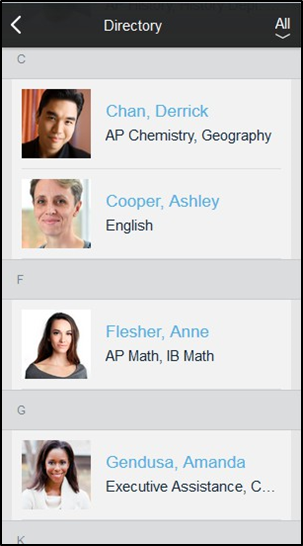
|
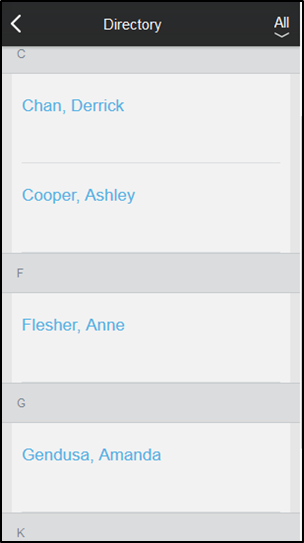
|
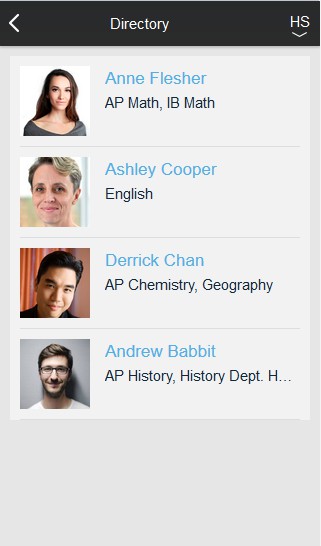
First Name Last Name
|
With Photo and Title |
Without Photo and Title |
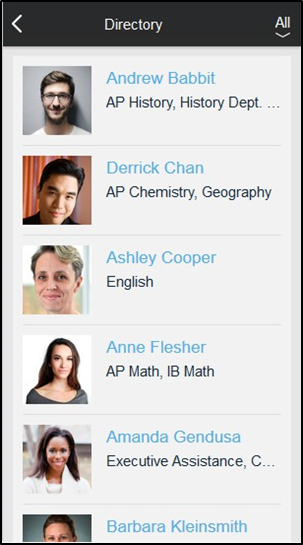
|
|
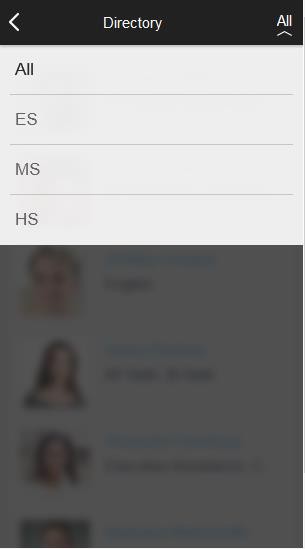
Staff Directory by Sections
You can also organize your staff directory into sections. This can make it a lot easier for users to find specific staff members, particularly if you have a lot of users in your directory.
You can split the directory into sections by:
-
School/Location
-
Title
-
Subject Taught
-
Others
|
Sections |
Inside a Section |
|
|
Menu
The Menu module allows users to view the menu for your district or a given school.
Menu Sources
With iCal and CSV, you are able to do a one-time import of a file with events.
When setting up your menu, you can import a CSV file do a one-time import or you can include a link to an external URL with the CSV file. This file can then be automatically synced on a periodic basis to capture any added, deleted or updated menu items.
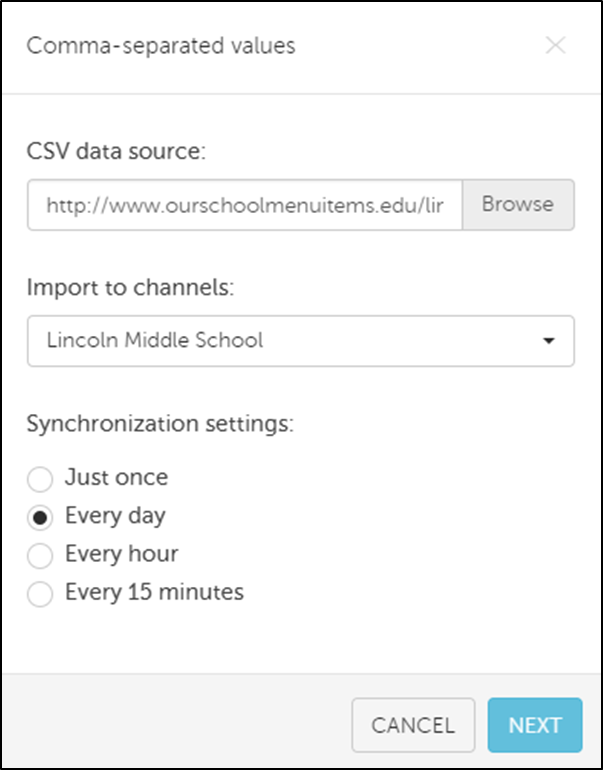
If your menu items or prices change frequently, you may wish to use the external URL sync option. If the menu is largely static, you may want to just do a one-time import.
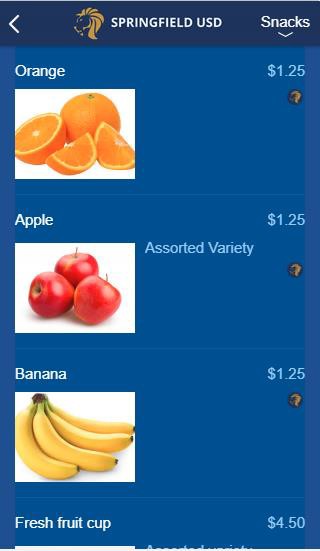
Menu Content
When setting up the menu, you may want to create multiple sections for the menu. You can organize the sections by style of food (Pasta, Fried, Vegetarian, and so on), when the food is available (breakfast, lunch, snacks, drinks, and so on), or menu by day, (Monday, Tuesday, and so on). How you organize the sections will depend on the scope of your menu and if the menu varies day by day.
|
|
When adding menu items, you can use the Description field to share useful information such as the size of the item, nutrition information, ingredients, allergy notices, days the item is available, and so on.
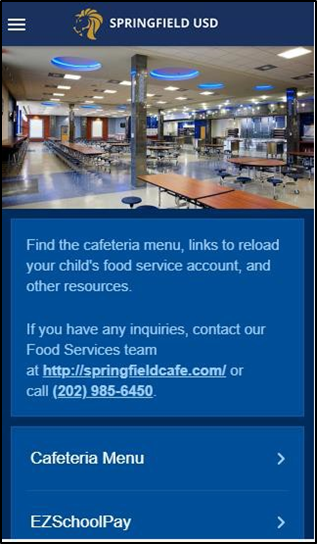
About Us
The About Us module allows you to create a page in your application that can provide users with a quick overview of your organization.
This is a great place to share your district’s mission statement, logo, important contacts, etc.
Note: If any of your information changes in the future, you can easily update the About Us section within the builder.
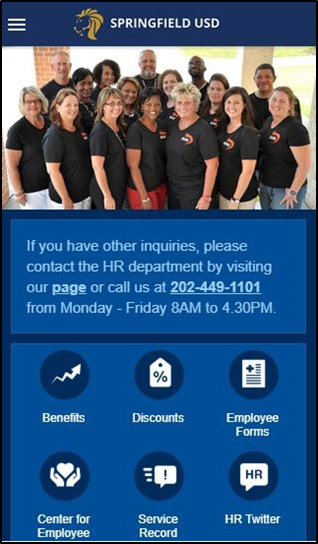
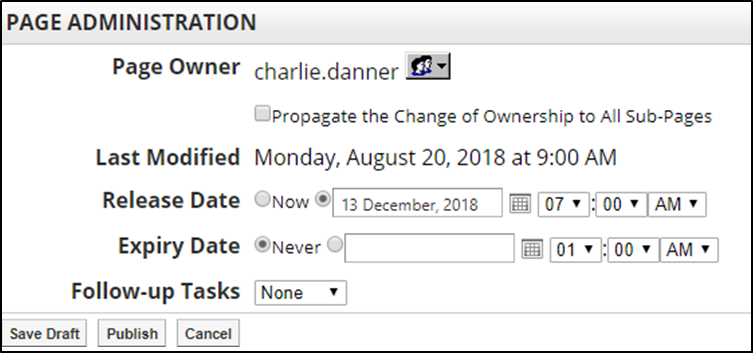
Custom Pages
You can use the New Page option to create additional landing pages for specific programs and departments or create pages tailored to a specific audience.
|
School Lunch Program |
Athletics |
|

|
|
Newcomers |
Employees |
|
|
Deep Link
With the Deep Link module, you can create a link to open another app from within CustomApp. The applications that are currently supported through Deep Link are:
-
SchoolMessenger App
-
Facebook: Link to a specified Facebook page.
-
Twitter: Link to a specified Twitter profile.
-
Youtube: Link to a specific Youtube channel, user, or video.
-
Vimeo: Link to a specific Vimeo user or channel.
-
Instagram: Link to a specified Instagram account.
-
Snapchat: Link to a specified Snapchat account.
-
Tyler SIS
Note: If target app not installed, will be redirected to Google Play or iTunes store to download and install.
Places
The Places module works like the Schools module but for places that are not part of the district’s day-to-day functions (performance centers, stadiums, so on).
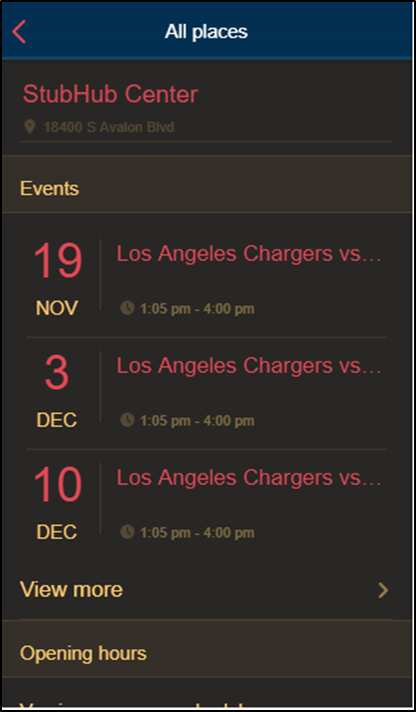
You can use Places for adding locations for away games. You can also add special locations for events such as band tours or foreign exchange locations.
Note: If the location you are adding has an internal tour video, you can add it to the Video URL field.
QR Code Reader
If you are using QR codes to promote special events, PR or marketing initiatives, you can add a QR Code Reader to the app. Users can then use the reader to view the QR Codes.
Social Media Integration
Photos
You can use the Photos module to connect to a Flicker account to show pictures natively in your app without requiring users to download and install separate app.
You can also import pictures from other sources via RSS to show the images natively within your app.
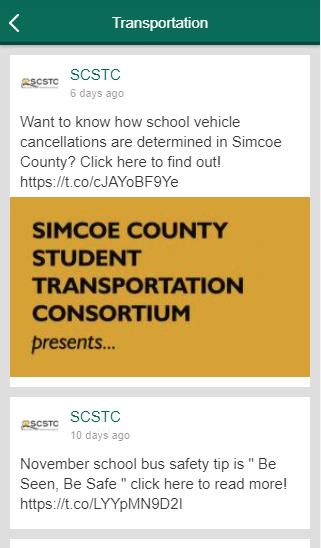
Twitter Wall
The Twitter Wall is a great way to communicate live updates via a familiar platform (for example: athletics updates, superintendent/principal’s tweets).
You are able to showcase multiple Twitter feeds for different uses (for example, the Twitter feed for the Superintendent, Athletics, Principal and Transportation).
To set up a Twitter Wall, contact our support team or your project manager for assistance.
|
|
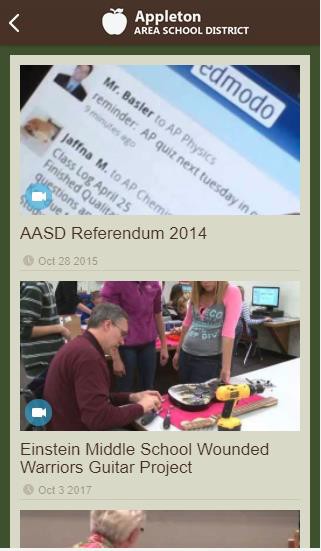
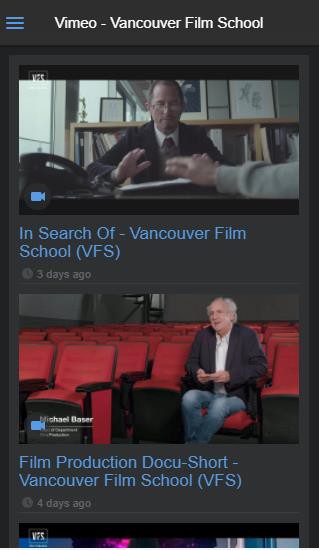
Videos
You can connect to a Vimeo or YouTube account to show videos natively within the app without requiring users to download and install a separate app.
|
|
If you prefer to have users view the videos within YouTube or Vimeo, you can instead create a Deep Link to the content you want to share. See the Deep Link section for more information on Deep Links.
CMS Integration
If you are using our Presence product, you can integrate your elements of your website(s) directly with your app. When you update these elements on your Presence site, the updates will automatically be reflected within the app.
CMS Integration pulls data from your Presence site to render it in your app. As a result, the data will be the same, but how it is displayed will differ from the website to the app.
What CMS Integration Covers
The CMS Integration can be configured to cover your schools, news, calendar events and staff directory.
Schools
The Name and Address for each school will be imported from the Presence site. This is based on the Server Information set on each Presence site.
News
You can select one news section page per site to display within the app. When you create news stories (or update existing stories) within the selected section, the news will automatically appear in your app. You can also enable an option for users to get Push Notifications when a new story is created.
Note: If you have more than one news section on a Presence site that you want to include, you can sync the RSS feed for each additional news section you want to link.
Events
You can select one calendar per site to display within the app. When you create new events (or update existing events) on the selected calendar, they will automatically appear in your app.
Note: If you have more than one calendar on a Presence site that you want to include, you can sync to the RSS or iCal feed for each additional calendar you want to link.
Staff Directory
You can select one staff directory page to display within the app. When users are added to the directory (or updates are made to user information), the updates will automatically appear in your app.
What CMS Integration Does not Cover
Any aspect of your Presence site that was not mentioned in the section above is not integrated with your app using CMS Integration (for example, banner portlets and photo galleries are not integrated from Presence).
If the content you want to include from the site is not covered by integration, you can create a link to the content (that will open outside the app) or you can manually bring in the content to the app.
Push Notifications
Push notifications provide you with an easy way to push important information and updates to your users.
Communicate Integration
If you are using our Communicate platform, we recommend integrating with Communicate so that you can send notifications to Communicate users and CustomApp users all from within Communicate.
CMS Integration
If you are using our Presence platform, you can configure push notifications for newly released news stories. These notifications are based on the release time setting in Presence. If a page is set to be released immediately, the notification will also be sent immediately. If the release is scheduled for a later time, the notification will be sent when the story is released.
Push Notification Recommendations
It is recommended to use push notifications for sharing important announcements or reminders, promoting events, board updates or press releases, school event updates, and for advising users on emergency situations like lockdowns or extreme weather.
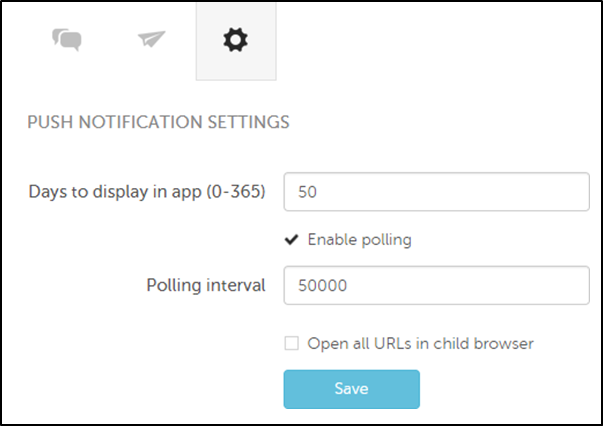
In the Push Notification Settings, you are also able to set a preference on how far back the notification history will go.
Translation
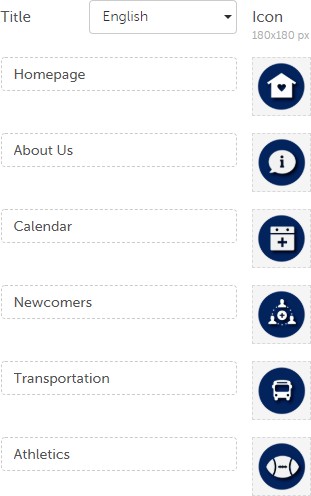
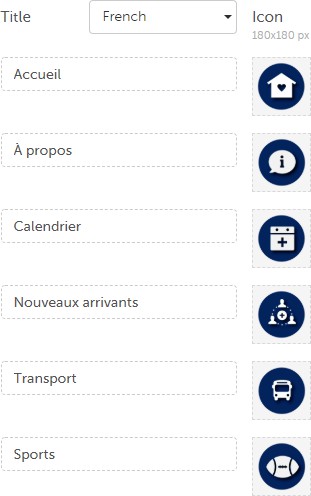
Menu Icons
When creating translations for menu icons, it is recommended to have someone fluent in the language provide the translation as this will provide you with a more accurate translation than relying on machine translation.
|
|
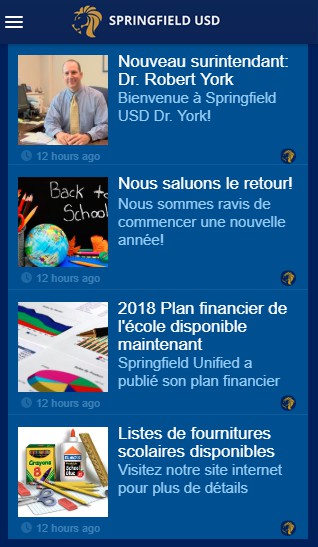
Content Feeds
With feeds from outside the app (news feeds, calendar feeds, and so on), you can use Google translate to dynamically transform your content to the desired language.
|
|