Import group enrollments
System administrators can use the Group Enrollments tab on the Import page to import group enrollment for all groups within their organization. Members can be enrolled in one group at a time.
Group administrators can import enrollments from within the group they manage. To import enrollments for a specific group, navigate to Add Members and select Import from file.
.png?cb=344afd6e968f22c09f23059231615f02)
-
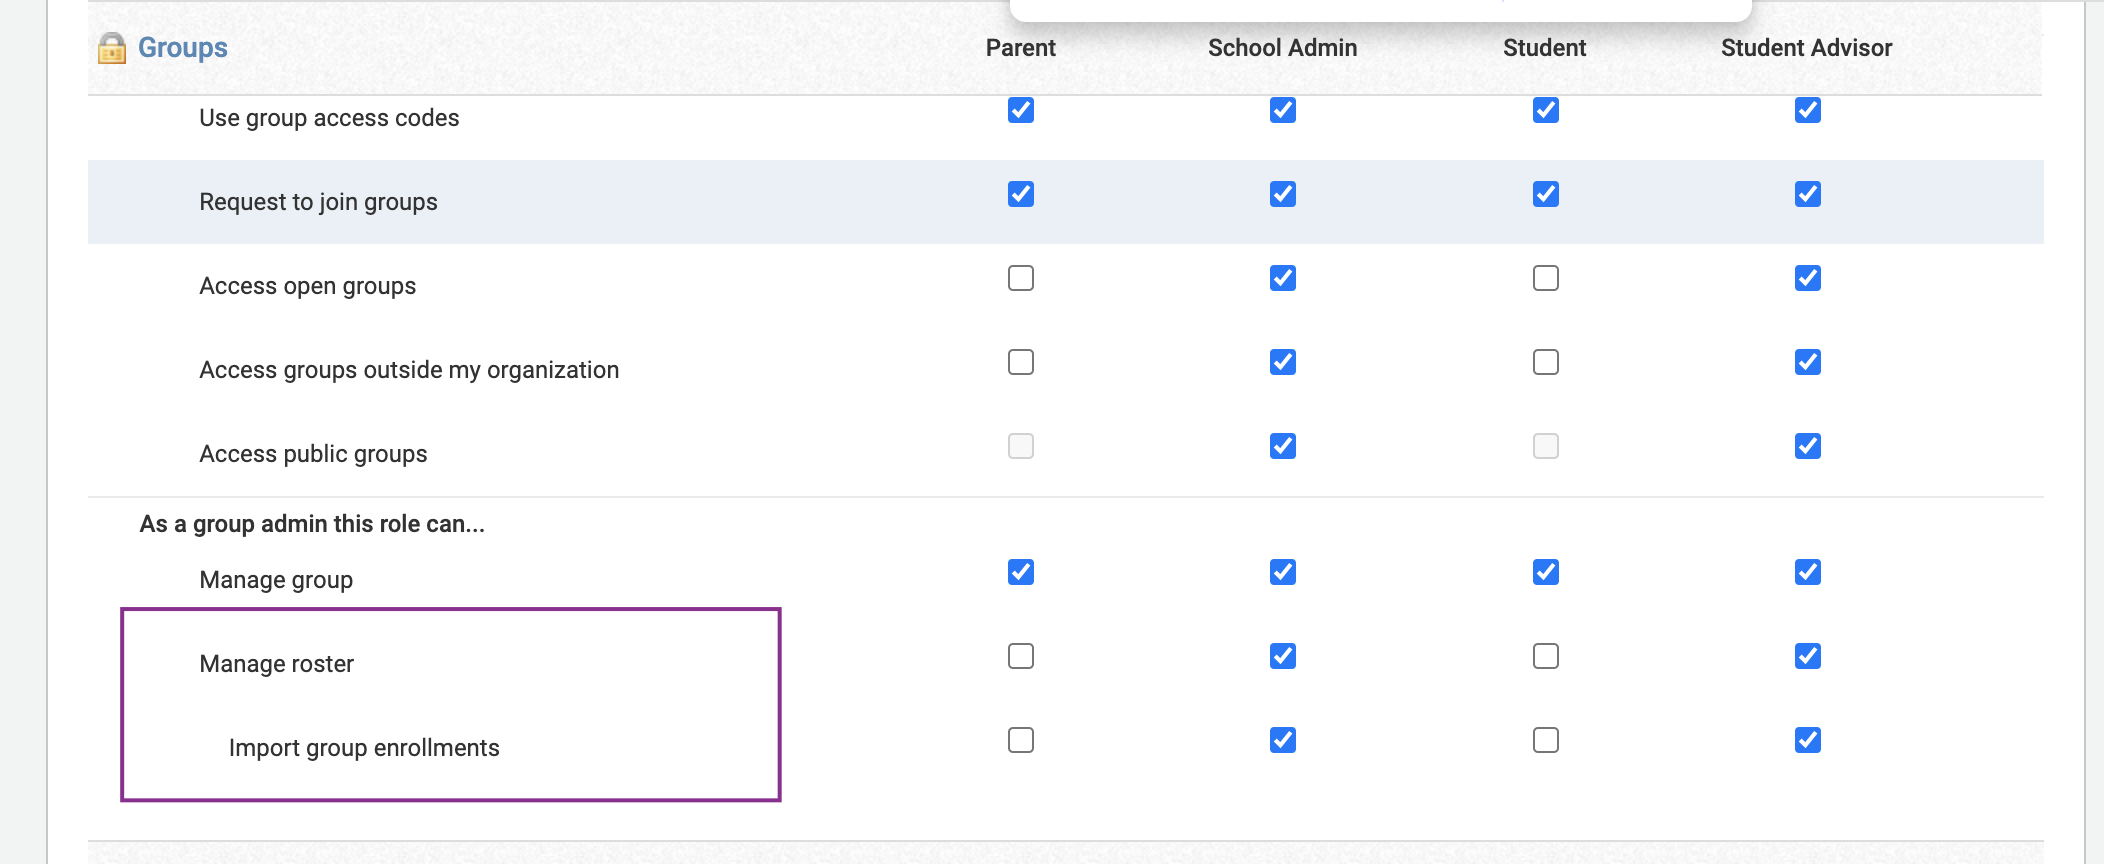
This option is available only when a system administrator has granted permission to import group enrollments.
-
The Import group enrollments permission can be enabled only when the Manage roster permission is enabled. Disabling Import group enrollments does not disable Manage roster.
Media album tags are not supported in groups with more than 1,000 members.
Select file
The XLS or CSV file for import must contain one of the following:
-
User unique ID
-
User name
-
Email address
System administrators should ensure the users in their school have either a user unique ID, user name, or email address, which can be obtained from the Edit Users area of Manage Users. The user unique id is usually a school ID or SIS ID.
If you are enrolling a large group of users as a system administrator but don't have a list of users to add on hand, you can export a CSV file of all users in your organization. Navigate to Export and select Users. Then, filter the exported CSV to include only the specific users who need to be enrolled in the group. We recommend including the following fields in the export of users to help this process:
-
First name
-
Last name
-
Email address
-
Role
-
Building
Enrollment type
The Enrollment Type designated in this field determines whether the user is a group member or admin.
Alternatively, you can select Use Import File and add an Enrollment Type column to your file. By entering 1 for group admin or 2 for group member, the import will associate users to a particular Enrollment Type based on their designation in the file.
Group
Select the Group into which you'd like to enroll users. You can only enroll users in one group at a time. Any groups within your organization will appear on this list.
Clear existing enrollments before import
Selecting this option will clear existing enrollment in the group and replace admin and members with users from the XLS or CSV file. When a user is cleared, adding that user back to the group restores the content that the user created in the group.
To clear only the admins in the group, import a file for the Enrollment Type Admin. To clear only the members of the group, import a file for the Enrollment Type Member. If you selected Use Import File, then both admins and members of the group not listed in the file will be cleared.
Select file
Select the XLS or CSV file that contains the enrollment information for import. There is a 10 GB limit per file.
Click Upload File to continue.
Match columns
Match the information listed in each column to add users to groups in Schoology.
-
If the first row of your XLS or CSV file contains headers, select First row contains headers.
-
Match each Schoology Field to a column in the XLS or CSV file.
-
After each field is matched to the appropriate column, select Preview for display an overview of enrollment information.
-
Click Preview to continue.
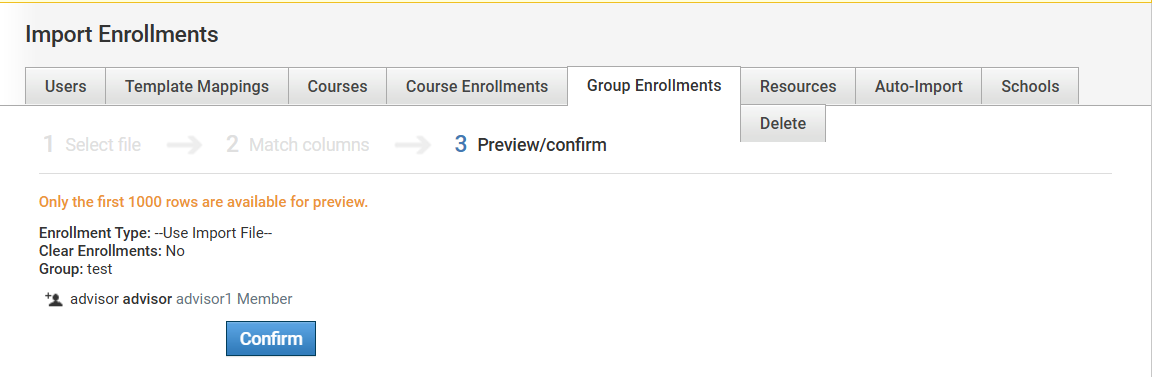
Preview/confirm
If an error message appears at the beginning of the screen, there may be users in your file who do not have matching unique IDs, usernames, or email addresses within your organization. Review the information in Edit Users and adjust your import file as needed. You do not need to correct every error to continue. As long as at least one valid row is included, the import process can proceed, and any valid additions or removals will be applied.
After ensuring the valid rows seem correct on the Preview/Confirm page, click Confirm to complete the group enrollment import.